
Gadzoinks Documentation
Uploading Images to Gadzoinks
There are a variety of ways to upload your existing and newly created images to Gadzoinks. The best way is to use our Automatic1111 Extension or our ComfyUI node. These integrate uploading an image with generation data directly into the image creation process. No extra steps are required.
For users not using A1111 or ComfyUI, or for cases where you have existing images we have the standalone Gadzoinks Assist program for Mac and Windows. These allow you to drag and drop existing images to your account. They also monitor a directory you choose and upload any image that gets created there. The Mac version is available on the Apple Store for Mac, The windows version is available here on the resources page.
There is also a web upload form, just click “Upload Image” at the top of this page
Lastly there is an upload button in the app, but this should be your last choice. The upload button uploads a low resolution version of the image and does not have an meta data like prompt or model.
Images in Gadzoinks have a lot of attributes, things like the prompt, model, and rendering options (steps, CFG scale, size, etc..) are set by the extension or extracted from the image if using web upload (usually, but its not 100%. And some images have no information ). Other attributes like the age rating, the star ranking , caption and keywords are set by you.
Gadzoinks Automatic1111 Extension
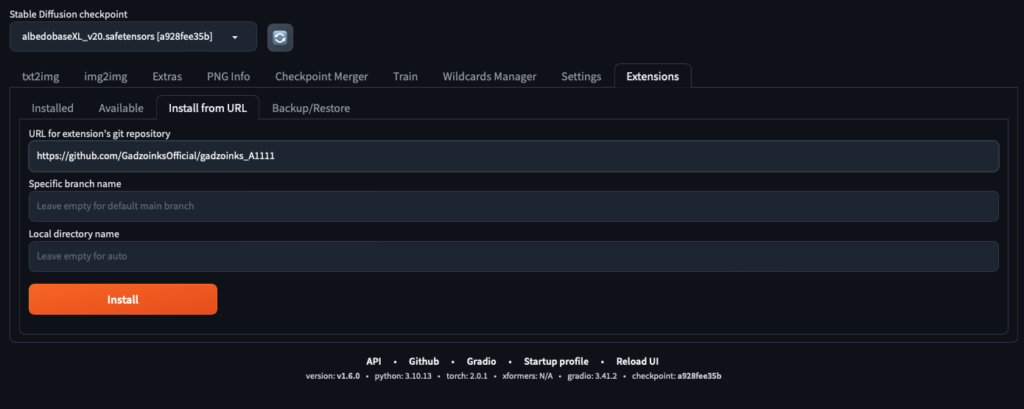
You can install the Gadzoinks extension directly from the automatic1111 web interface, go to the Extensions Tab, then click on “Install from Url” and enter ” https://github.com/GadzoinksOfficial/gadzoinks_A1111 ” , and click Install. After that you will need to restart the web interface, go to “Installed” and click “Apply and restart UI”. ( On some hosted sites, the option may be different, like “Quit and Restart” )
You can also install the extension directly, this may be useful if you are using a script to build a site. In that case download the code from the Resources Page and install it in my_home/stable-diffusion-webui/extensions. ( assuming my_home/stable-diffusion-webui is where you install A1111). Then restart automatic1111, and refresh your web browser. For example in Linux or Mac,
cd extensions
curl https://www.gadzoinks.com/wp-content/uploads/gadzoinks.tar.gz | tar xzf –
For Windows users it might be easier to download the zip version.
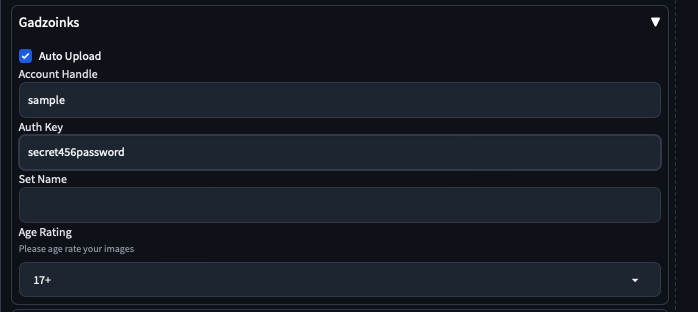
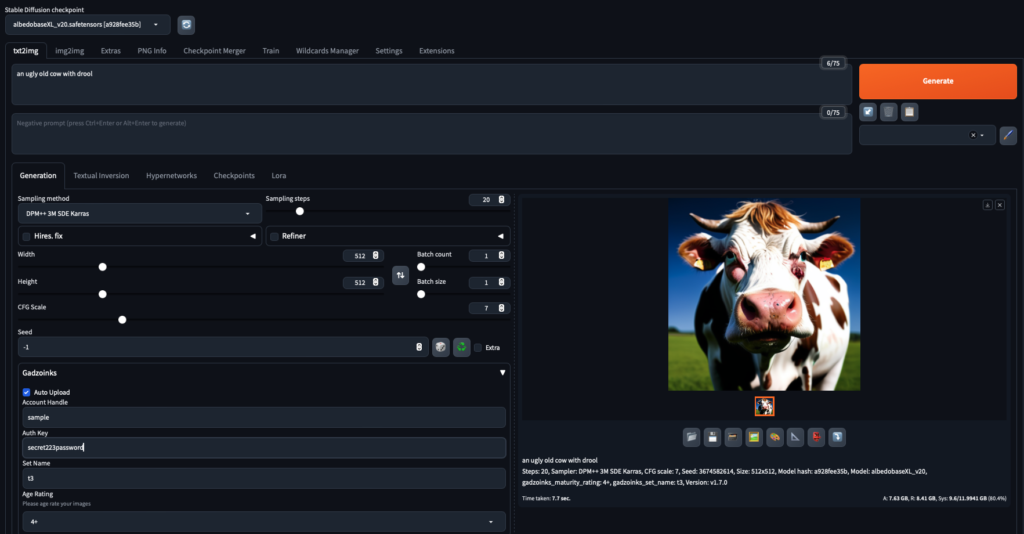
Using the Extension is easy, expand the Gadzoinks Section and enter your Account Handle and Auth Key (You can find these in the app in the config page, account section). If you have auto upload enabled your images will be uploaded as they are generated, this works with batches and dynamic prompts.
There are 2 additional buttons. 👺 is used for uploading the last image generated if you are not using auto upload, and 🔗 (Link) is used to download and paste the parameters from an image in the app.
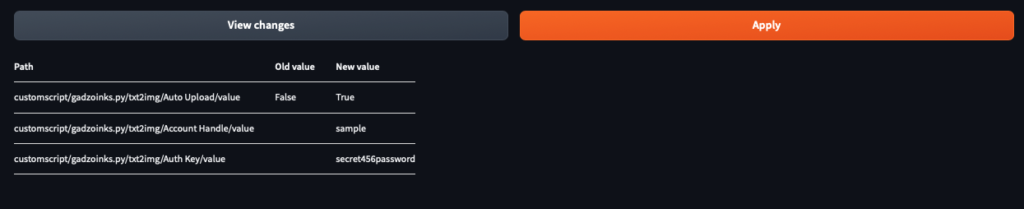
If you are running A1111 locally and want to save your user name and auth token ( do not do this if you are sharing the server, these values are stored on the server, NOT locally ). Restart the browser, expand the Gadzoinks section and add your account handle and Auth Key, you can also select auto upload and set the Age Rating (but be careful, I leave it at 17). Now at the top of the page select Settings. On the Settings page scroll down to the bottom and click “defaults”, then scroll up and click the button ‘View Changes’. You should see your changed settings, now click ‘Apply’. Next time you start the browser your defaults should be loaded from the server.
Gadzoinks ComfyUI Custom Node
Install the Gadzoinks custom node by going into your ComfyUI/custom_nodes directory and using the command:
git clone https://github.com/GadzoinksOfficial/gadzoinks_ComfyUI
Now restart ComfyUI and you’re done. Inside ComfyUI right click on the background and select Add Node -> Gadzoinks -> Gadzoinks, From the Gadzoinks node image input click and drag to the “Vae Decode” node image output. Enter your handle and authkey. select an age rating of 4,12 or 17. If you want a private upload set Private to 1. That’s it, the next image you generate will be uploaded to your account.
In the ComfyUI button bar, you will now see a new button “🔗 Gadzoinks” to link with the app and download the parameters of a selected image. You will need to set your handle and authkey first.
A few notes about the 🔗 Link , we do not support lora and upscaling settings yet (you can still add them yourself) and if the model used in the image is not available then ComfyUI will use whatever model was previously selected.
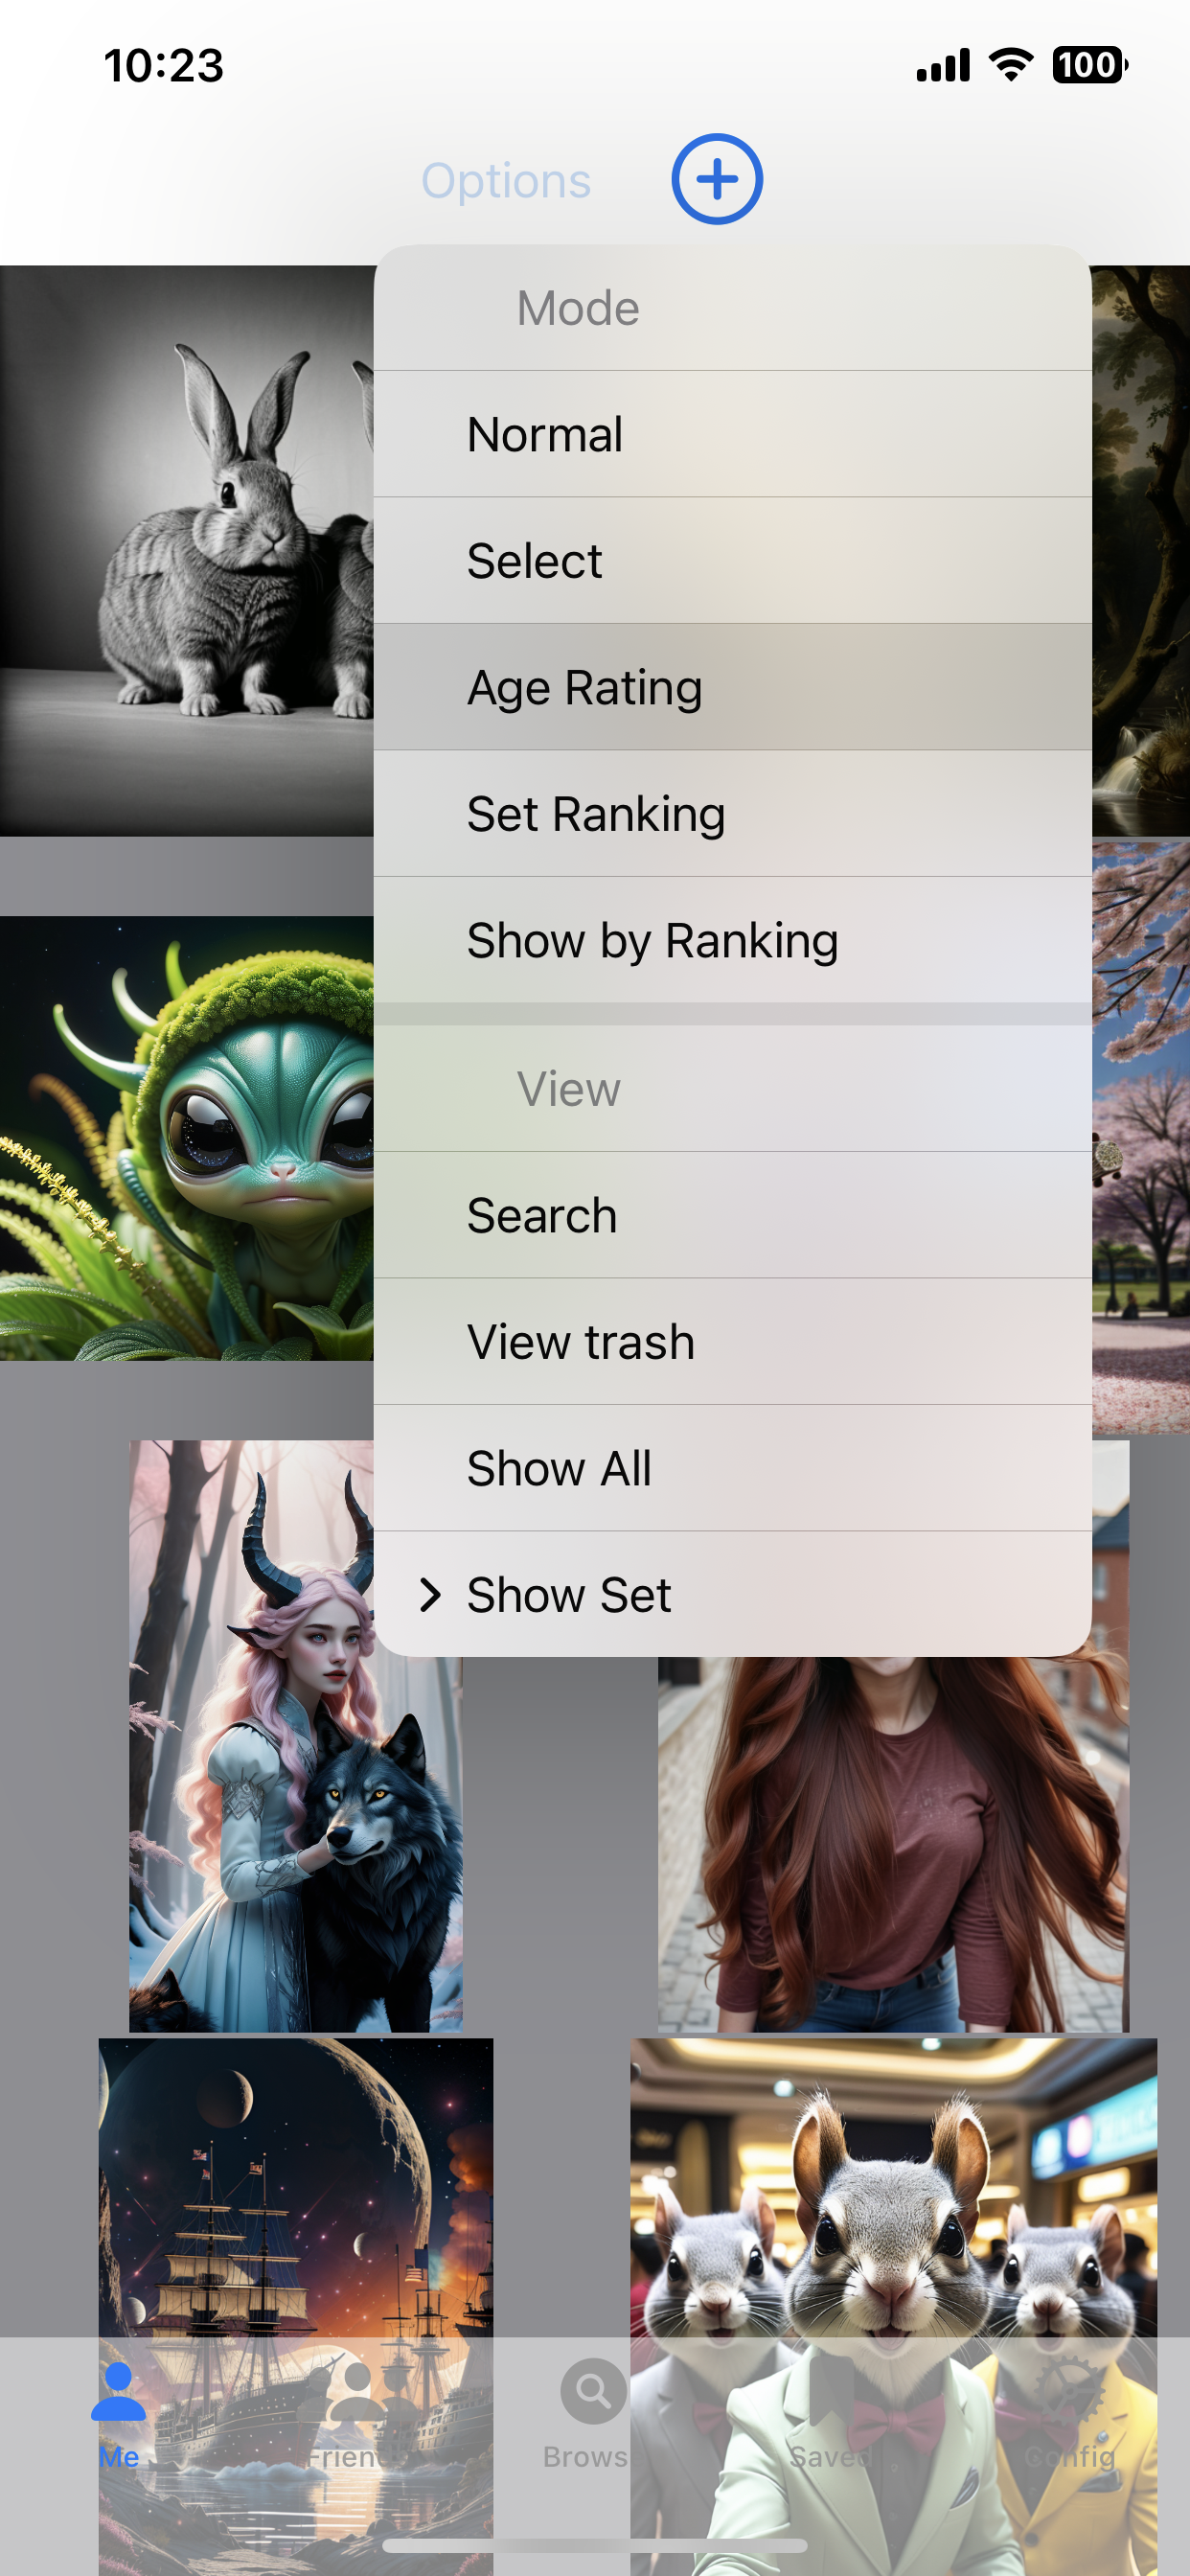
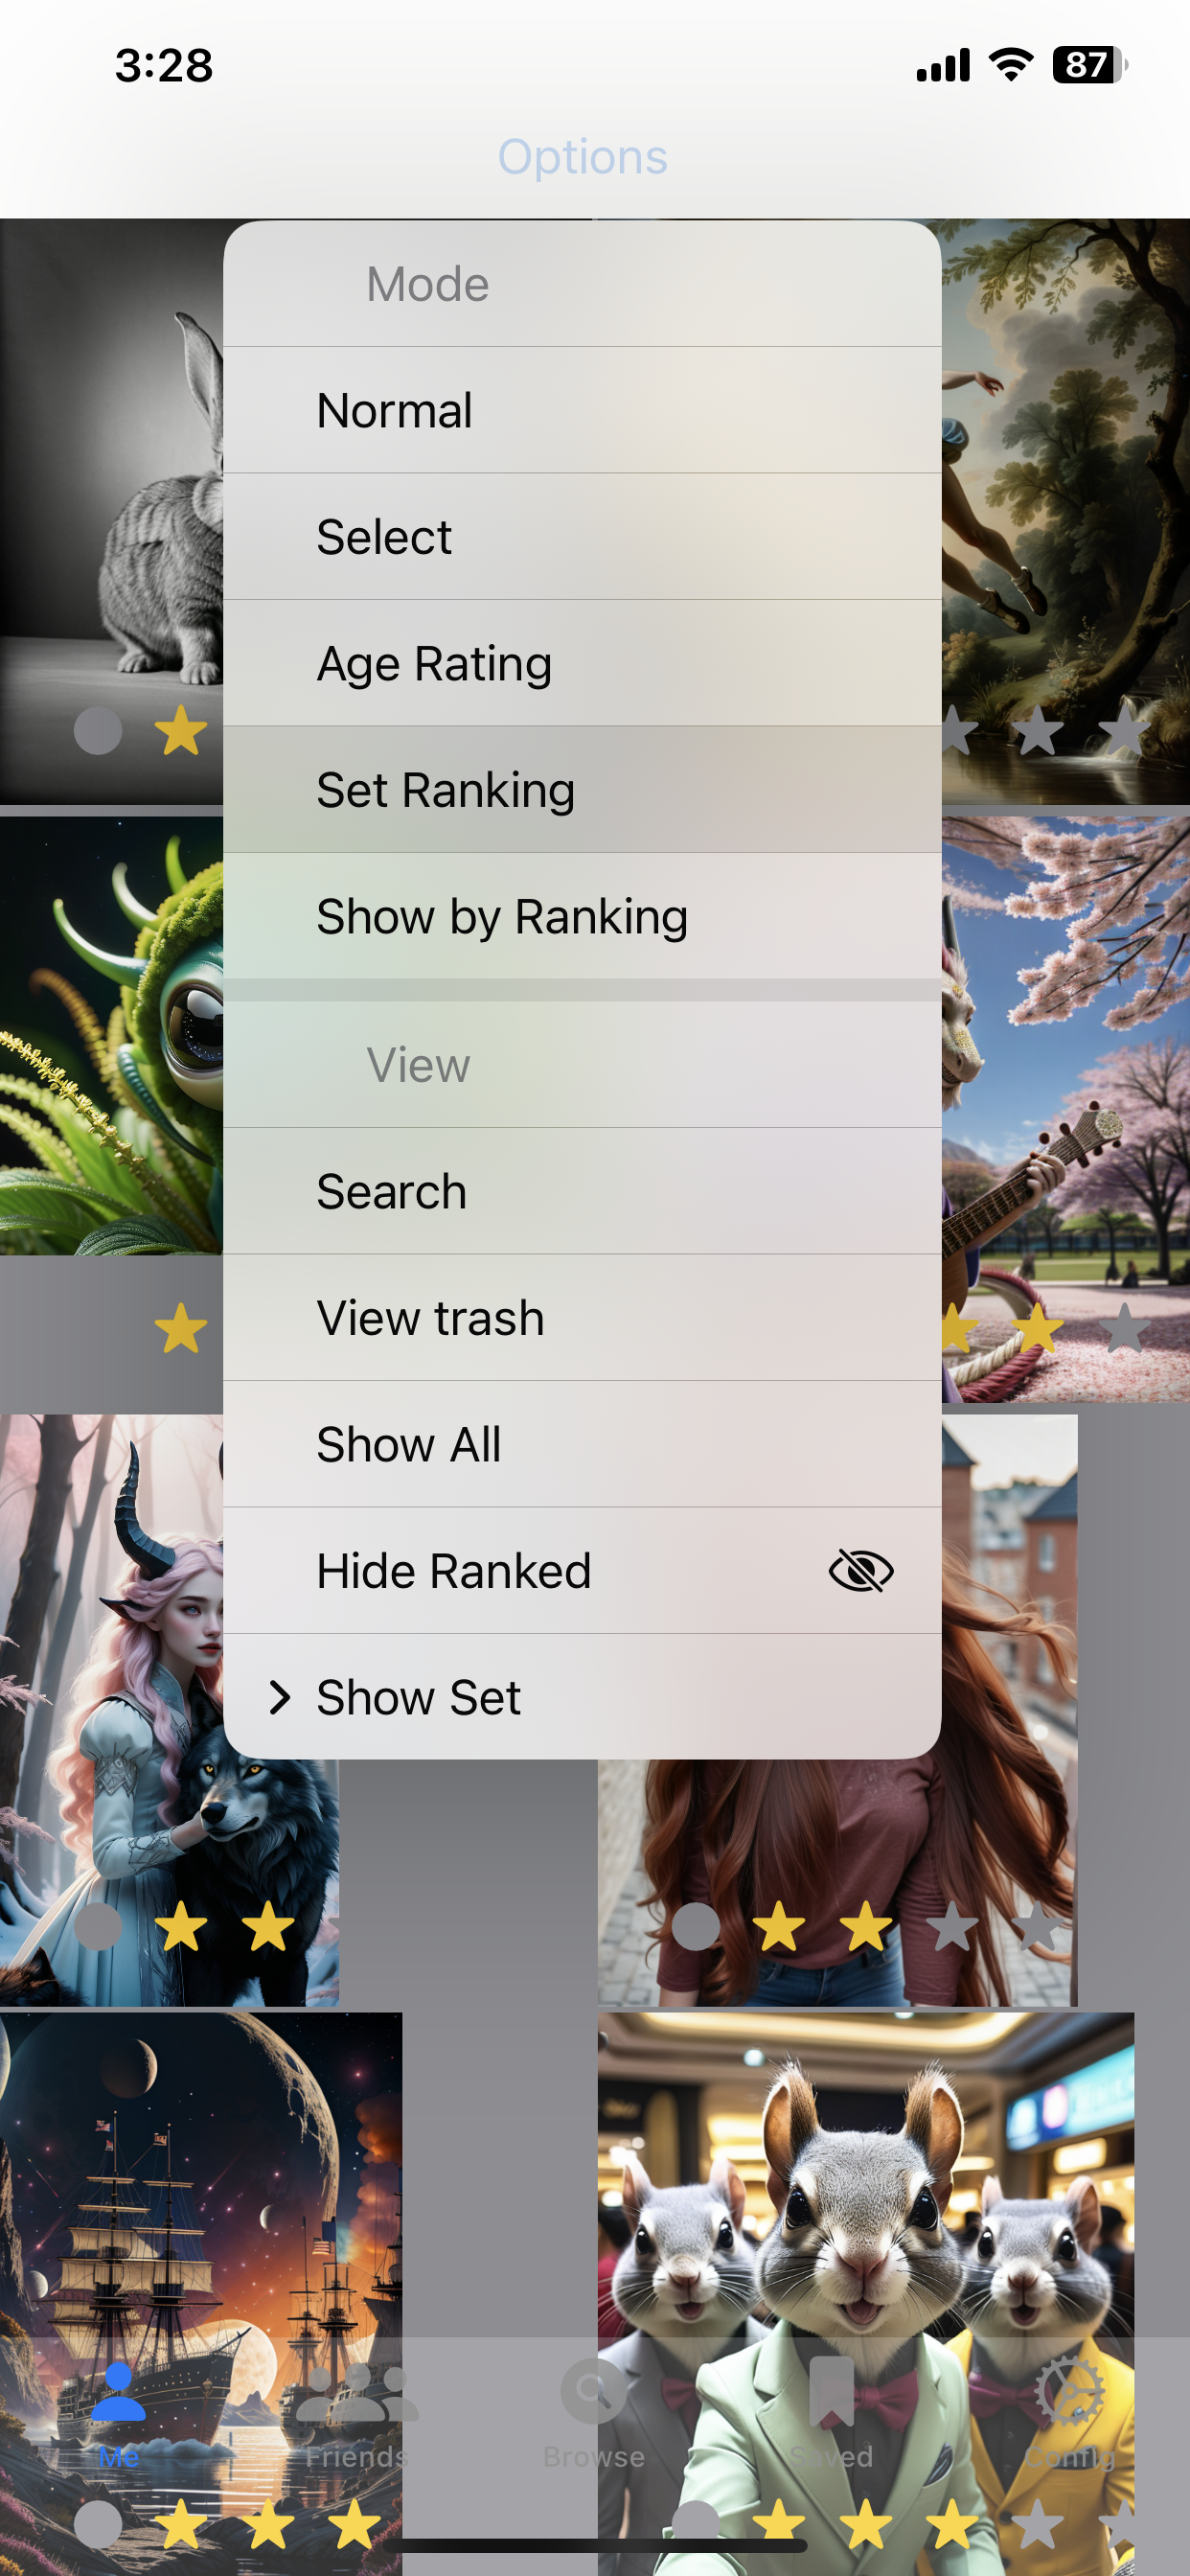
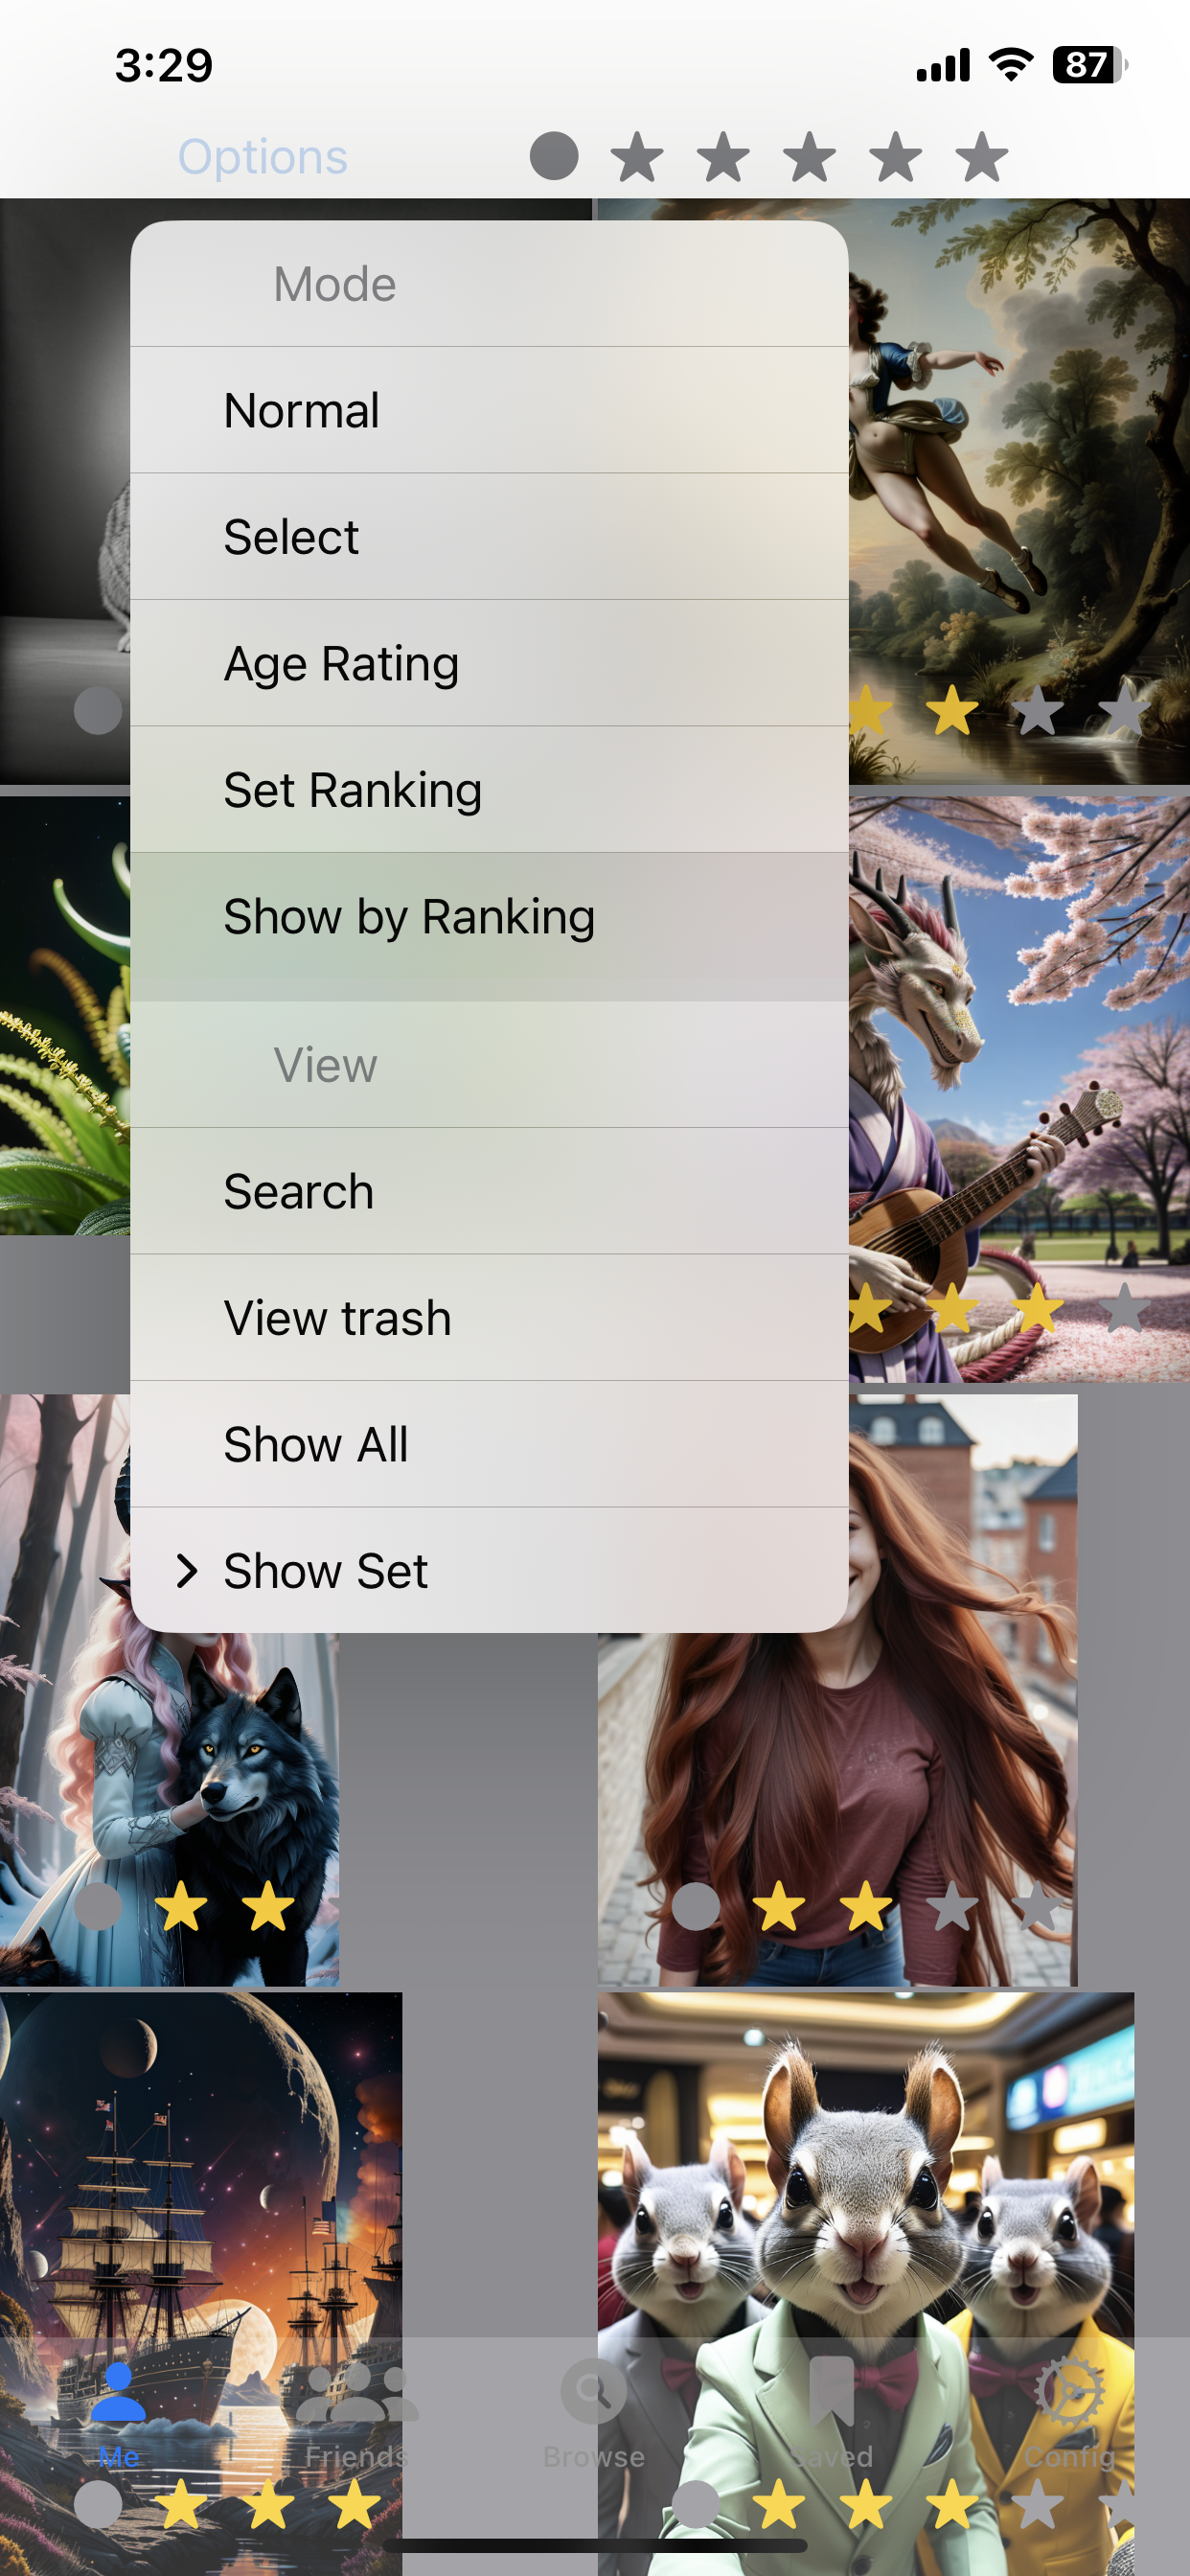
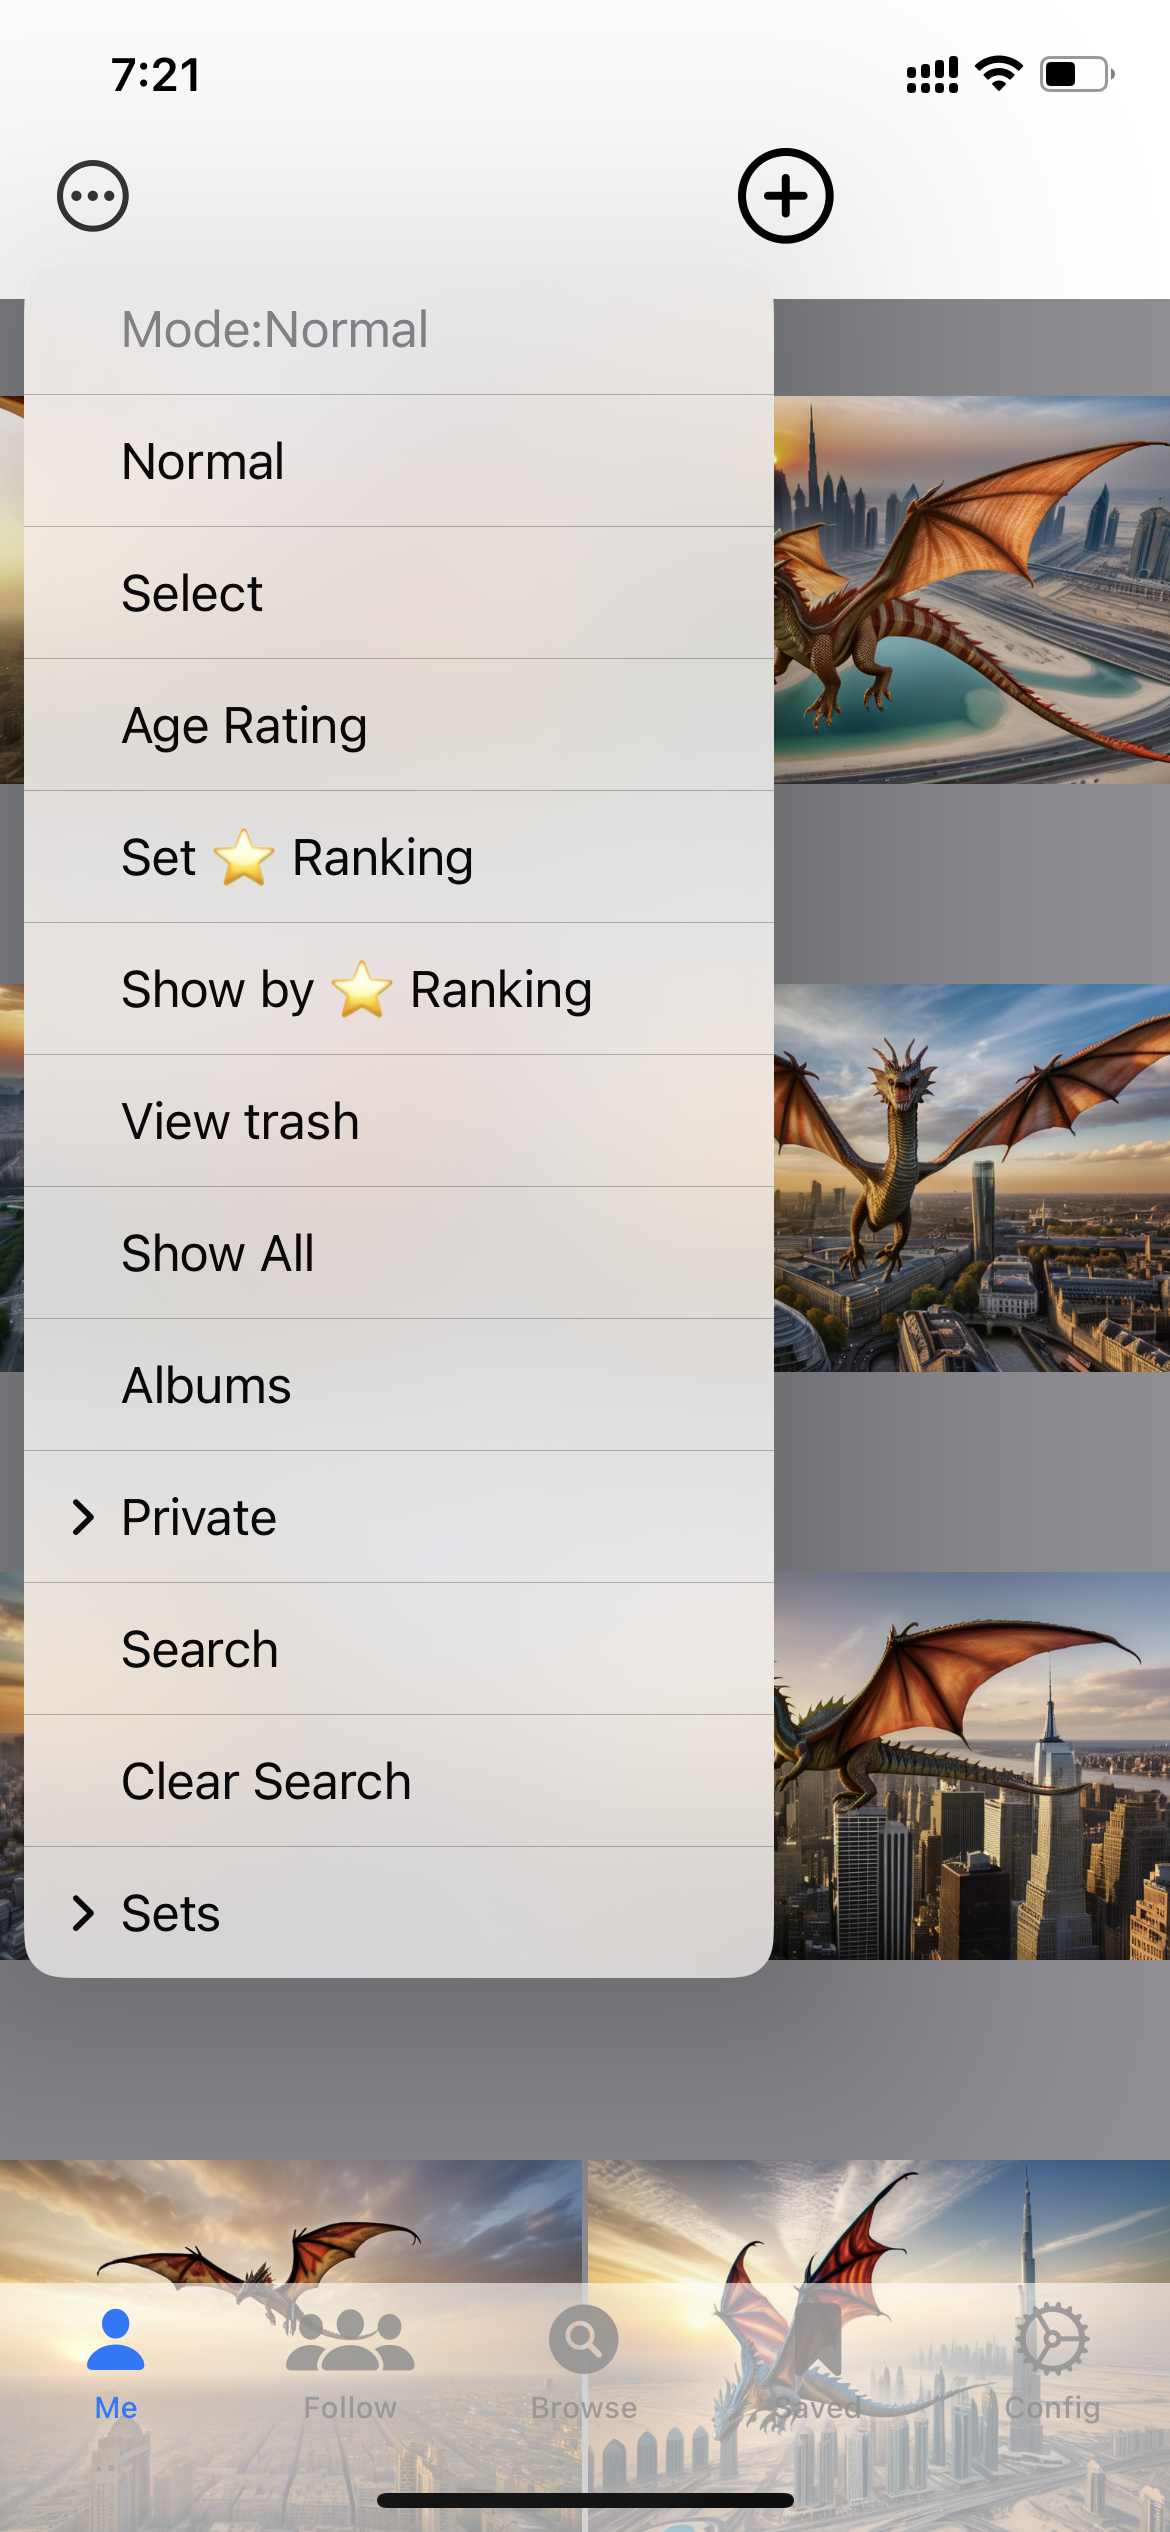
"Me View" Walk Thru
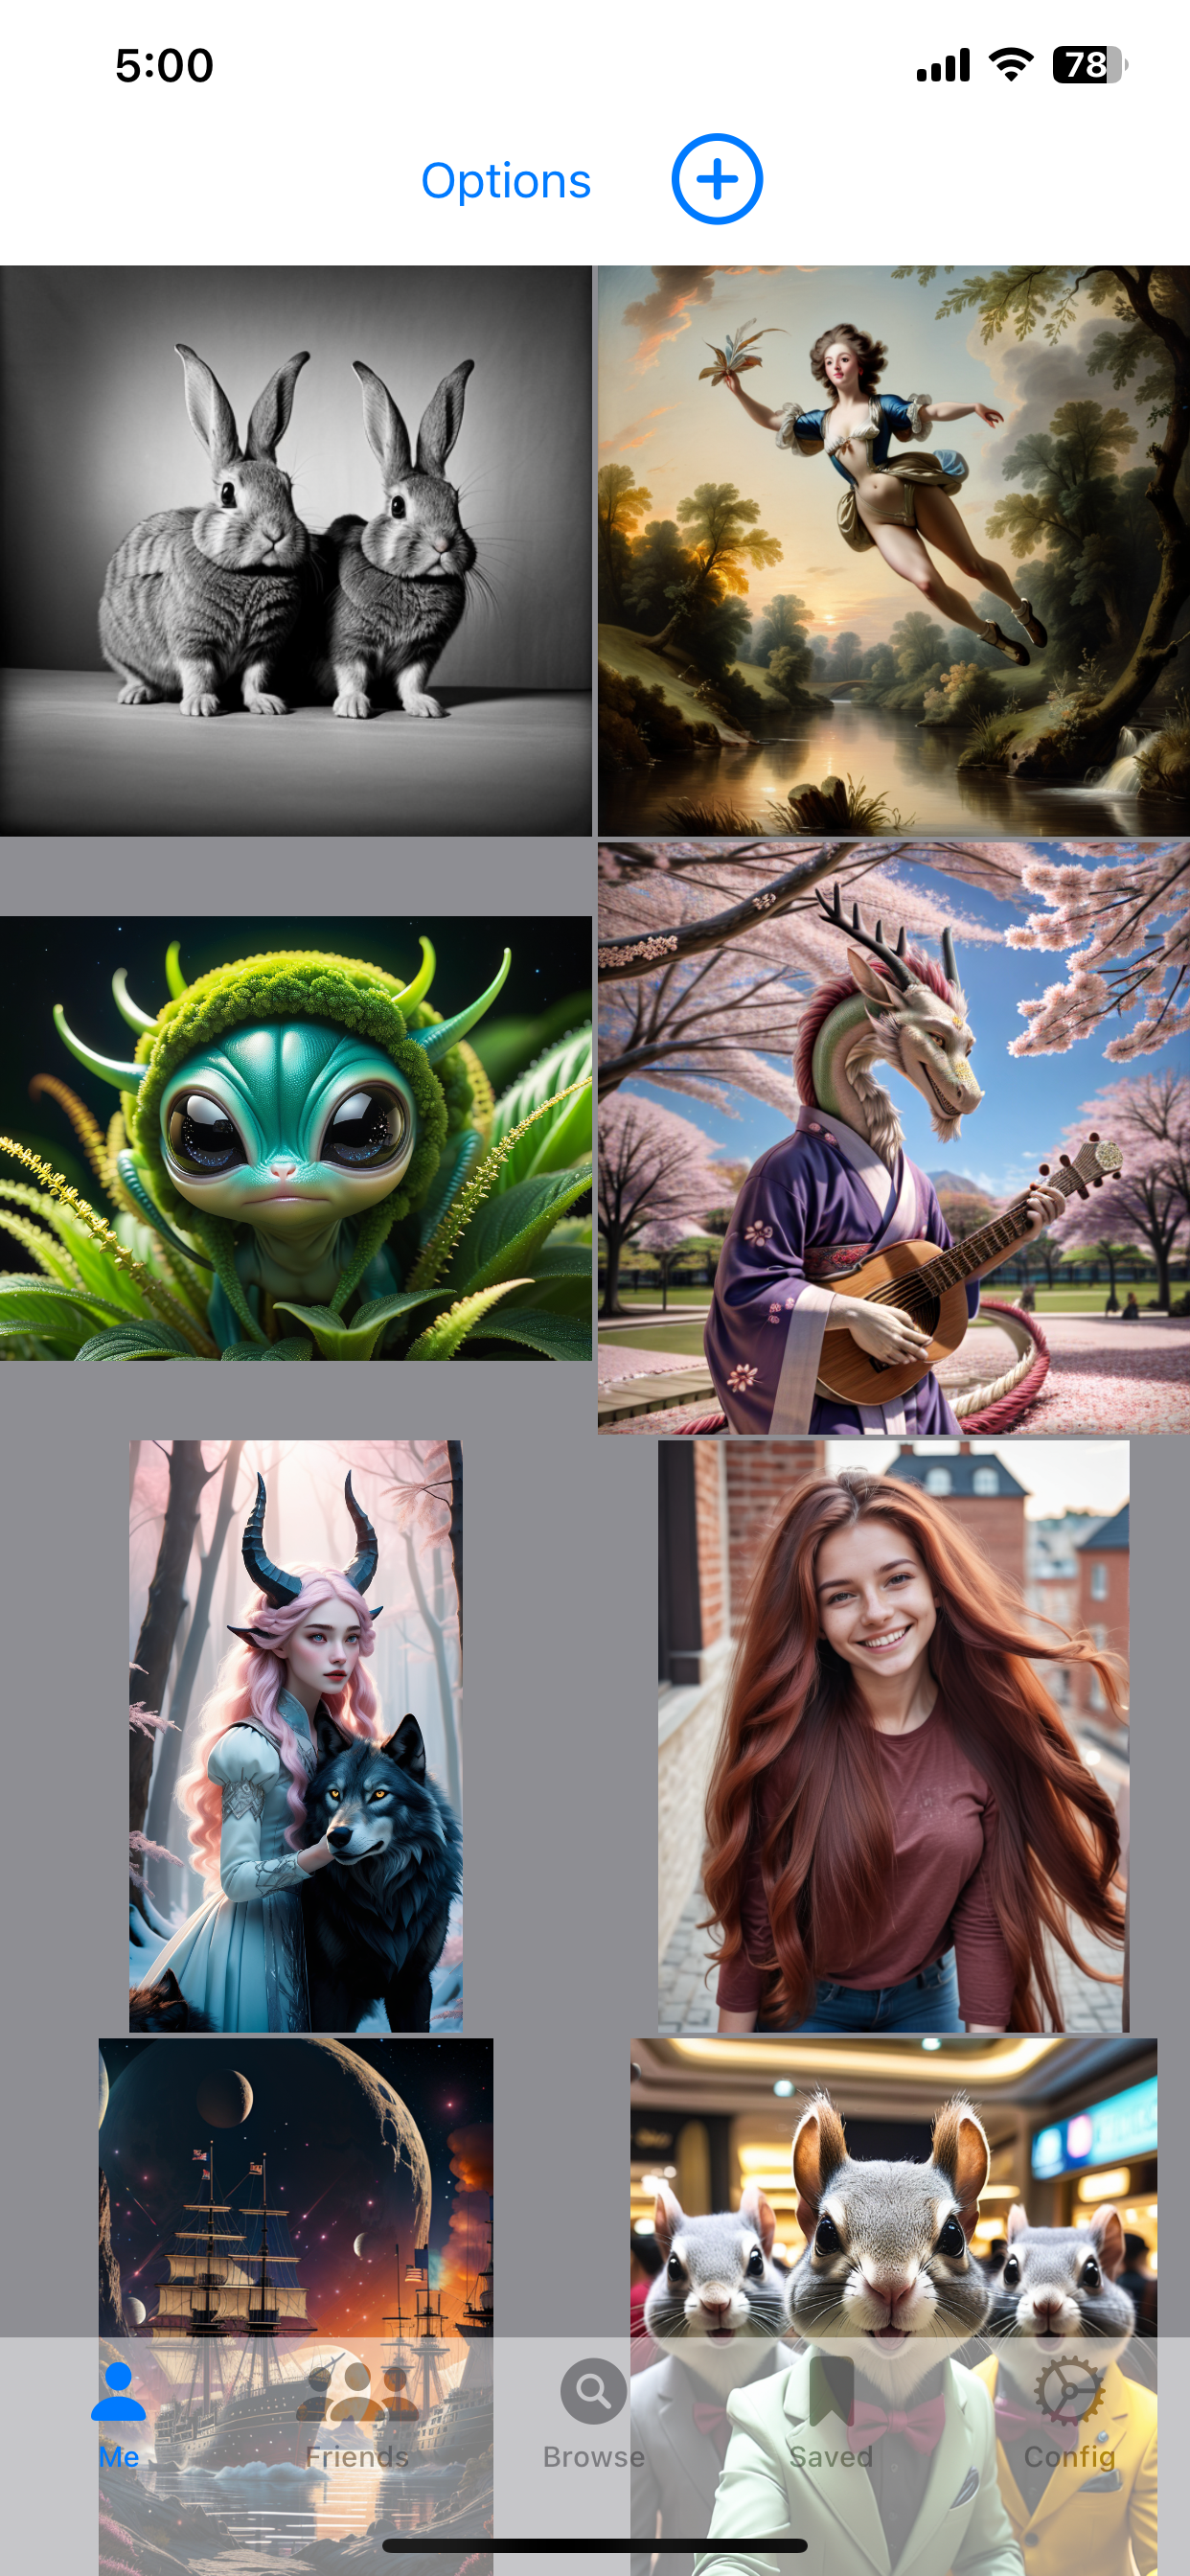
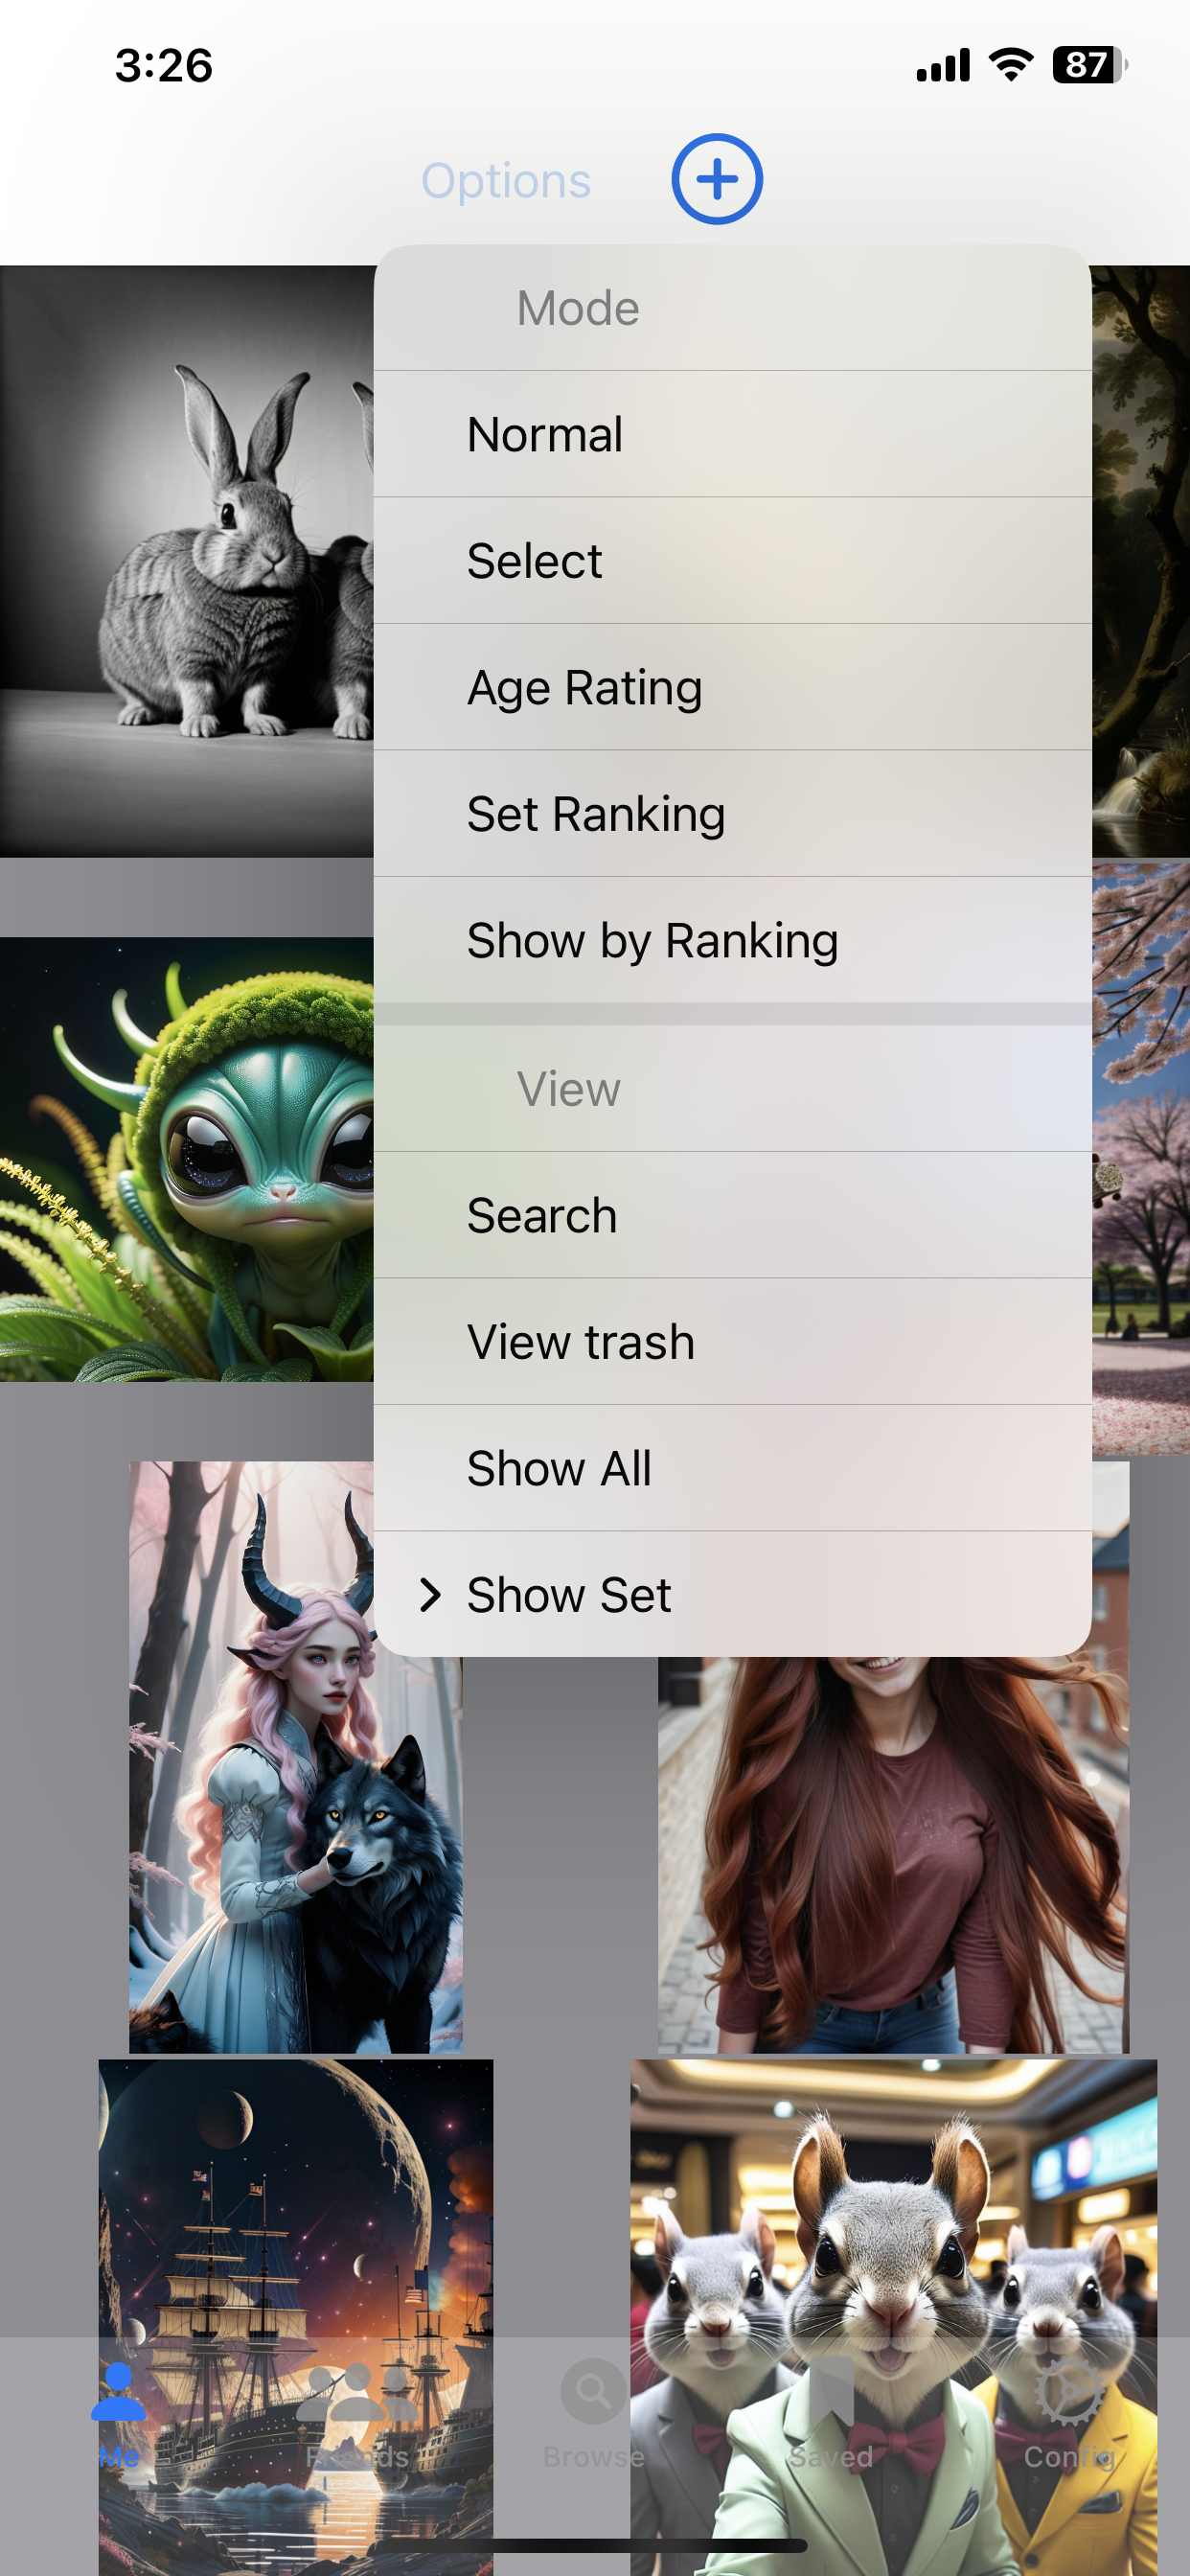
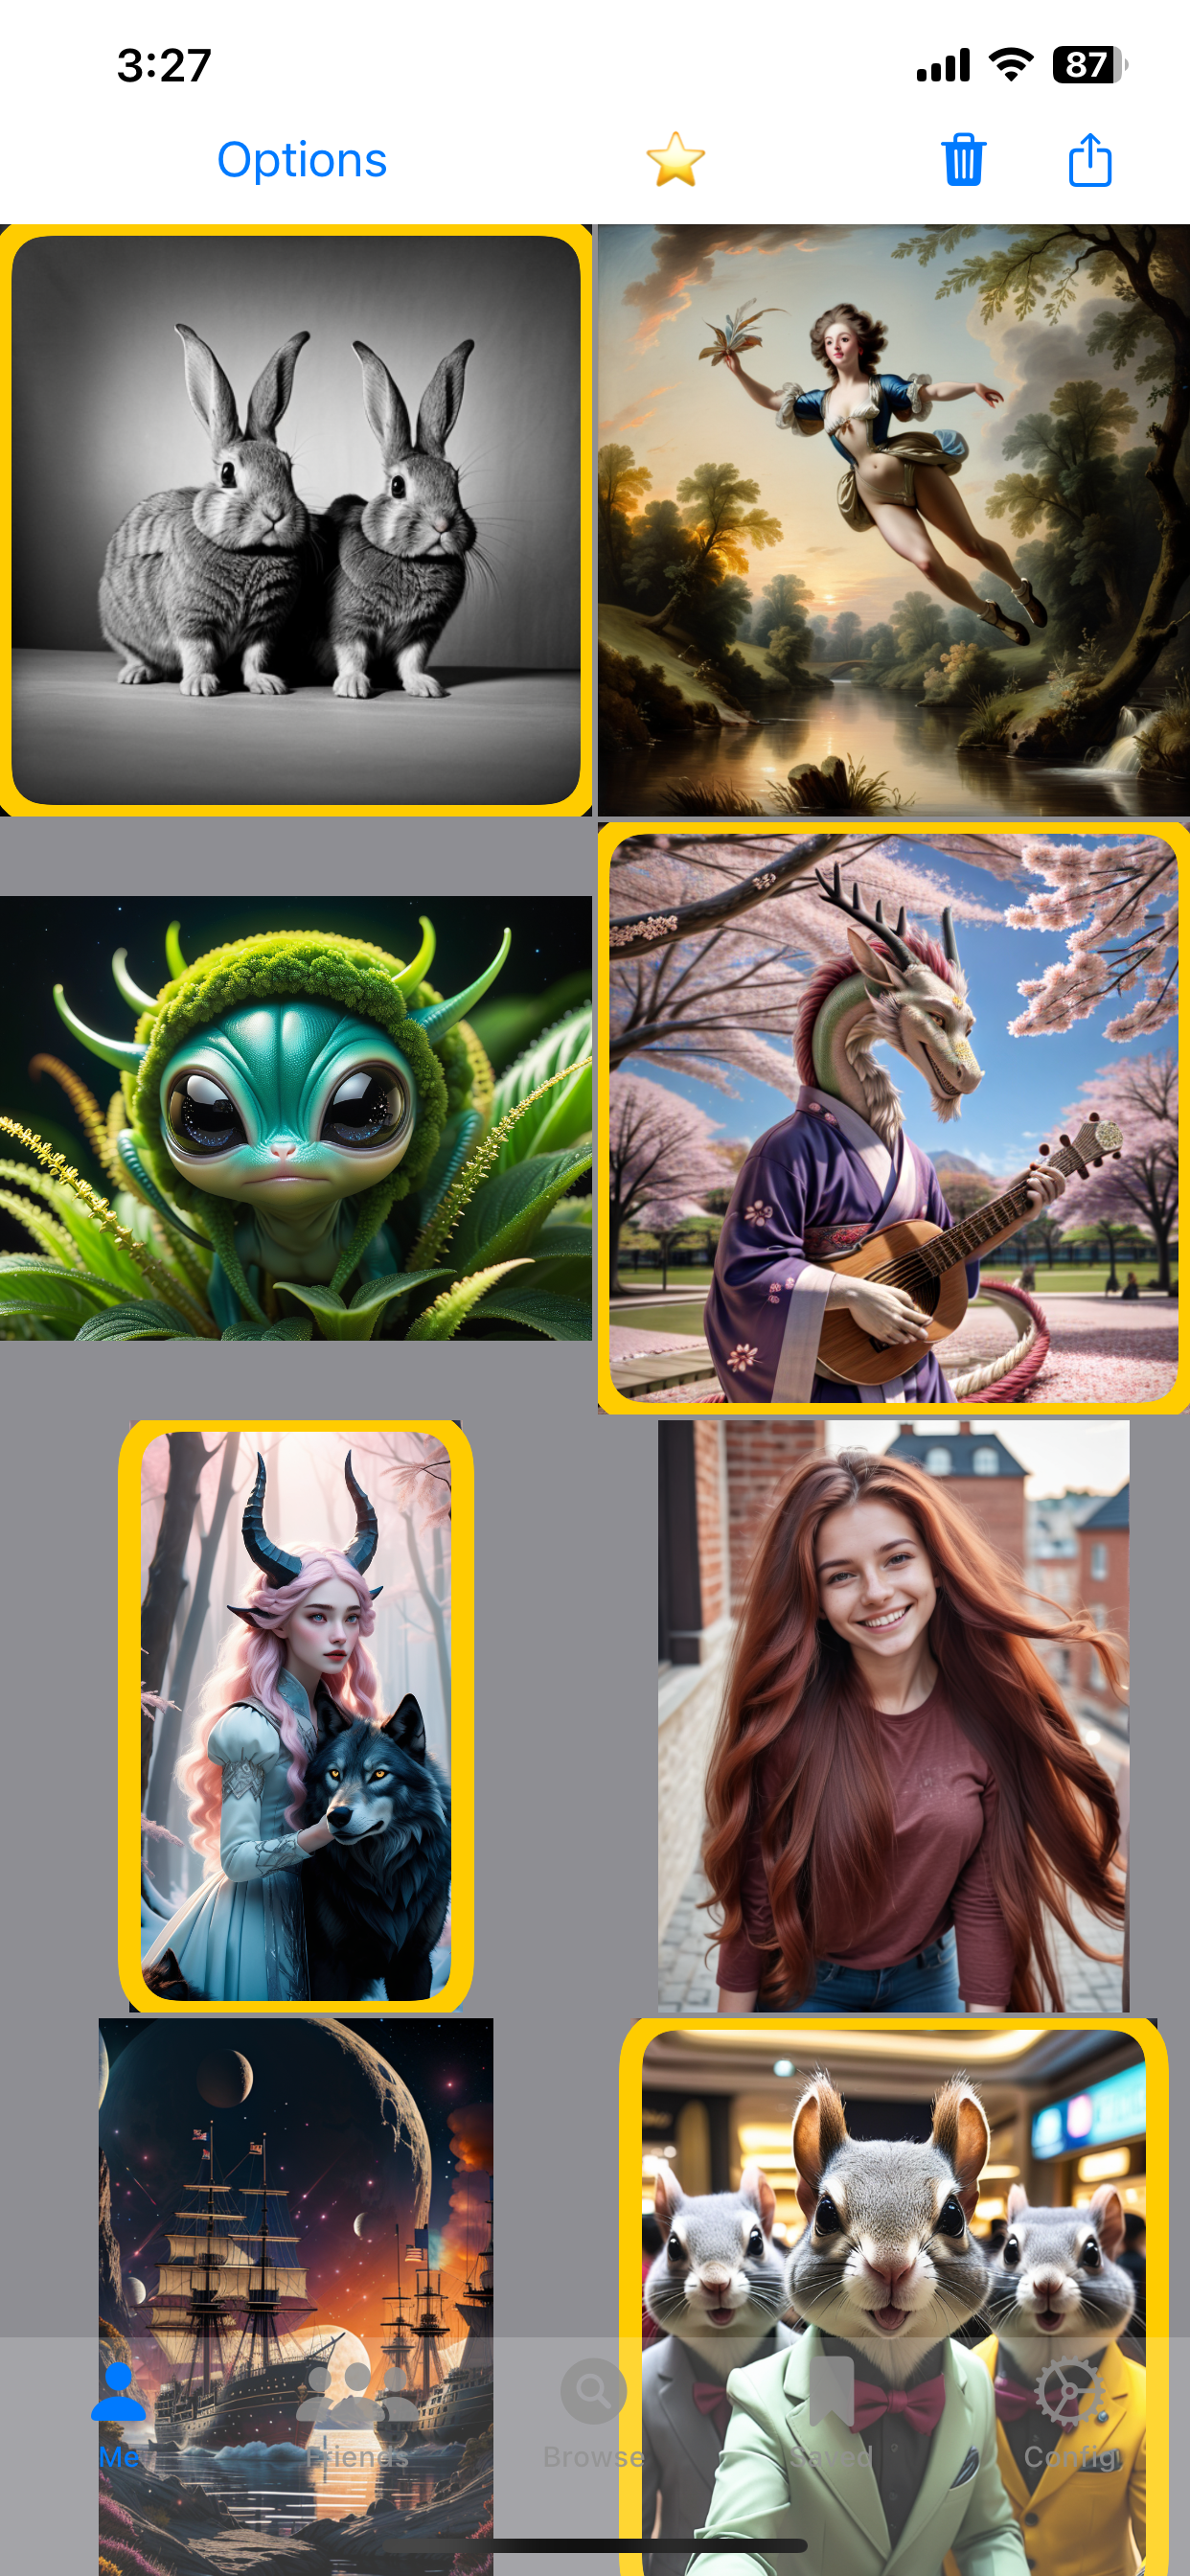
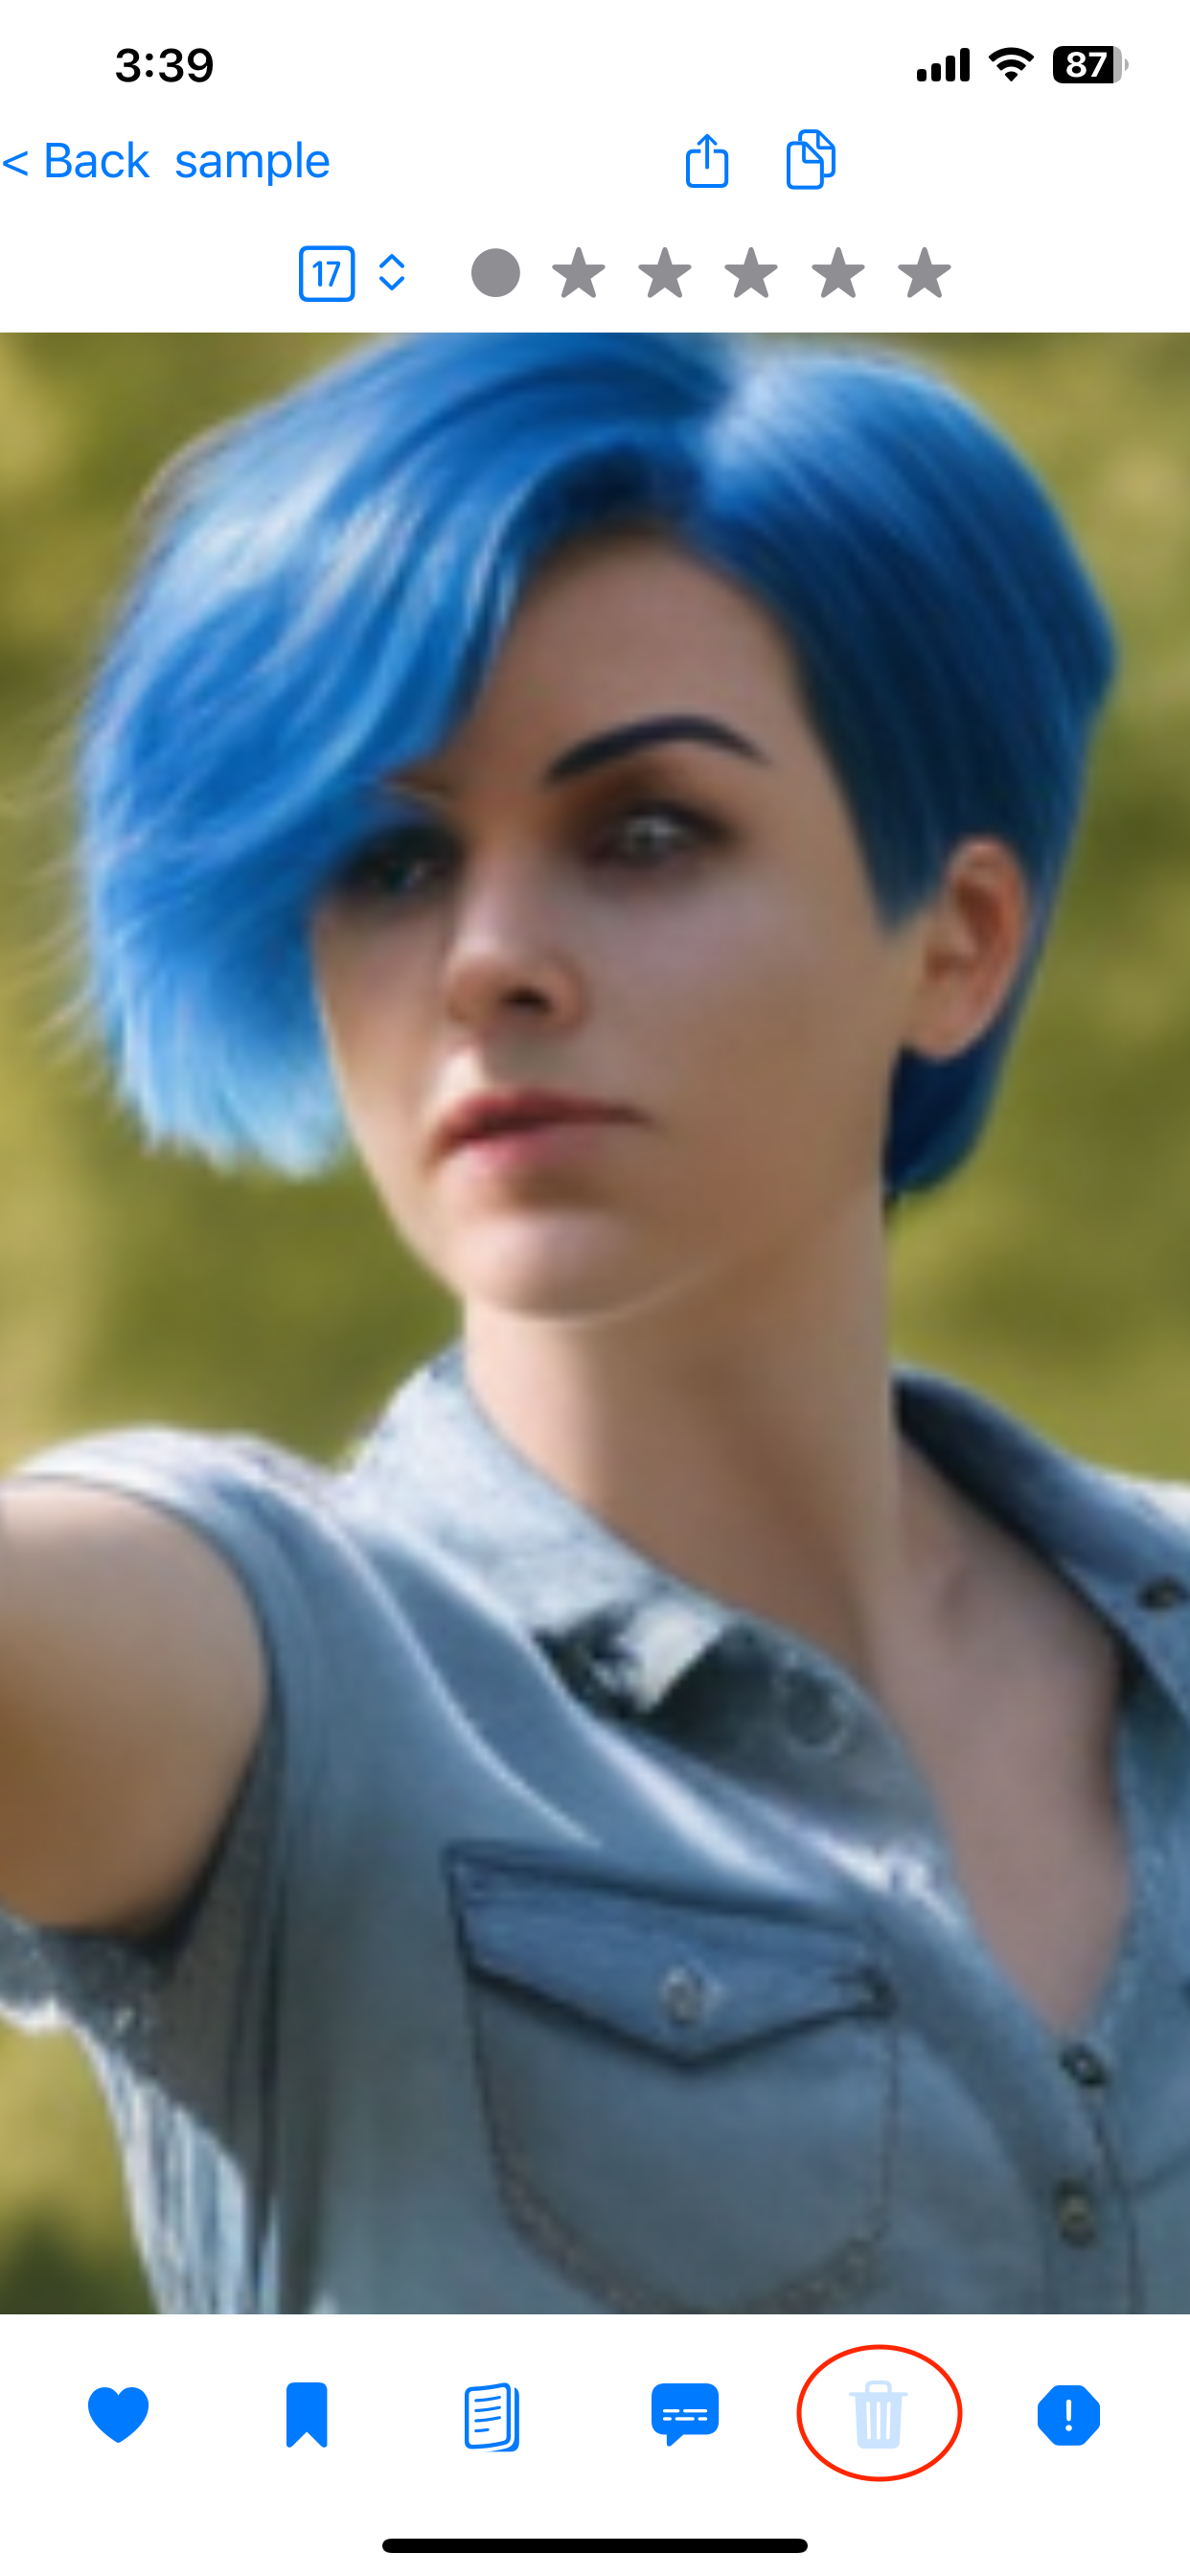
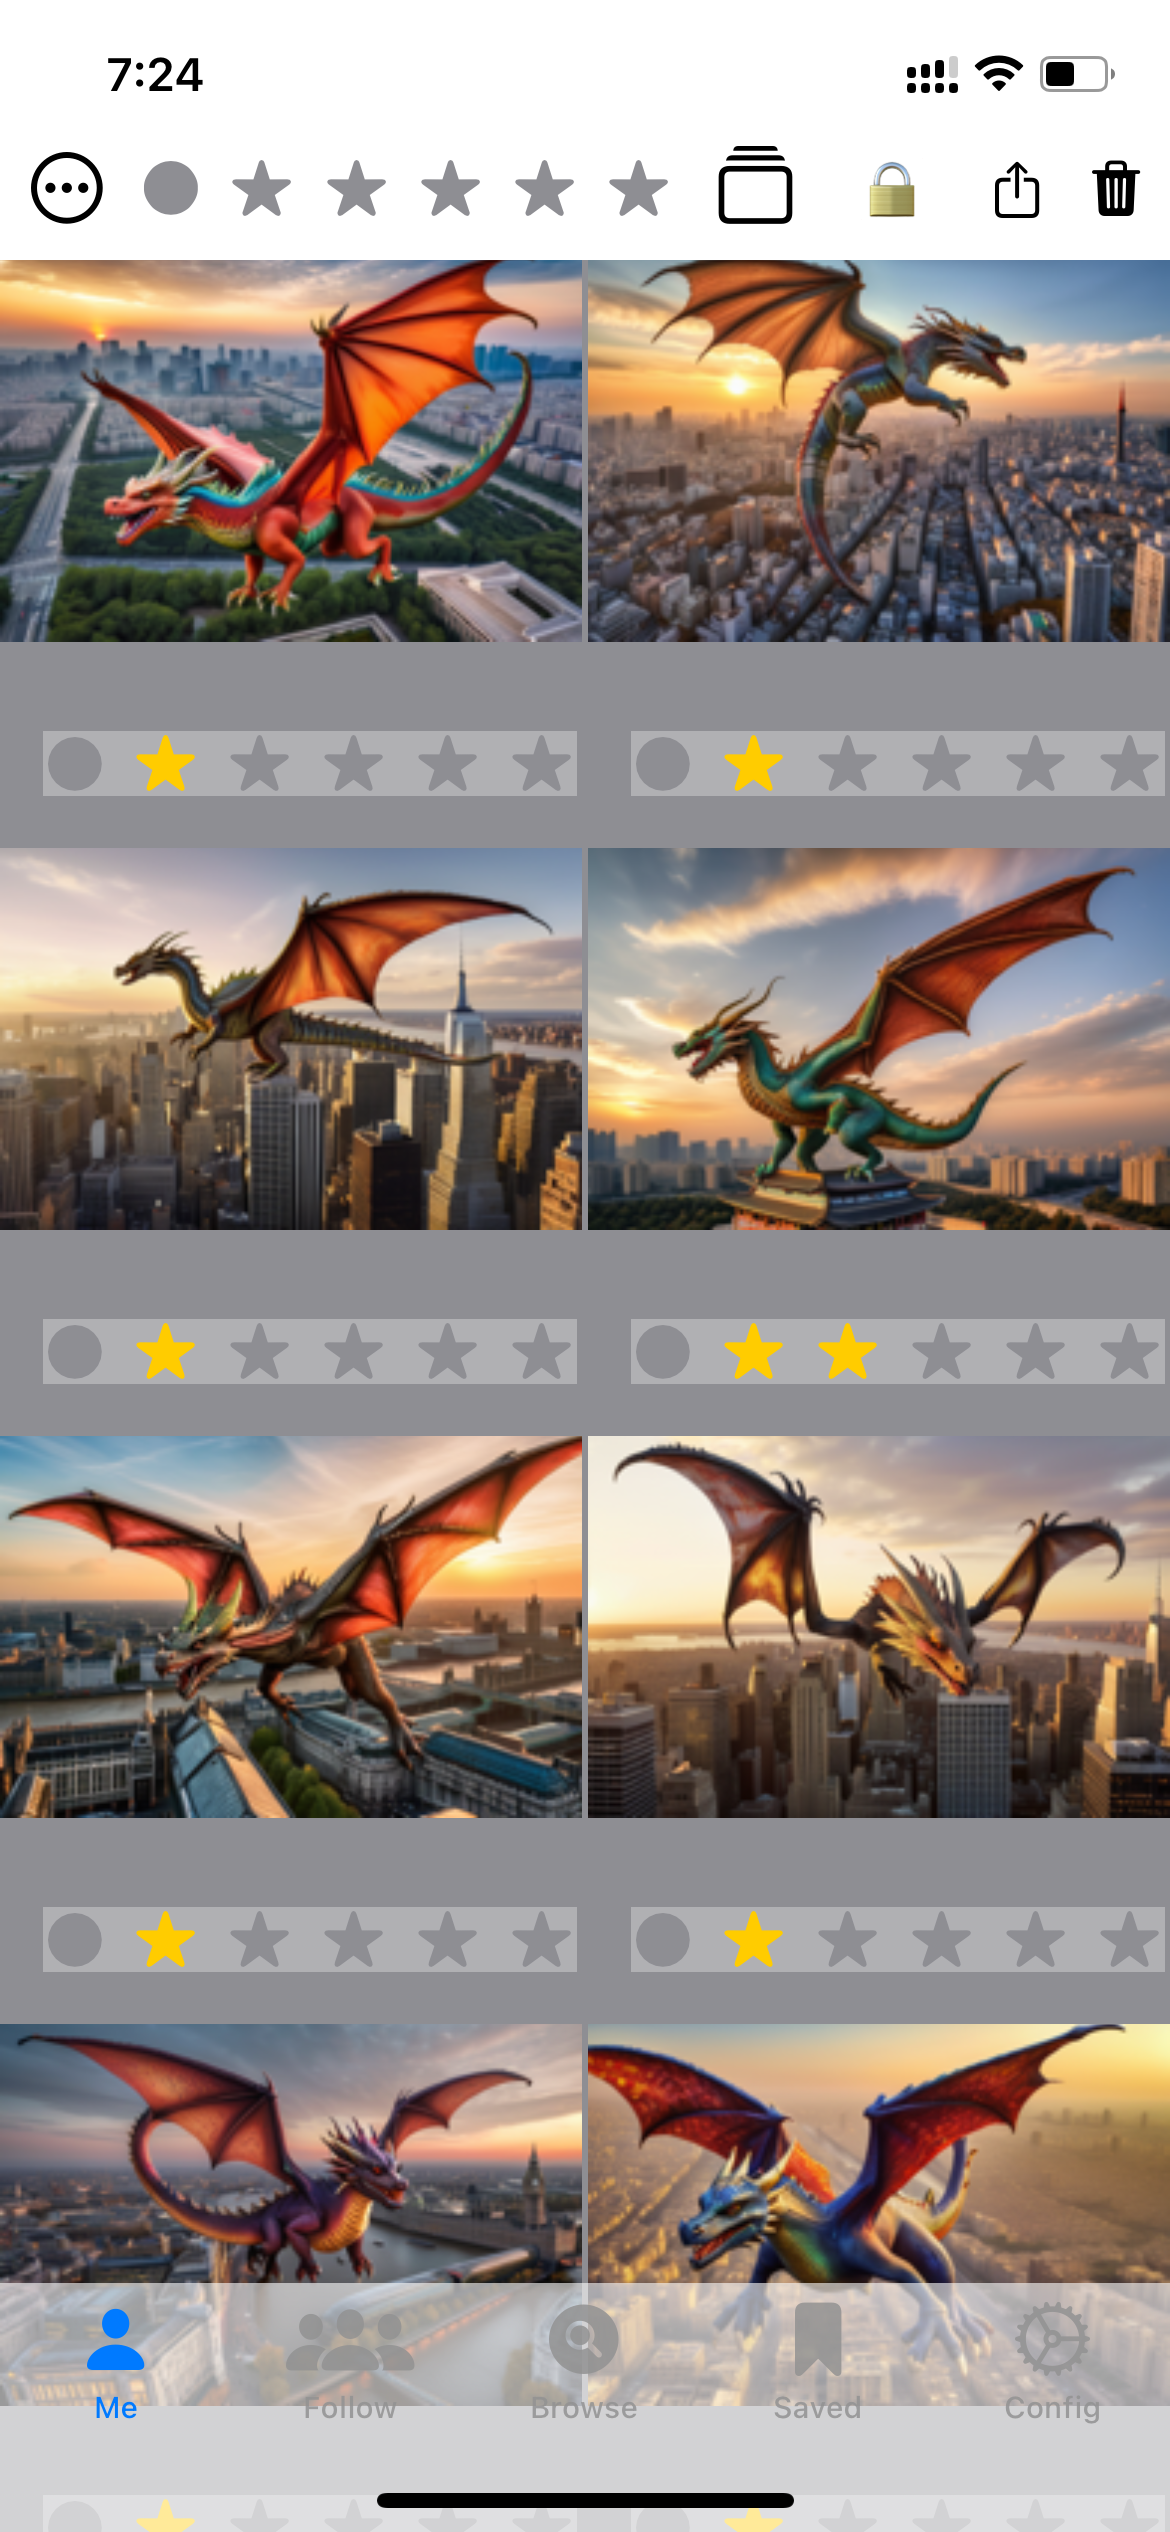
The “Me View” is all of your uploaded content. By default you are in Normal Mode, and clicking on an image will bring you to the Image Details view. The options Menu is used to select other modes and options. The select mode is used to, you guessed it, select images. You can do a long press on an image to get a preview, swipe left or right to see other images, swipe down to dismiss, You can use the star button to assign a ranking to selected images, use the trash icon to delete or the share icon to send to friends.
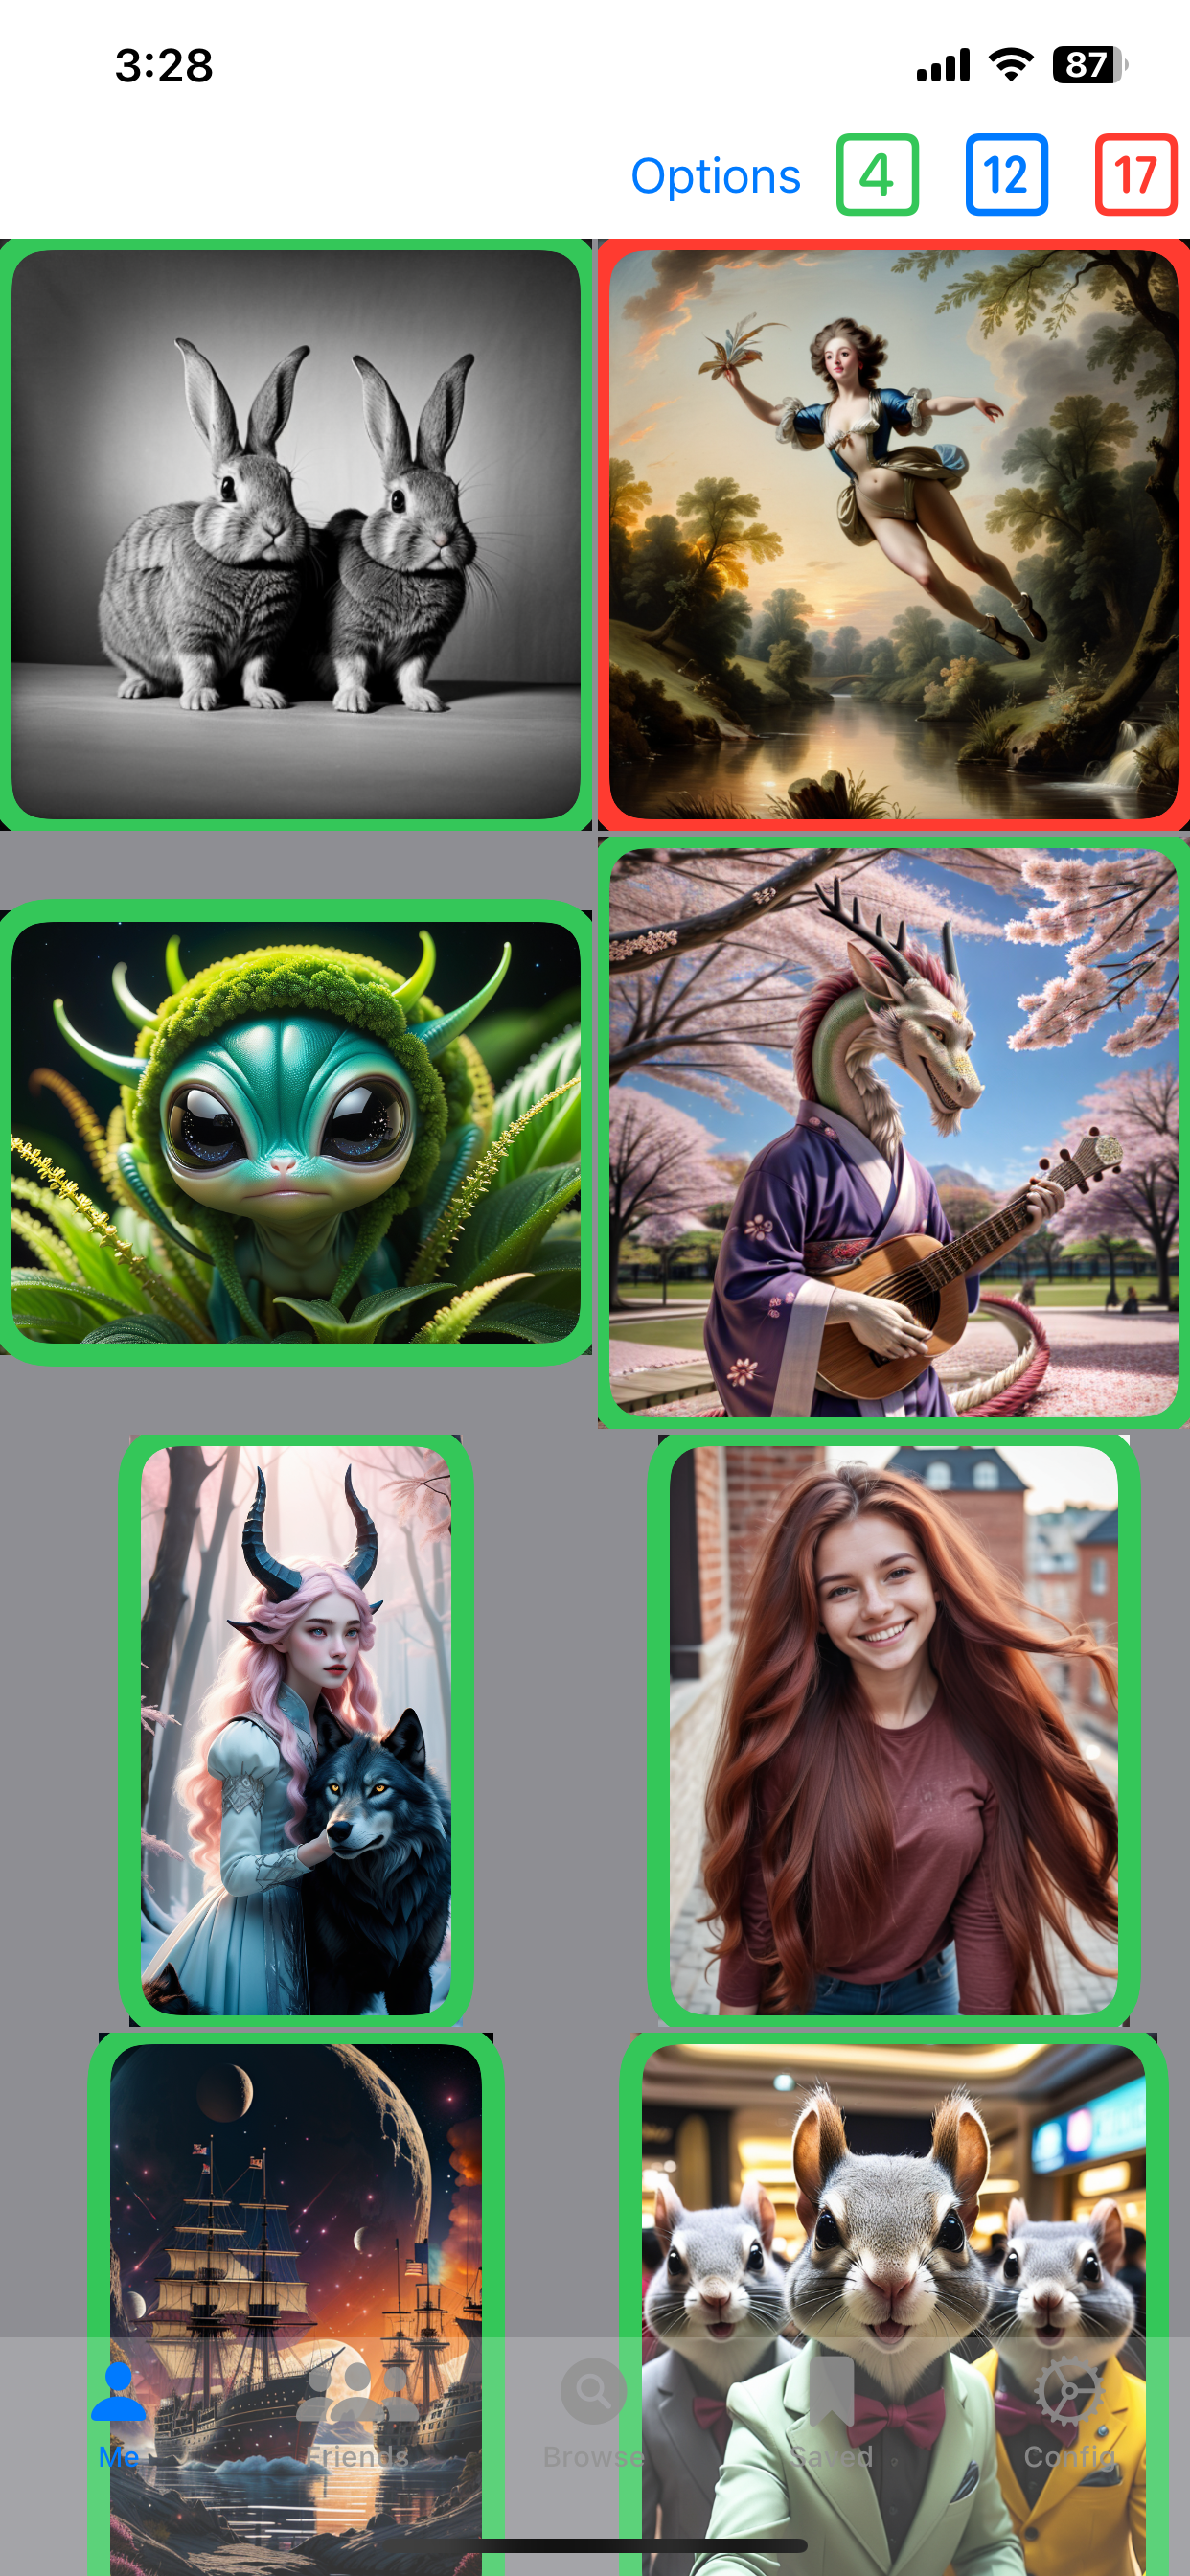
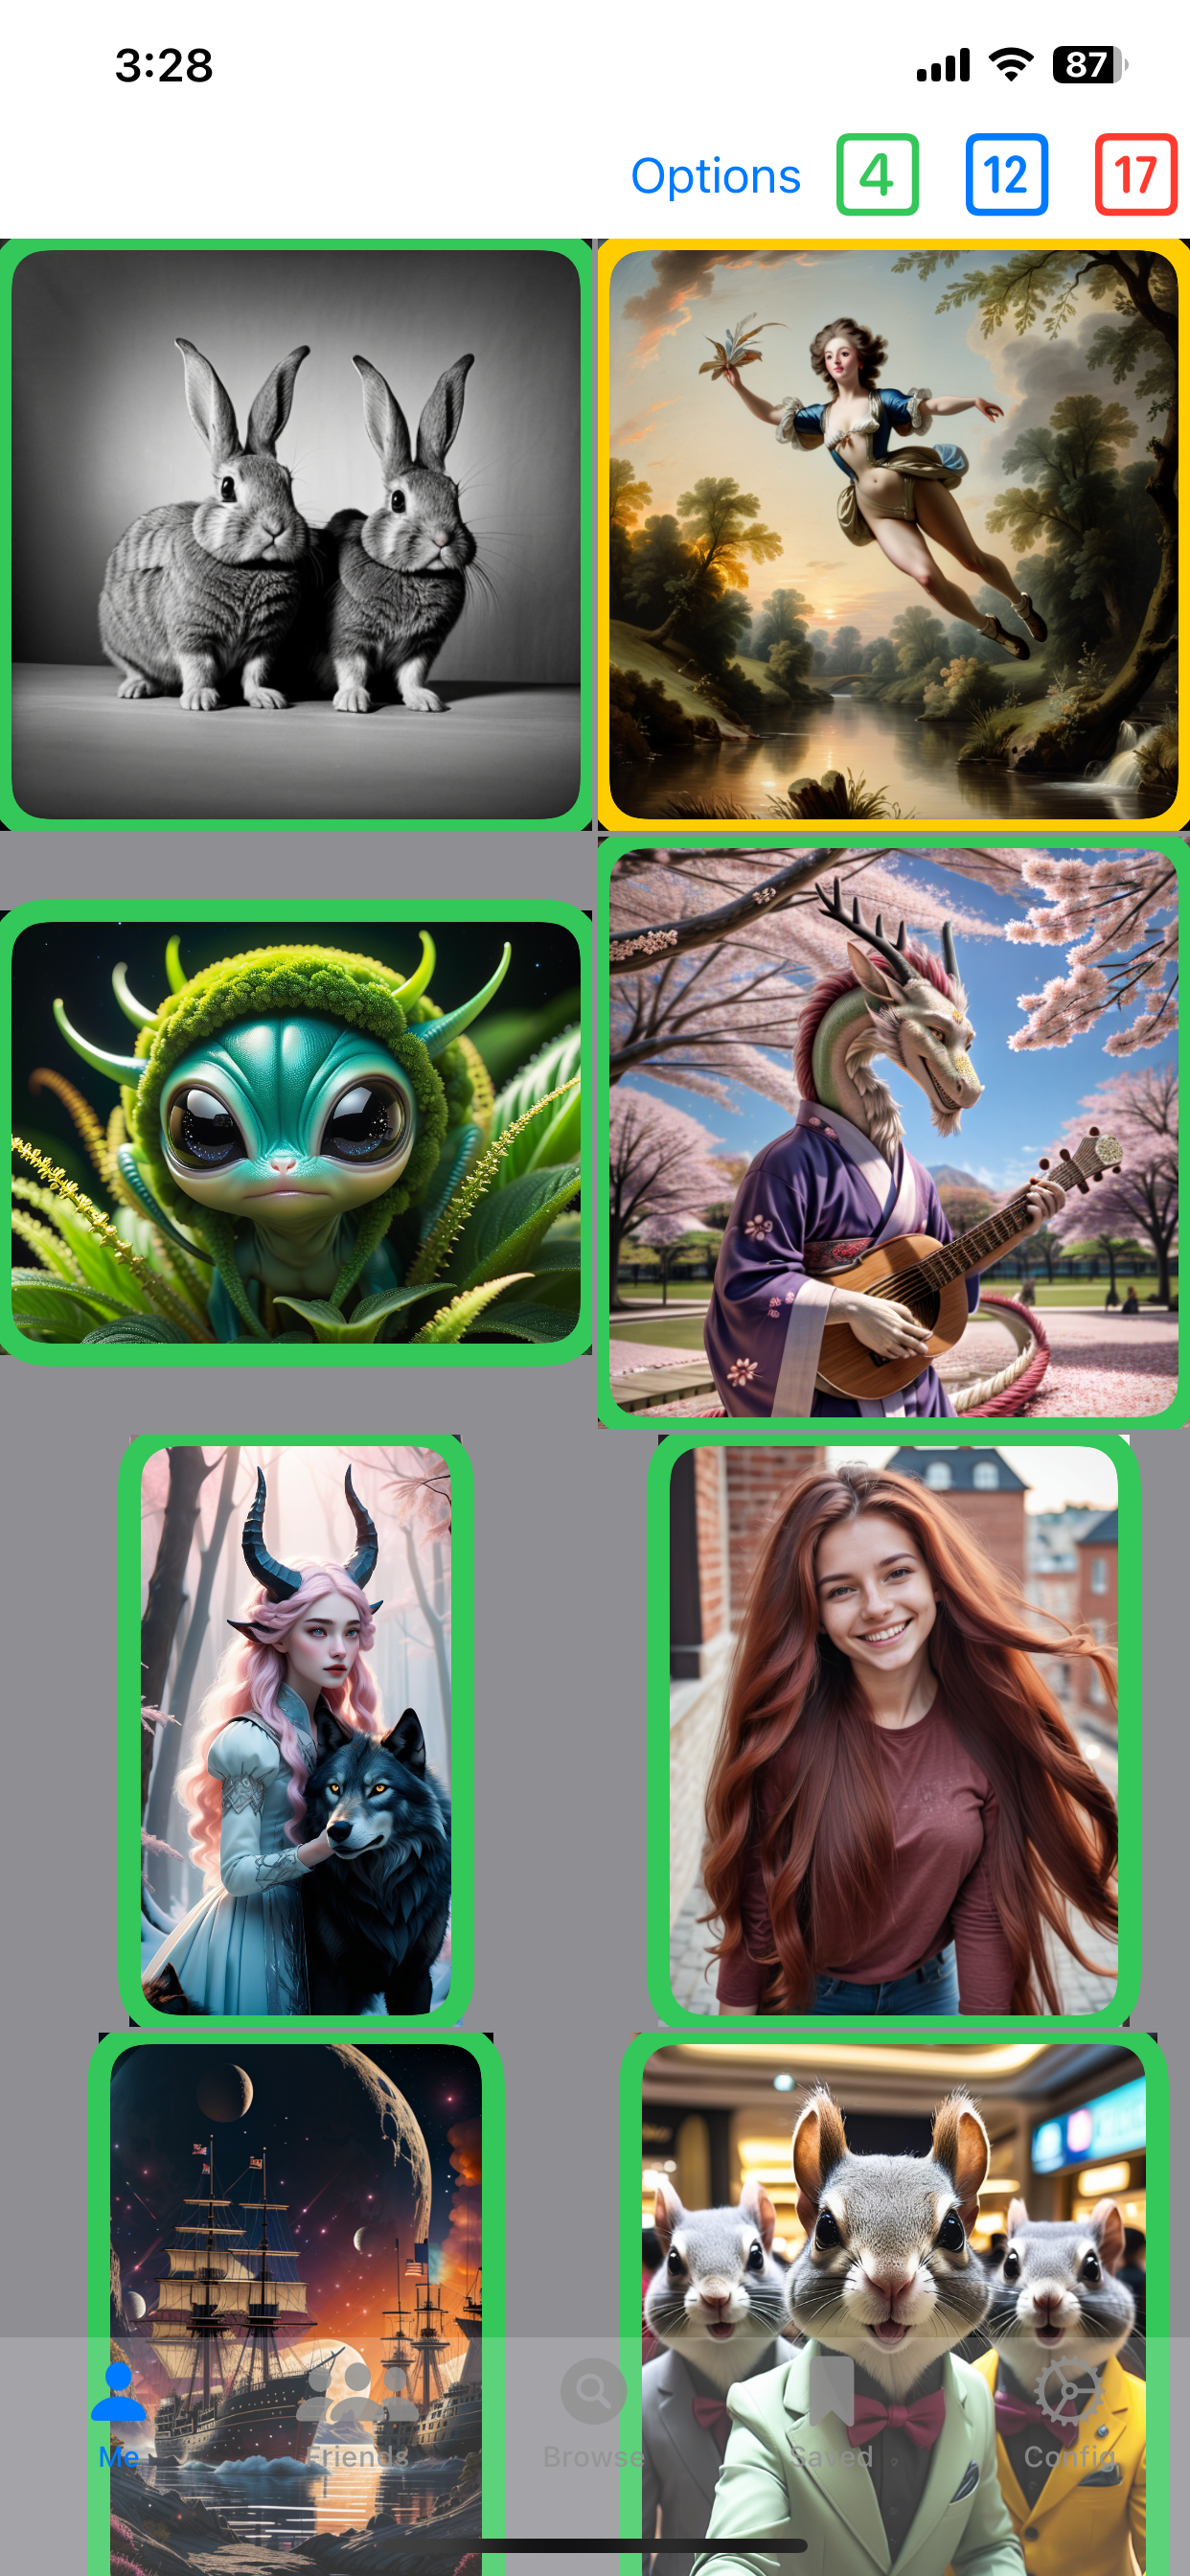
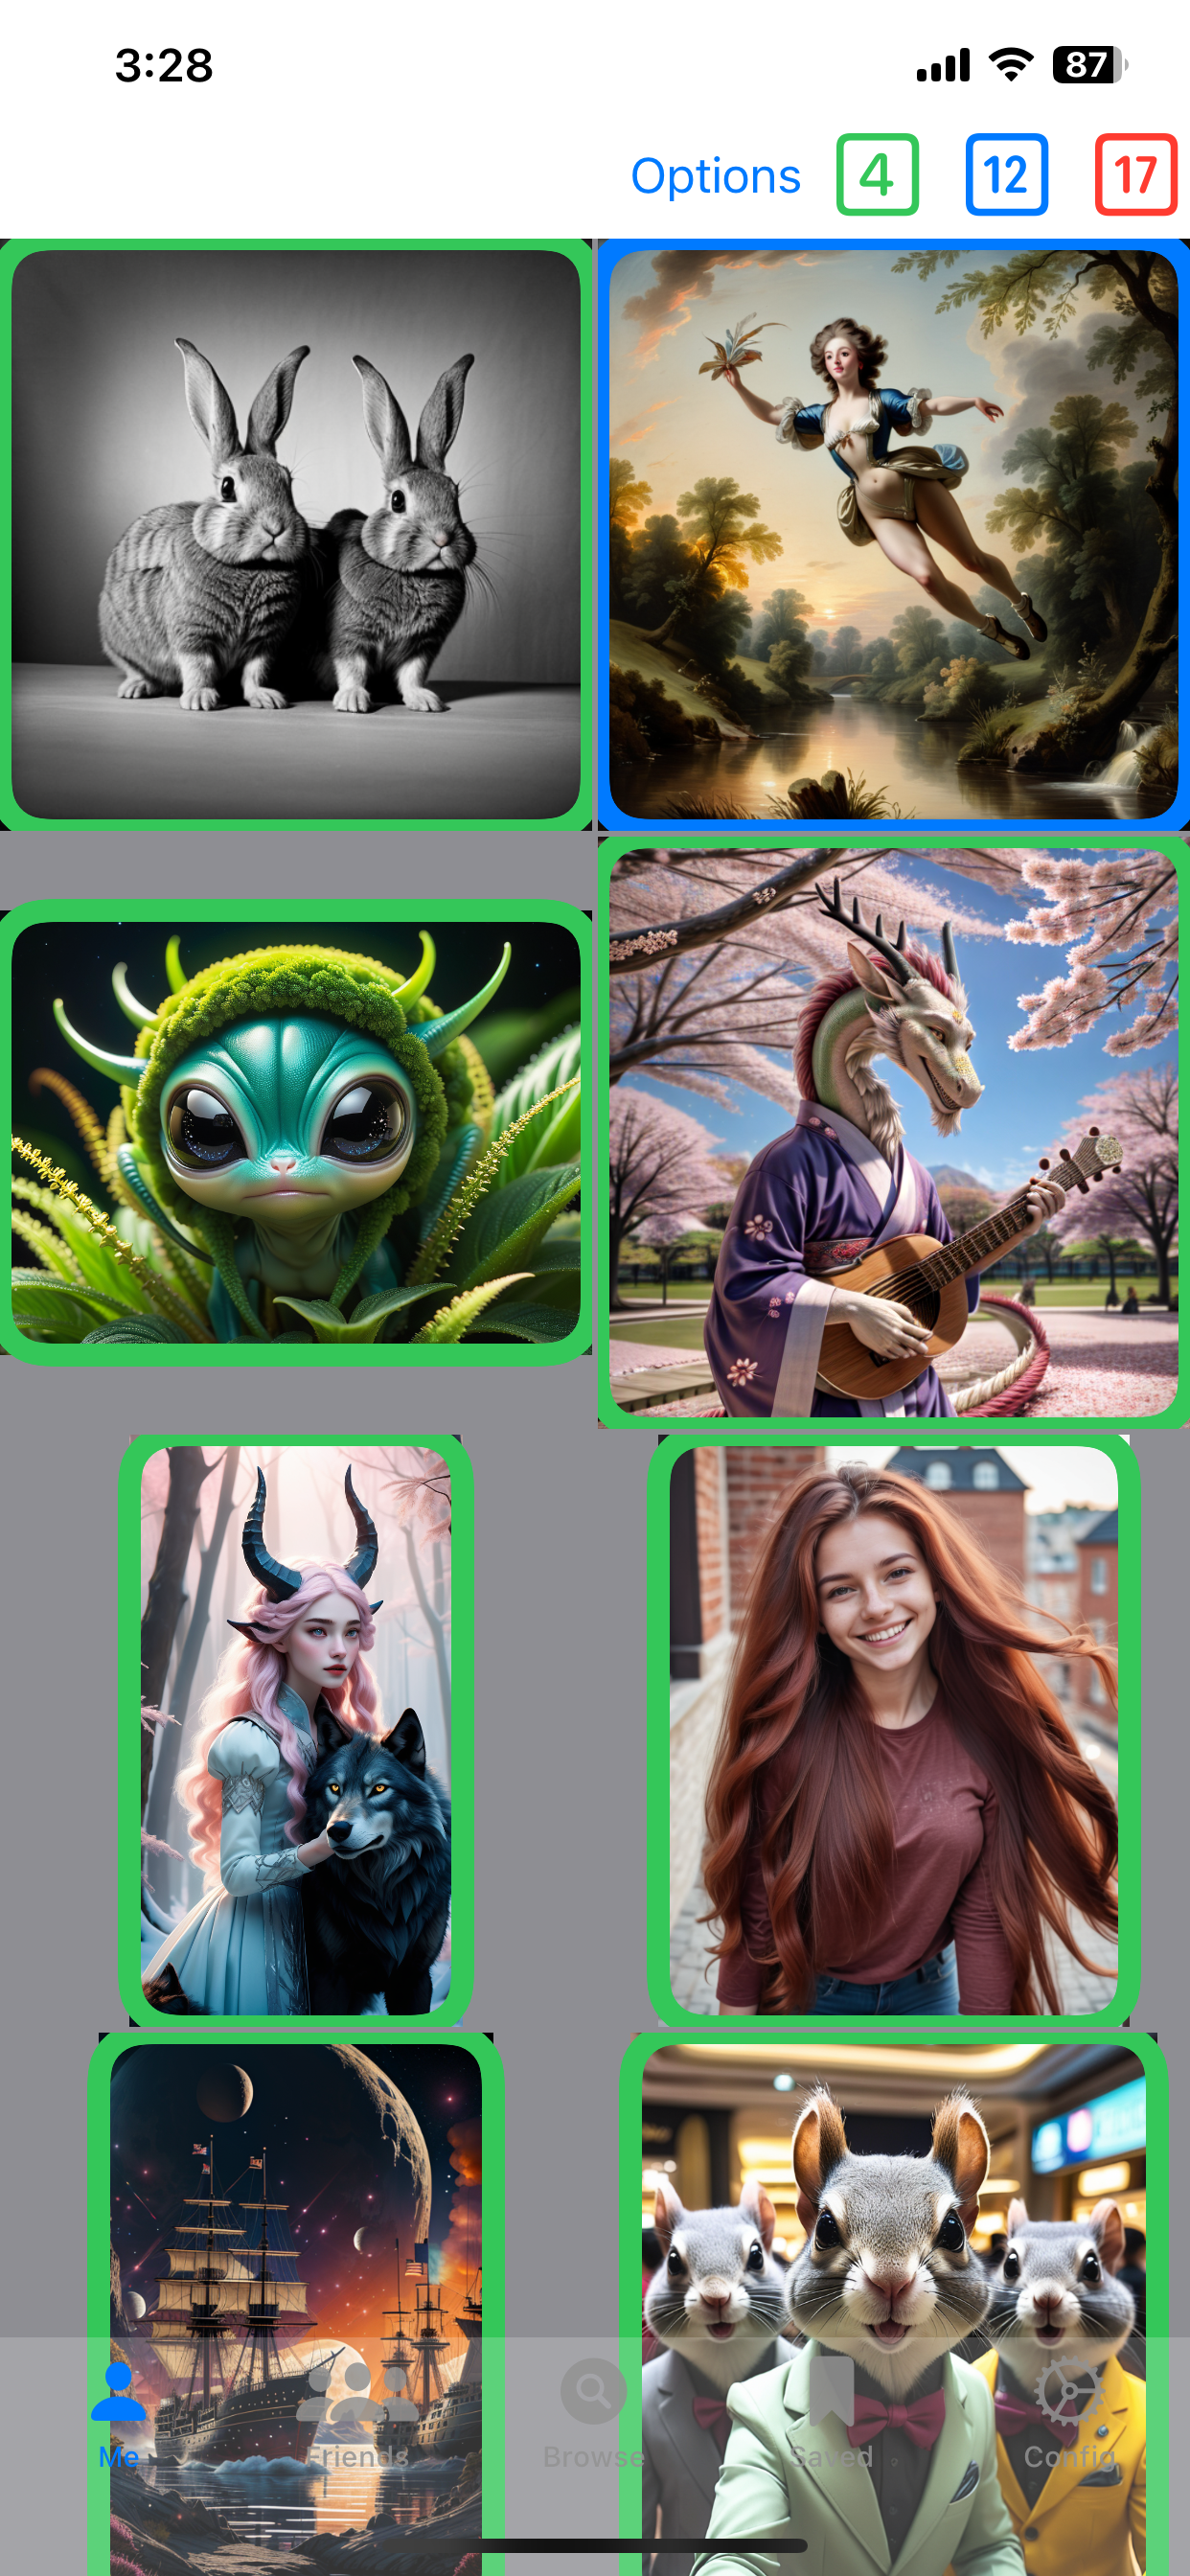
The Age Rating mode is used to set the rating for selected images. Age Rating is very important in Gadzoinks, not everyone is comfortable seeing all kinds of content. The image in the top right is highlighted in red to show it is a rated 17, but it doesn’t need to be. Click on it , and its highlighted in yellow, then click the blue [12] button on top and the image is now marked as age 12
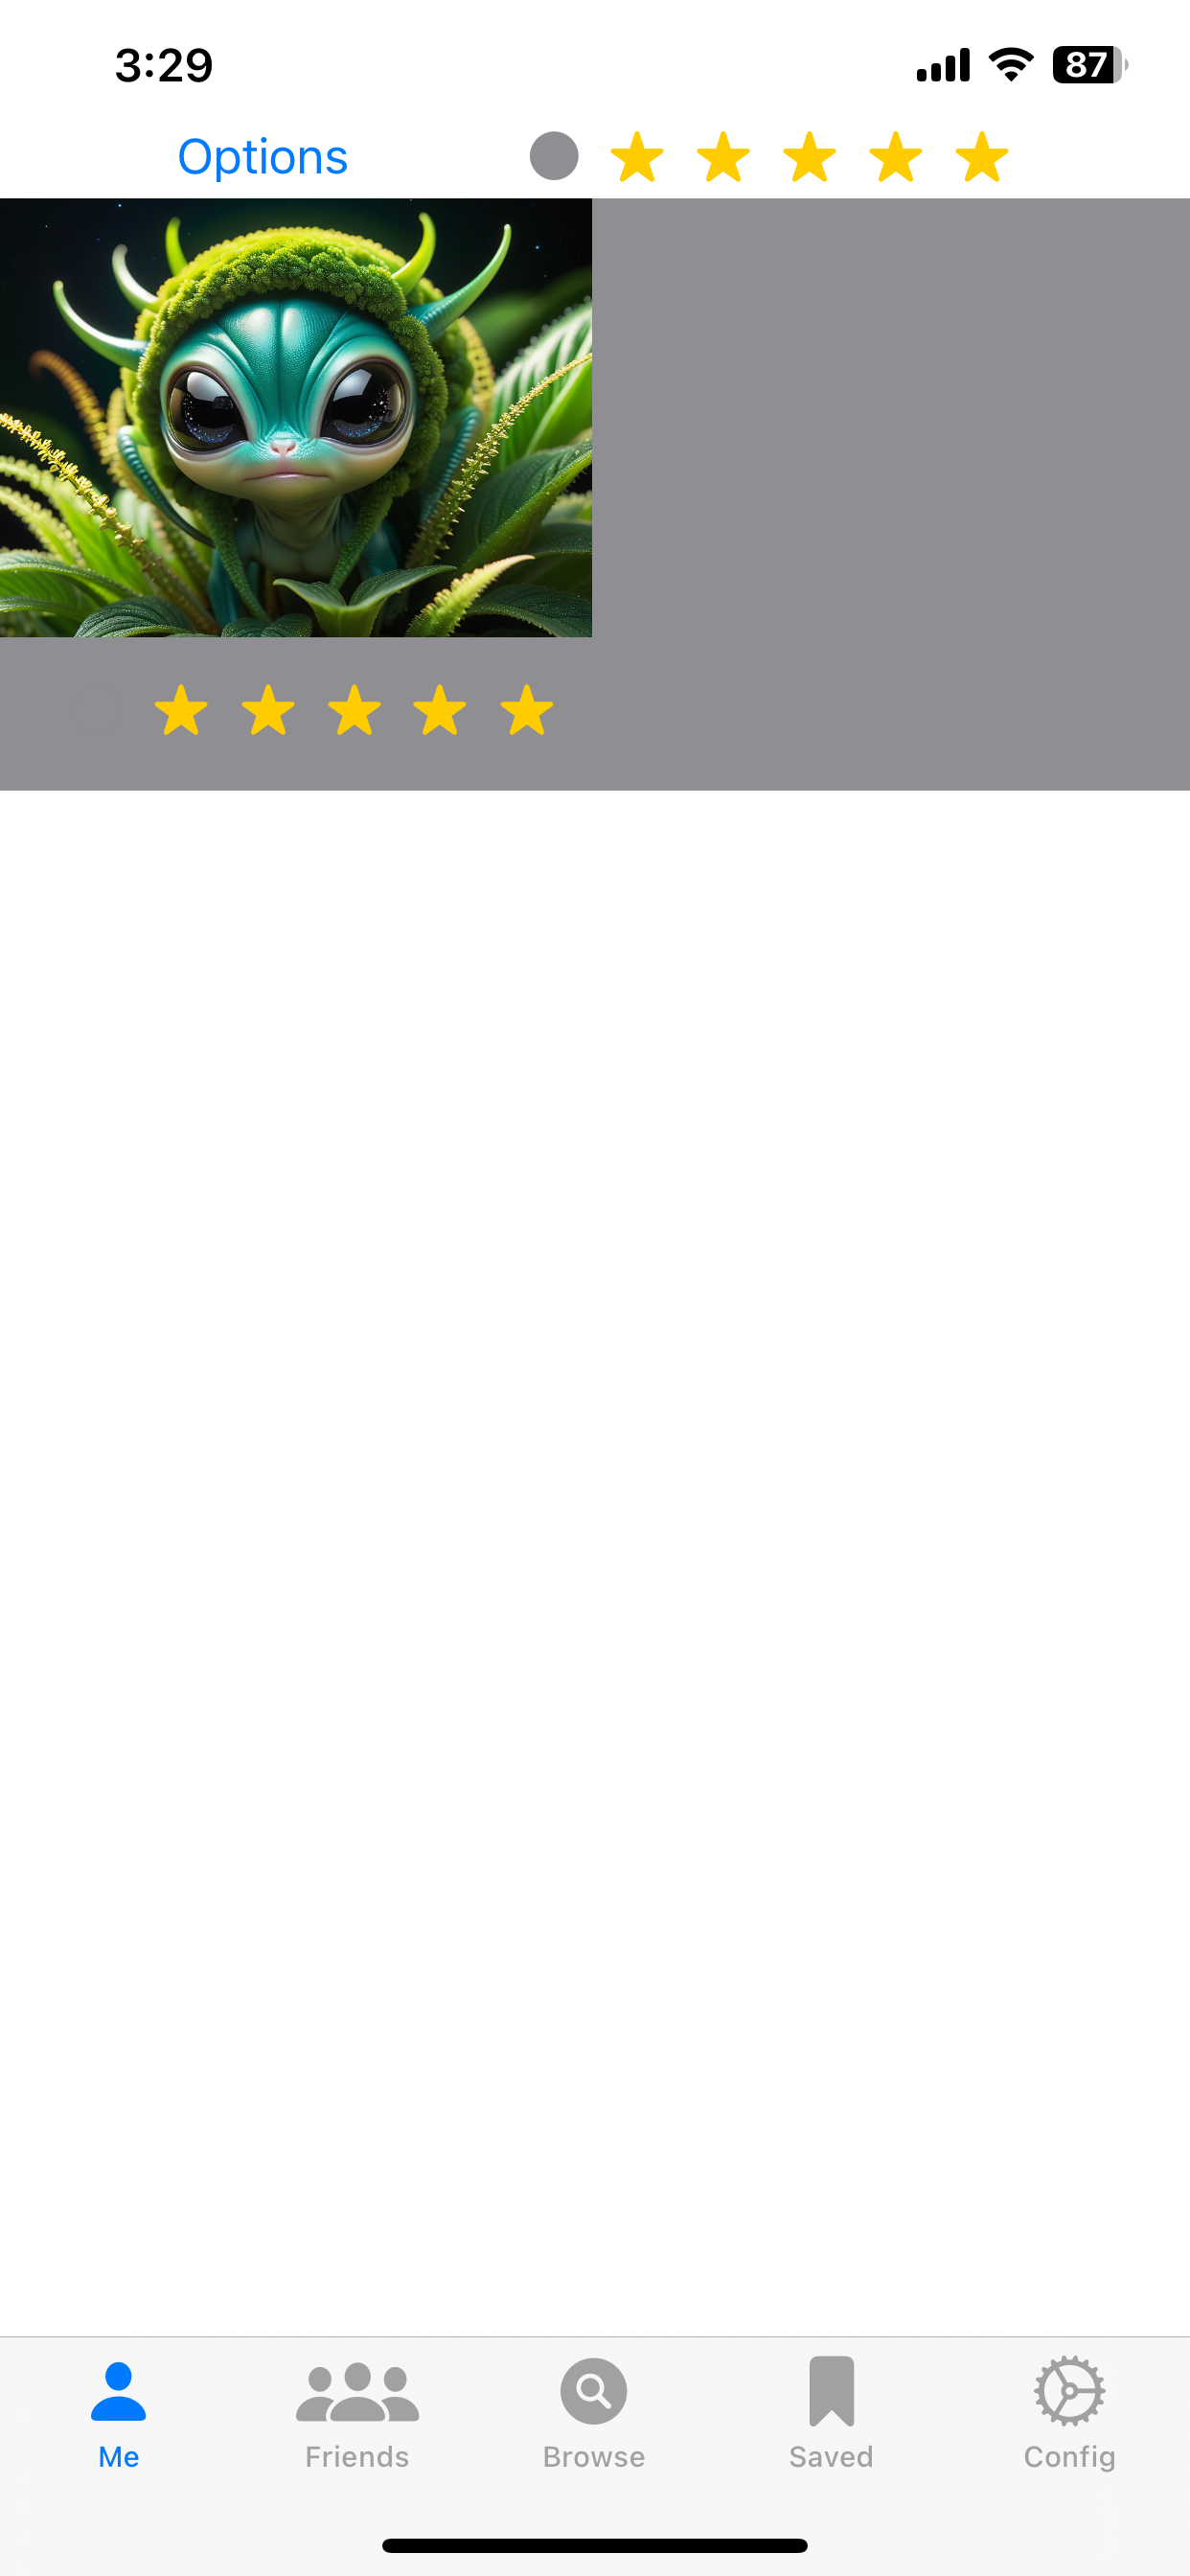

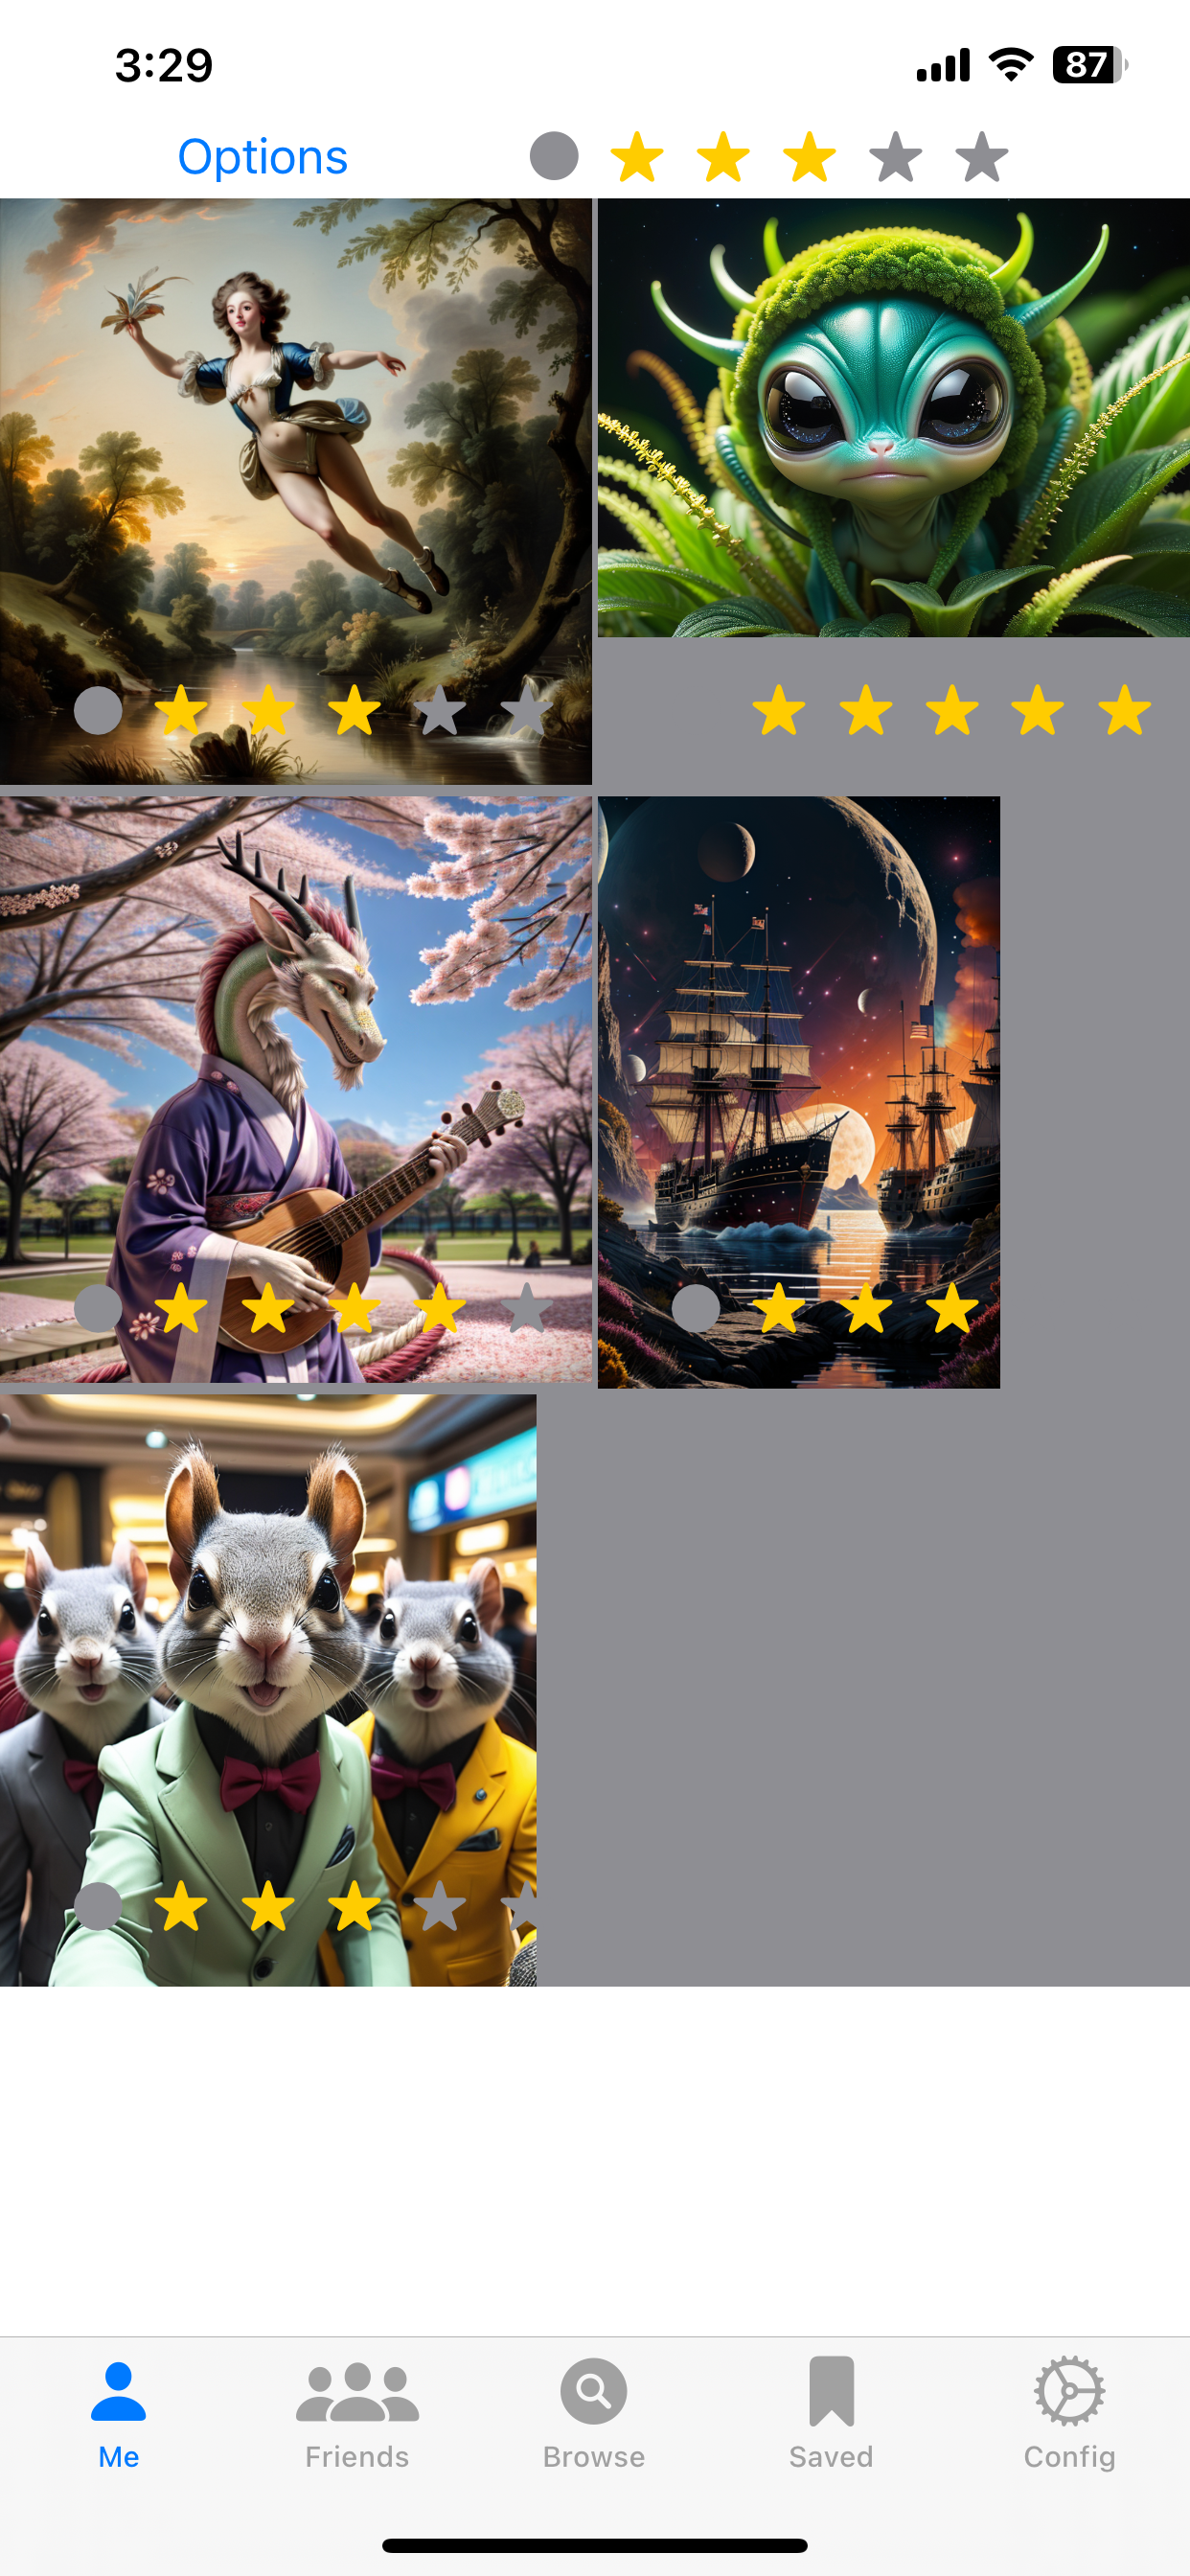
Ranking is a way to assign 1 to 5 stars to an image, this helps you find your best images quickly, and get rid of the duds. Ranking is very useful, so there are a variety of way to set it, you can use Ranking View, or the Select View with the Star Menu at the top, or use the Image Detail View to set individual images. Use whatever you like, or use a combination.
In the Options Menu, Set Rankings brings up the Ranking View. From here you can assign a rank, the circle on the left means ‘No Rank’.
Show By Ranking is how you find your best images, click on 5 to see only 5 star images. click on 4 to see 4 and 5 star images, 3 will show 3,4 and 5. You can change ranking from this view. So if that 3 star image is actually a 4 you can change it here.
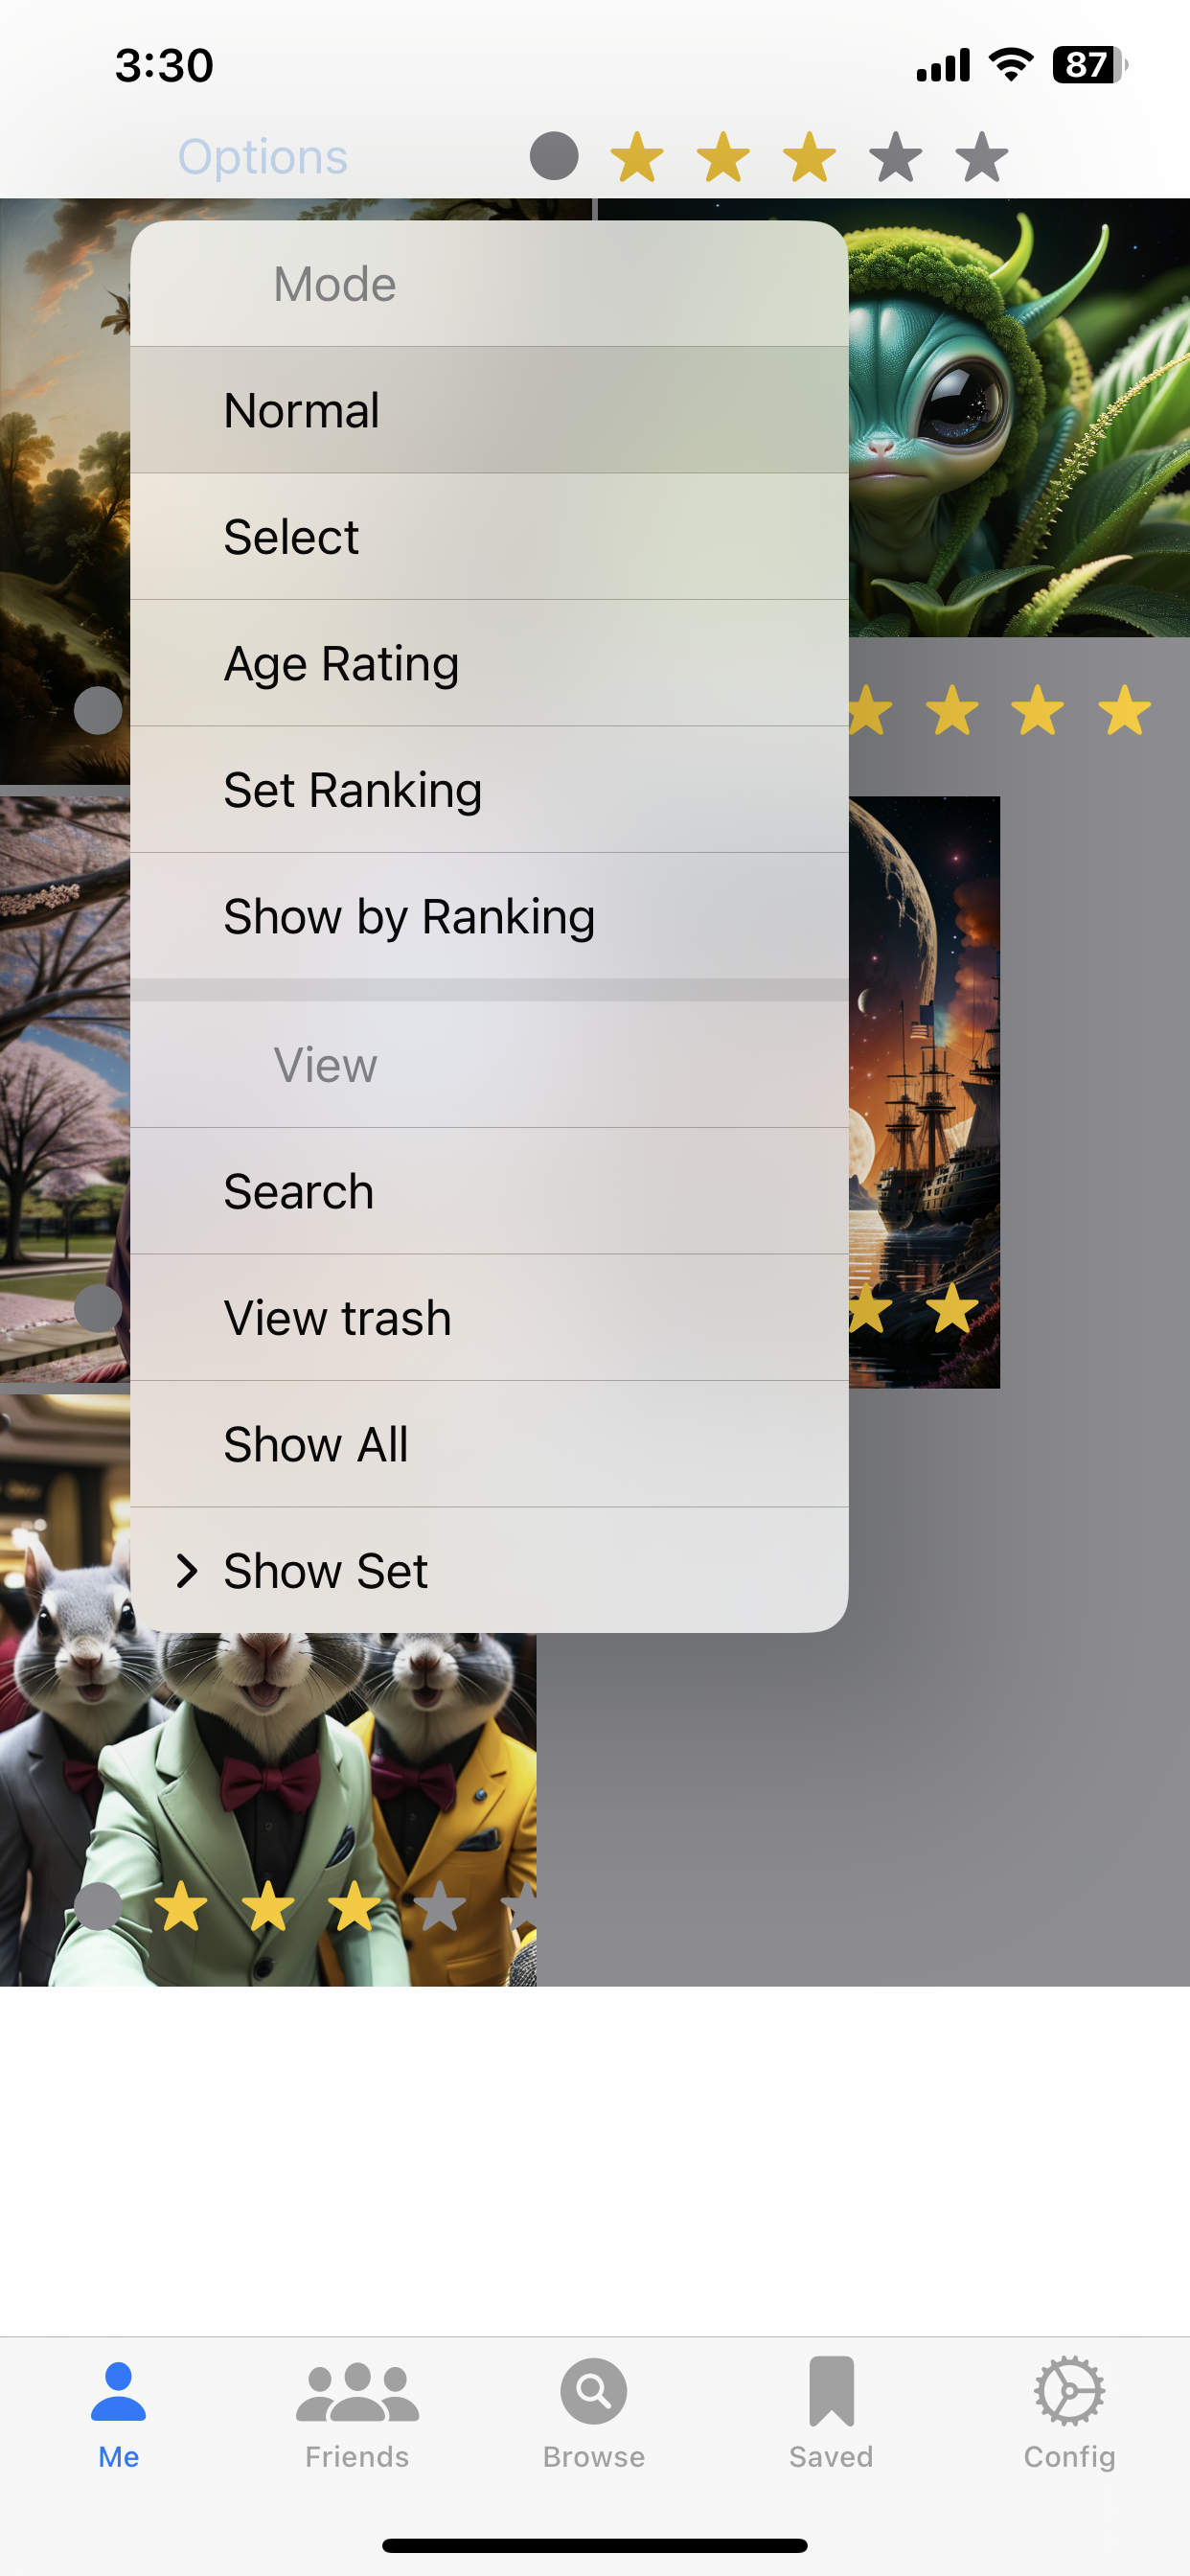

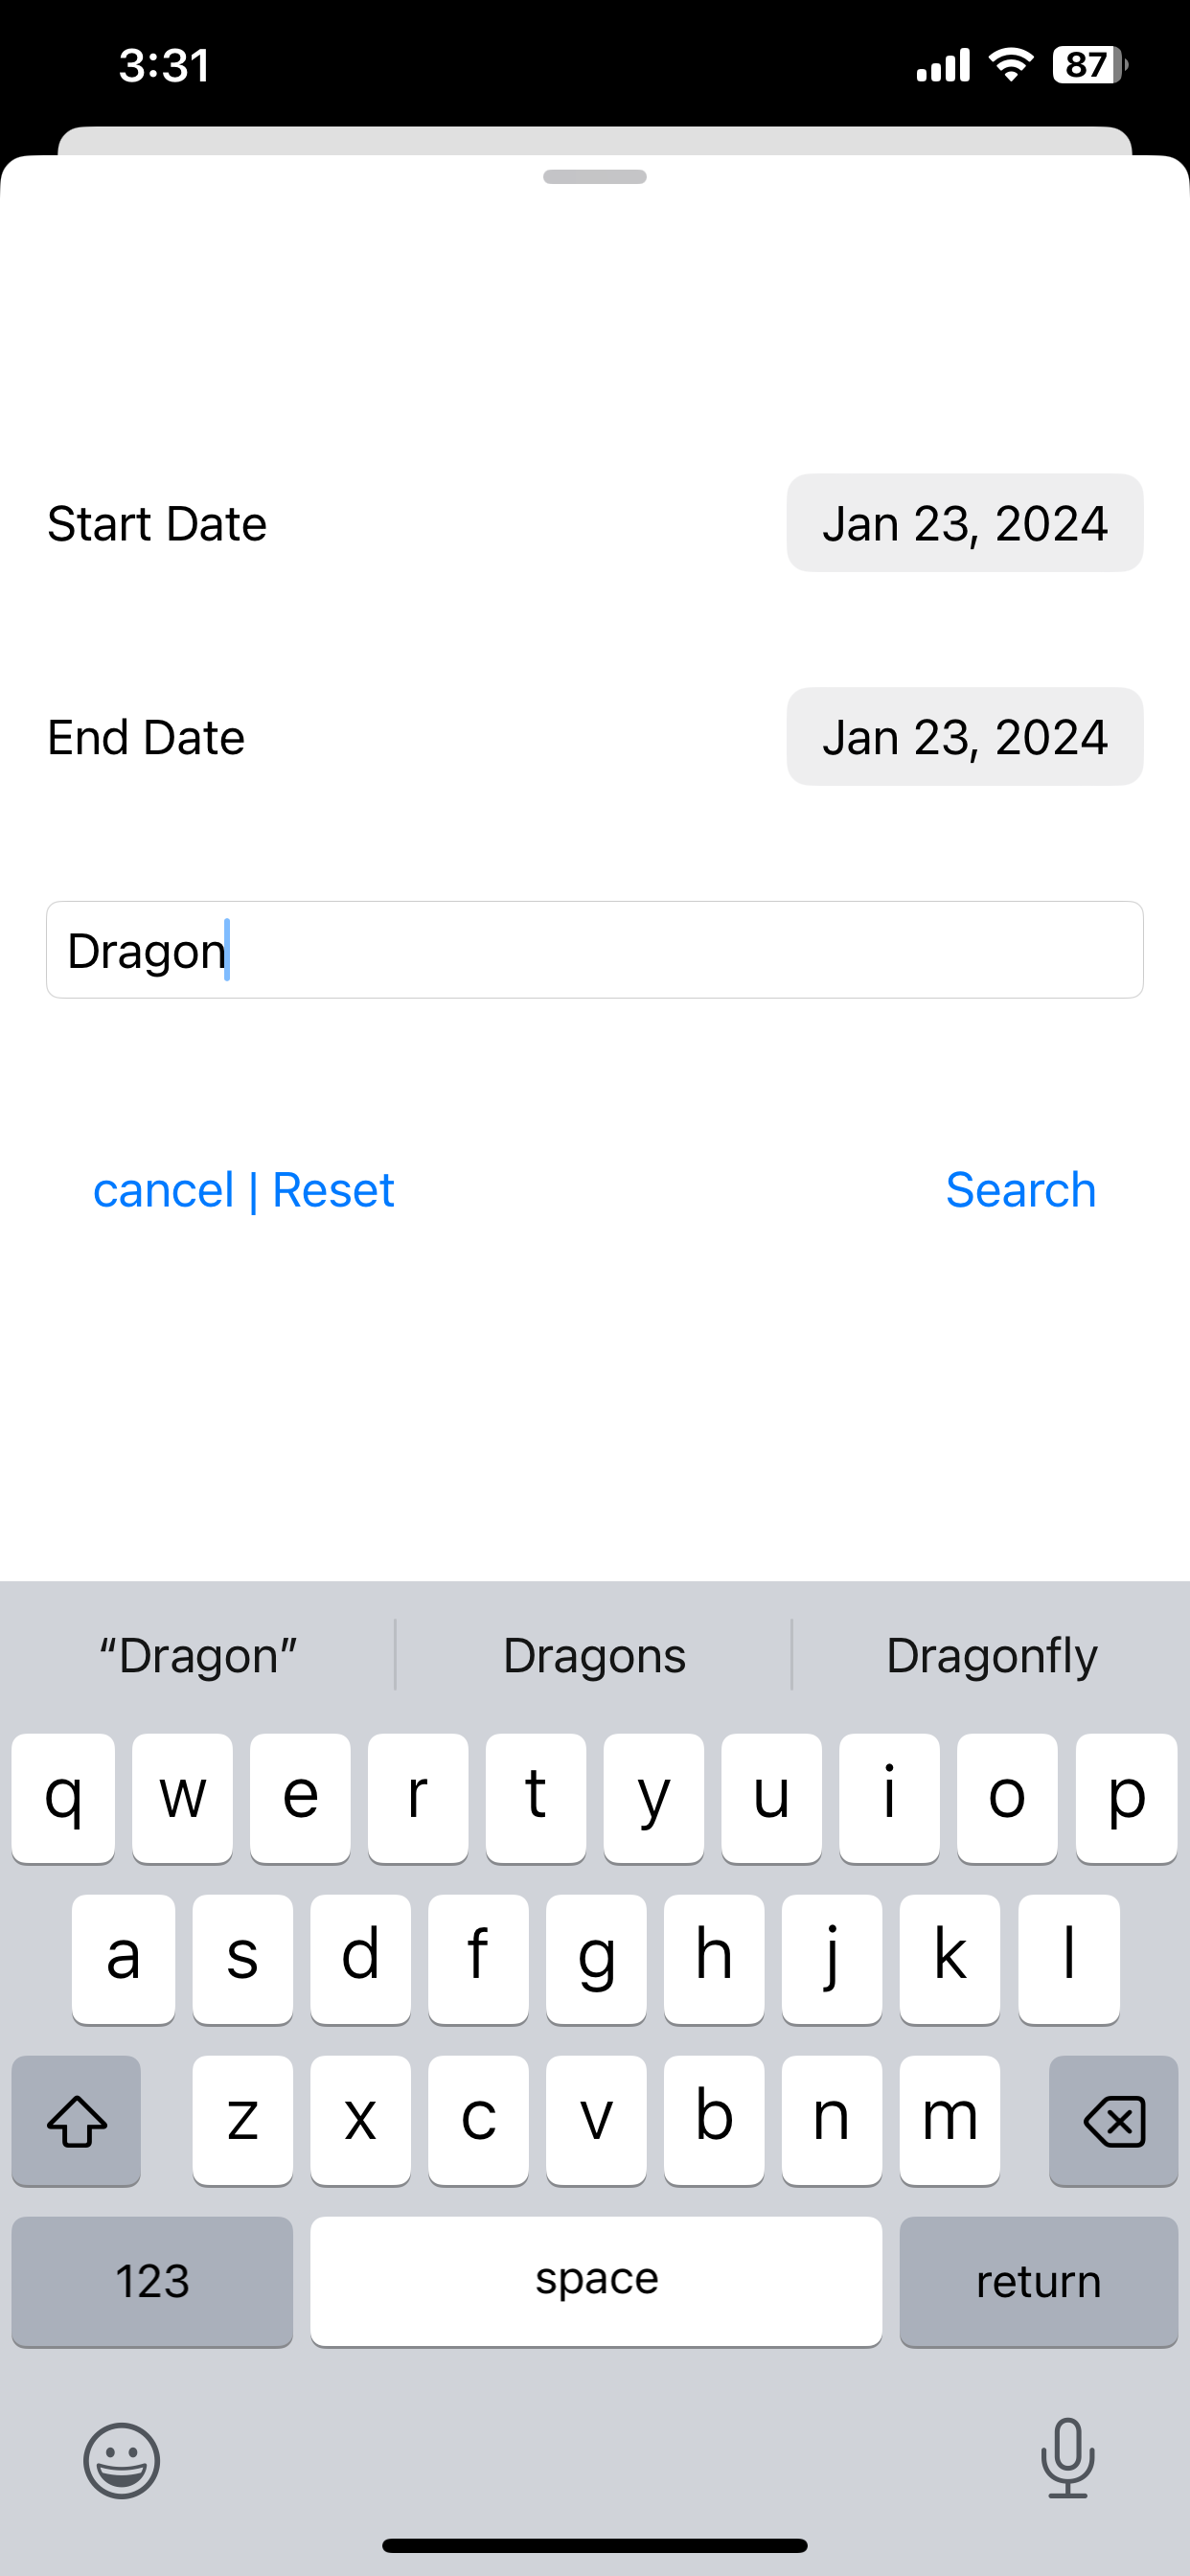

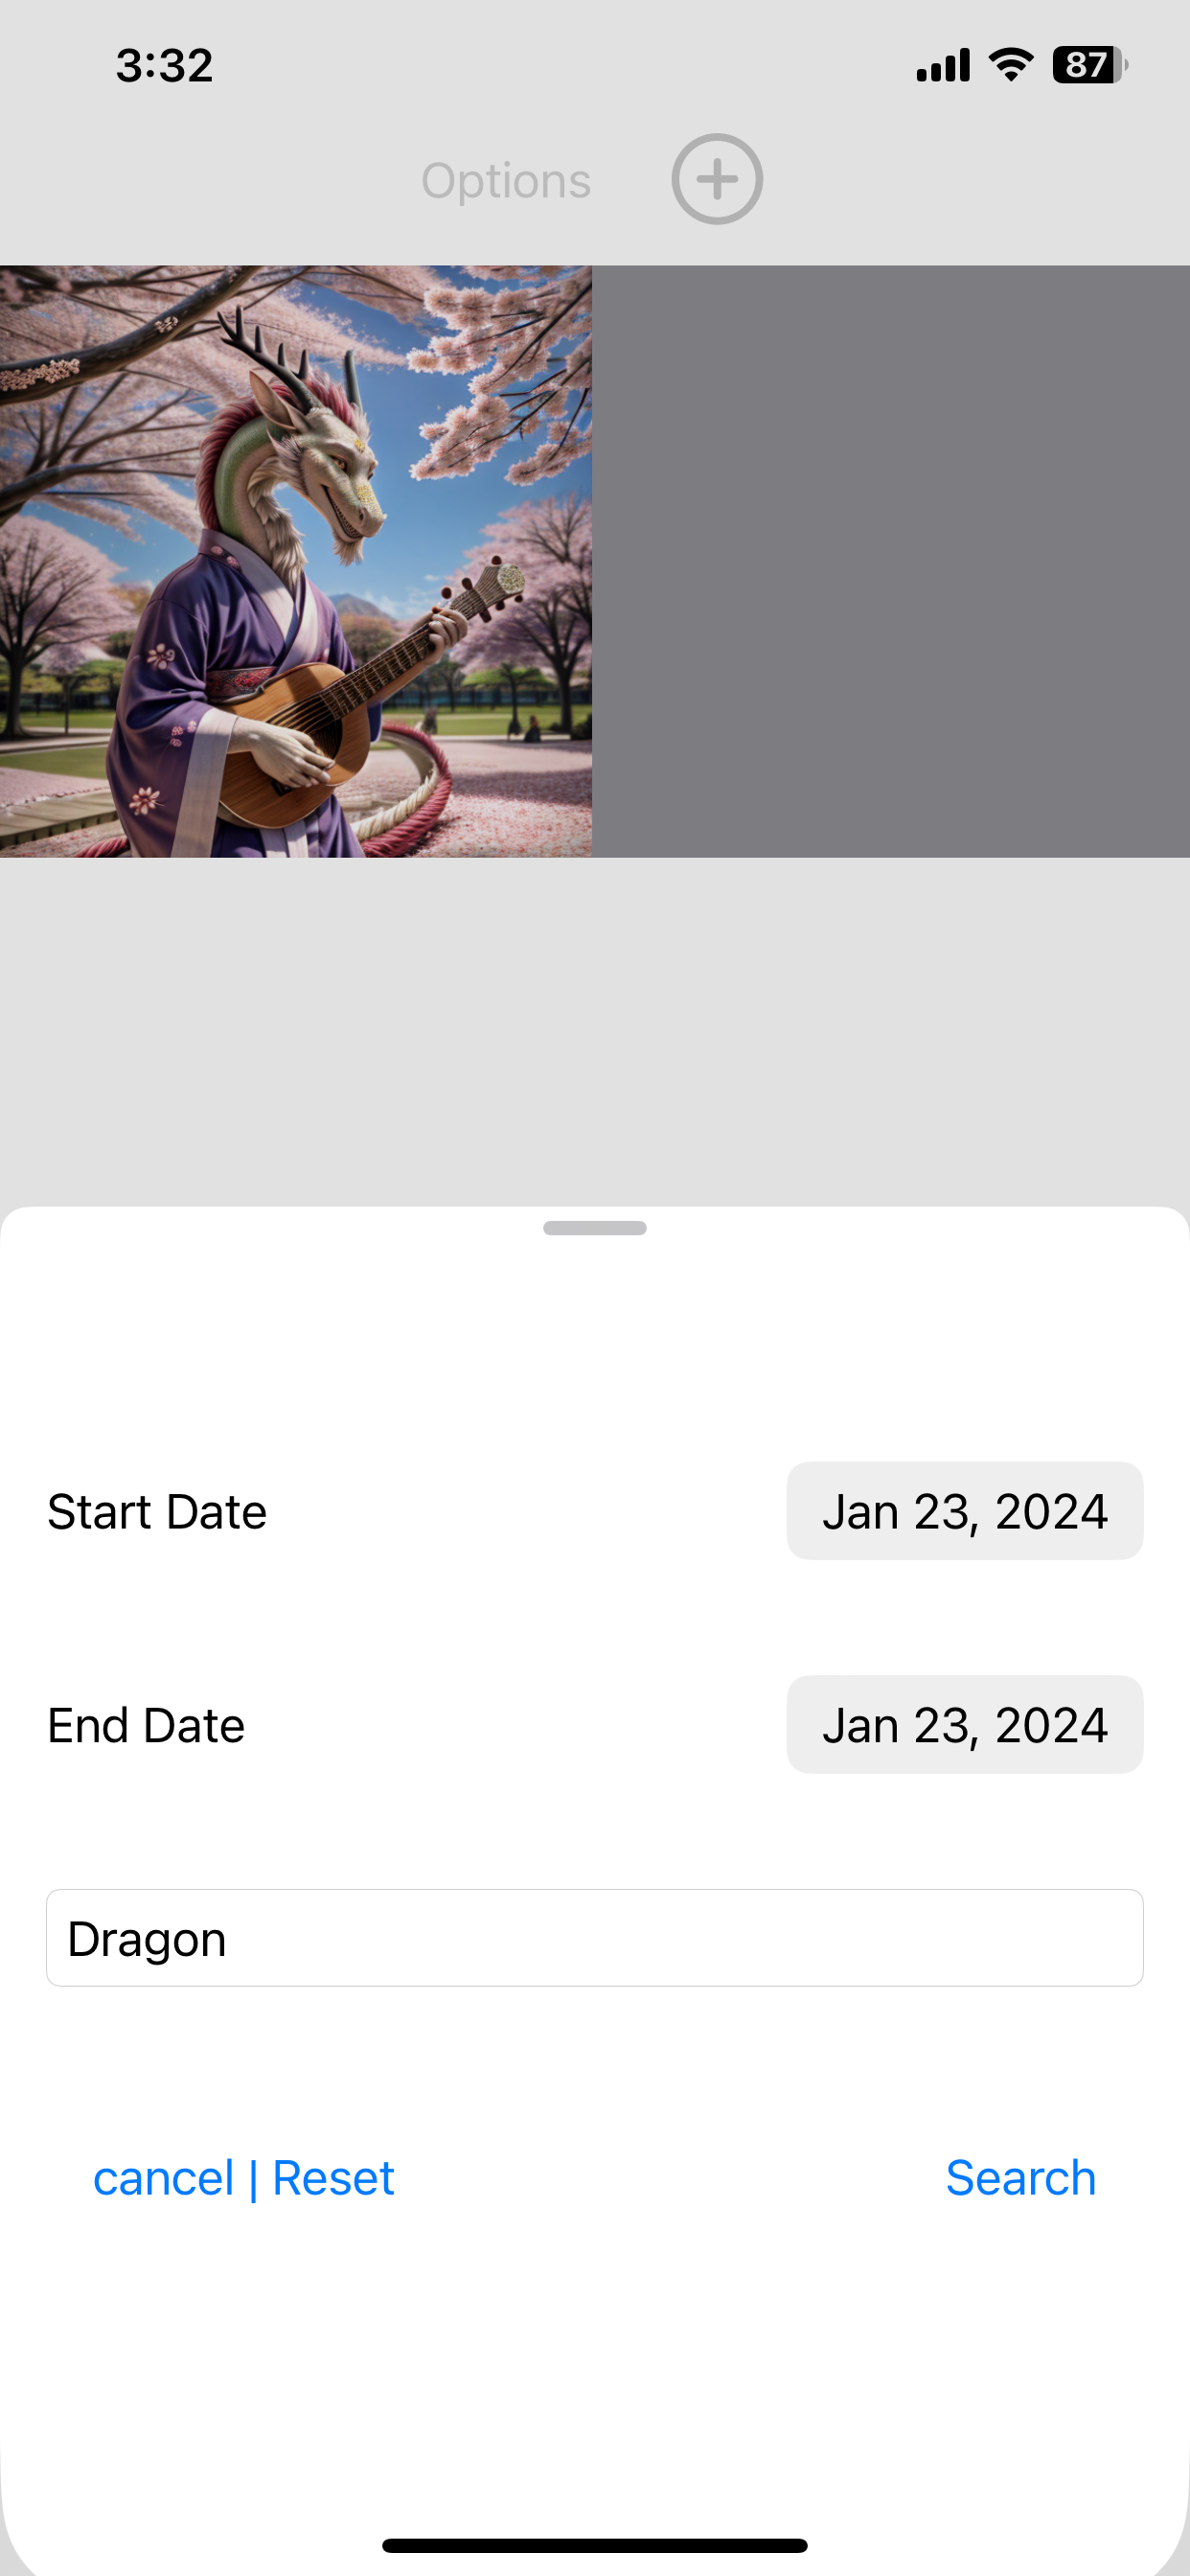
To Search for images from your content, use the Search option. But first go back to Normal mode, since we changed to Set Ranking mode above. The search for Dragon, optionally provide a date range ( or provide a date range and no search terms ). You can see we found one image where ‘dragon’ was in the prompt. Go back to search and click cancel | reset to go back to viewing all your images.
Automatic1111 and Gadzoinks
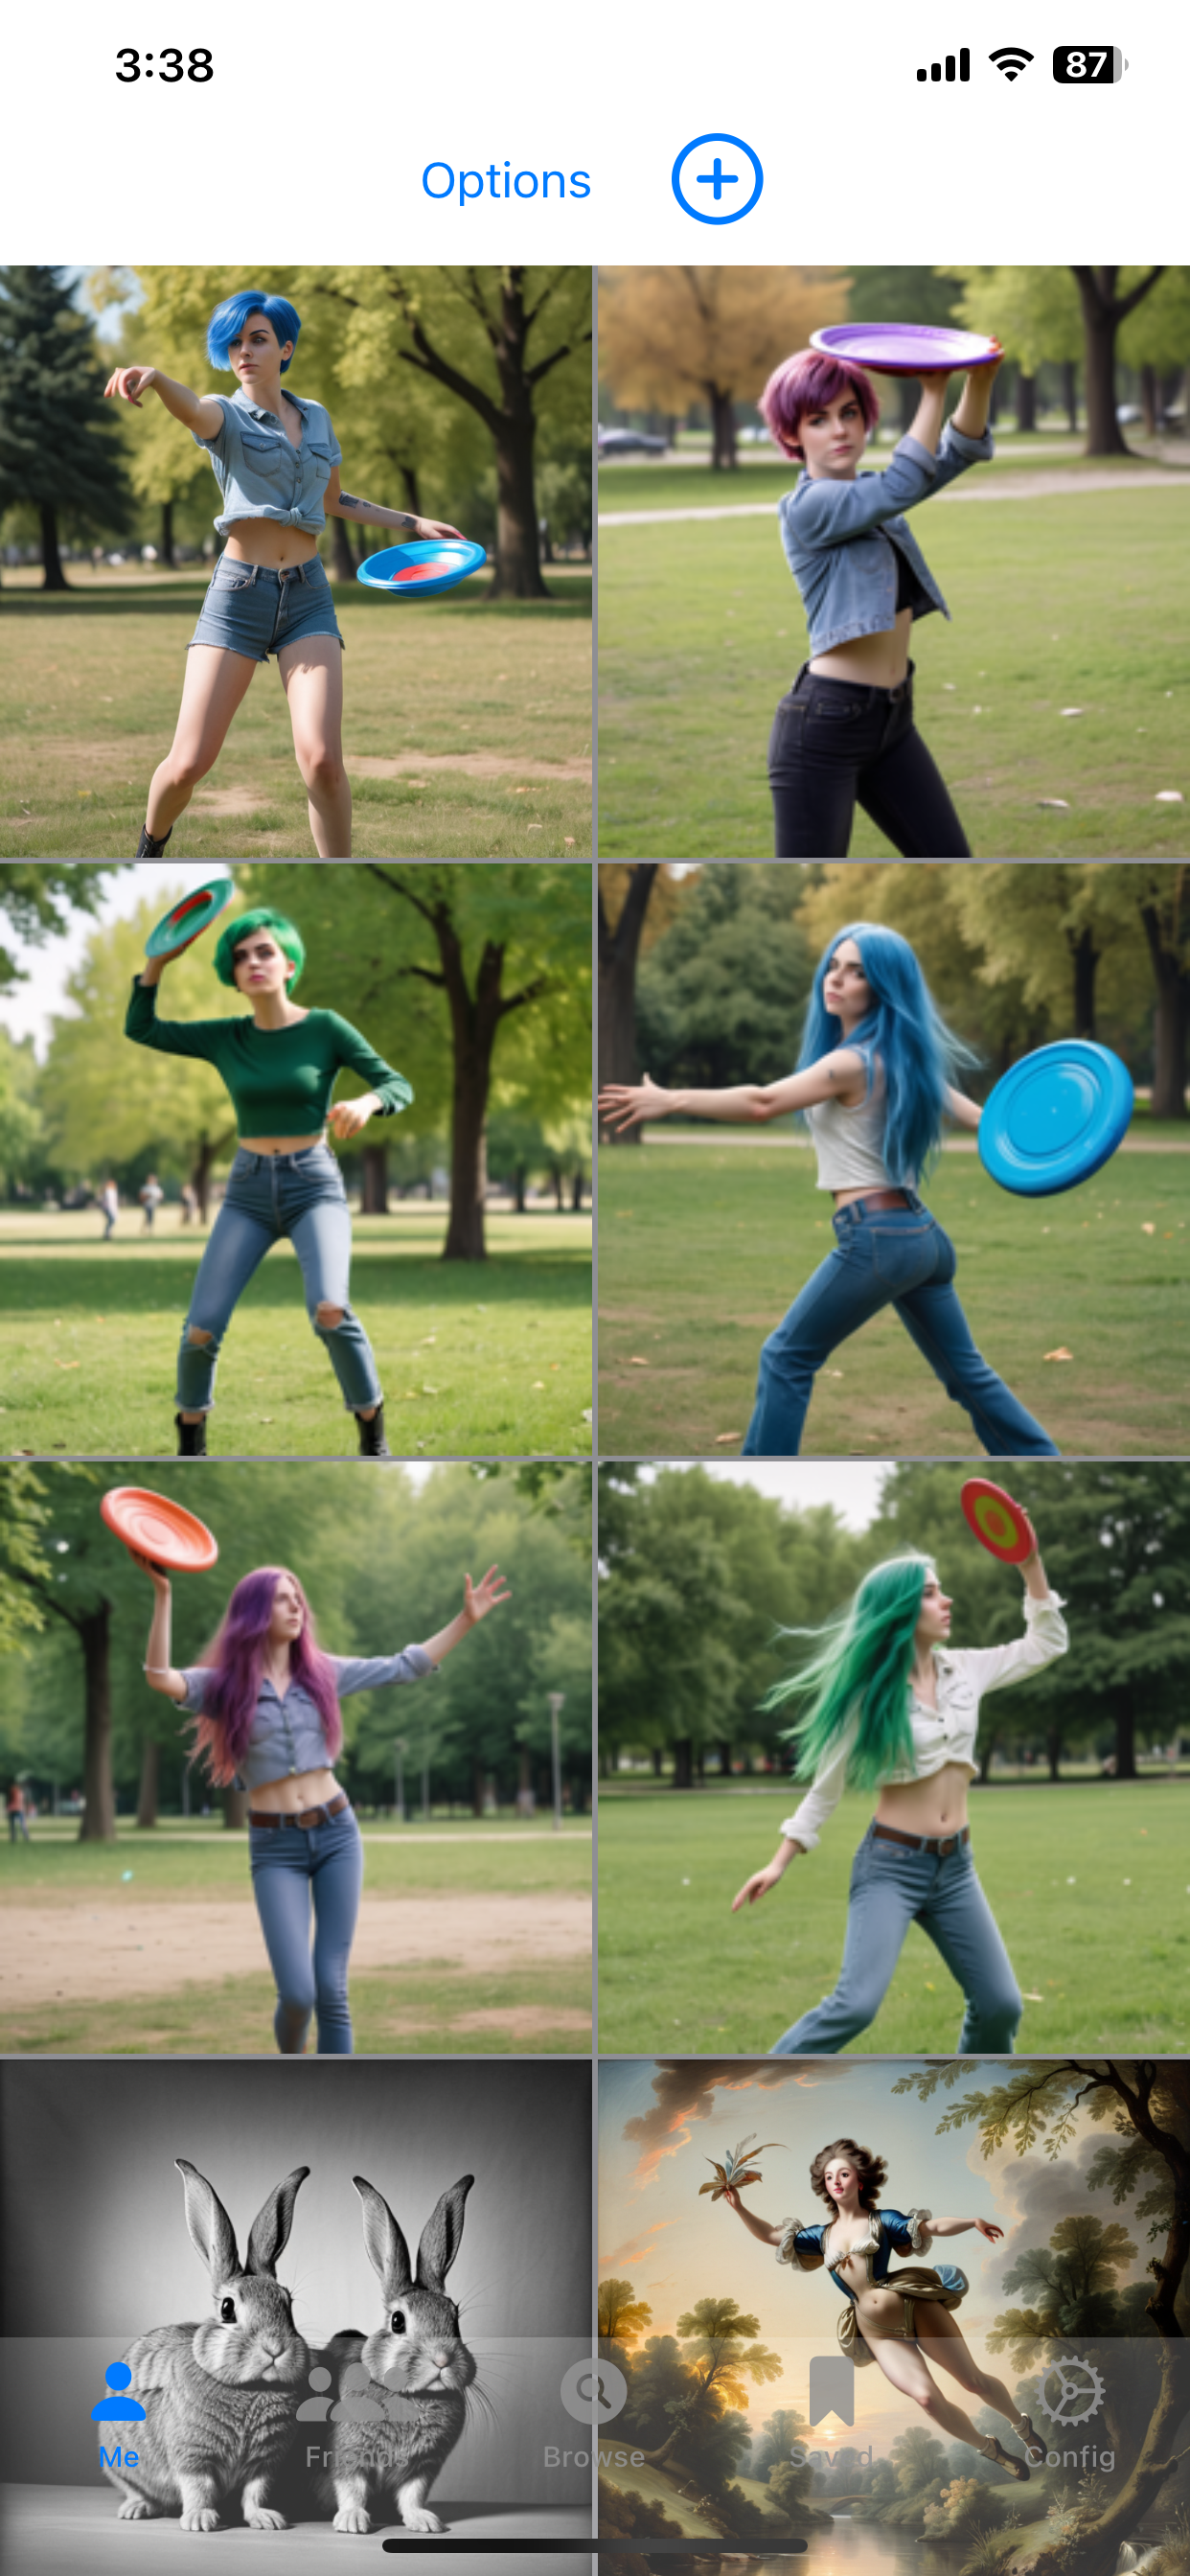

Lets use automatic1111 to create some images of a girl throwing a frisbee, we use the prompt “Raw photo 1girl, a 20 year old woman with {long | short} { green | violet | blue } hair in a park throwing a frisbee (cowboy full body shot) realistic high detail 4k “. The { long | short } is a part of the dynamic prompts extension and will make automatic1111 generate multiple images , with the prompt changing each time. In this case we will create 6 images since we have {long | short} and { green | violet | blue } , which is 2 x 3 variations. To enable all of this make sure you have the Dynamic Prompts extension installed, and you check “Dynamic Prompts enabled” and “Combination generation”. Make sure you have Gadzoinks configured with Auto upload checked, your account Handle and you Auth Key entered.
Now Generate the images. Wait a few minutes for it to finish , depending on how fast your rendering is. You can refresh Gadzoinks during the render and see each image after it is uploaded. You don’t have to wait for all 6 to finish.
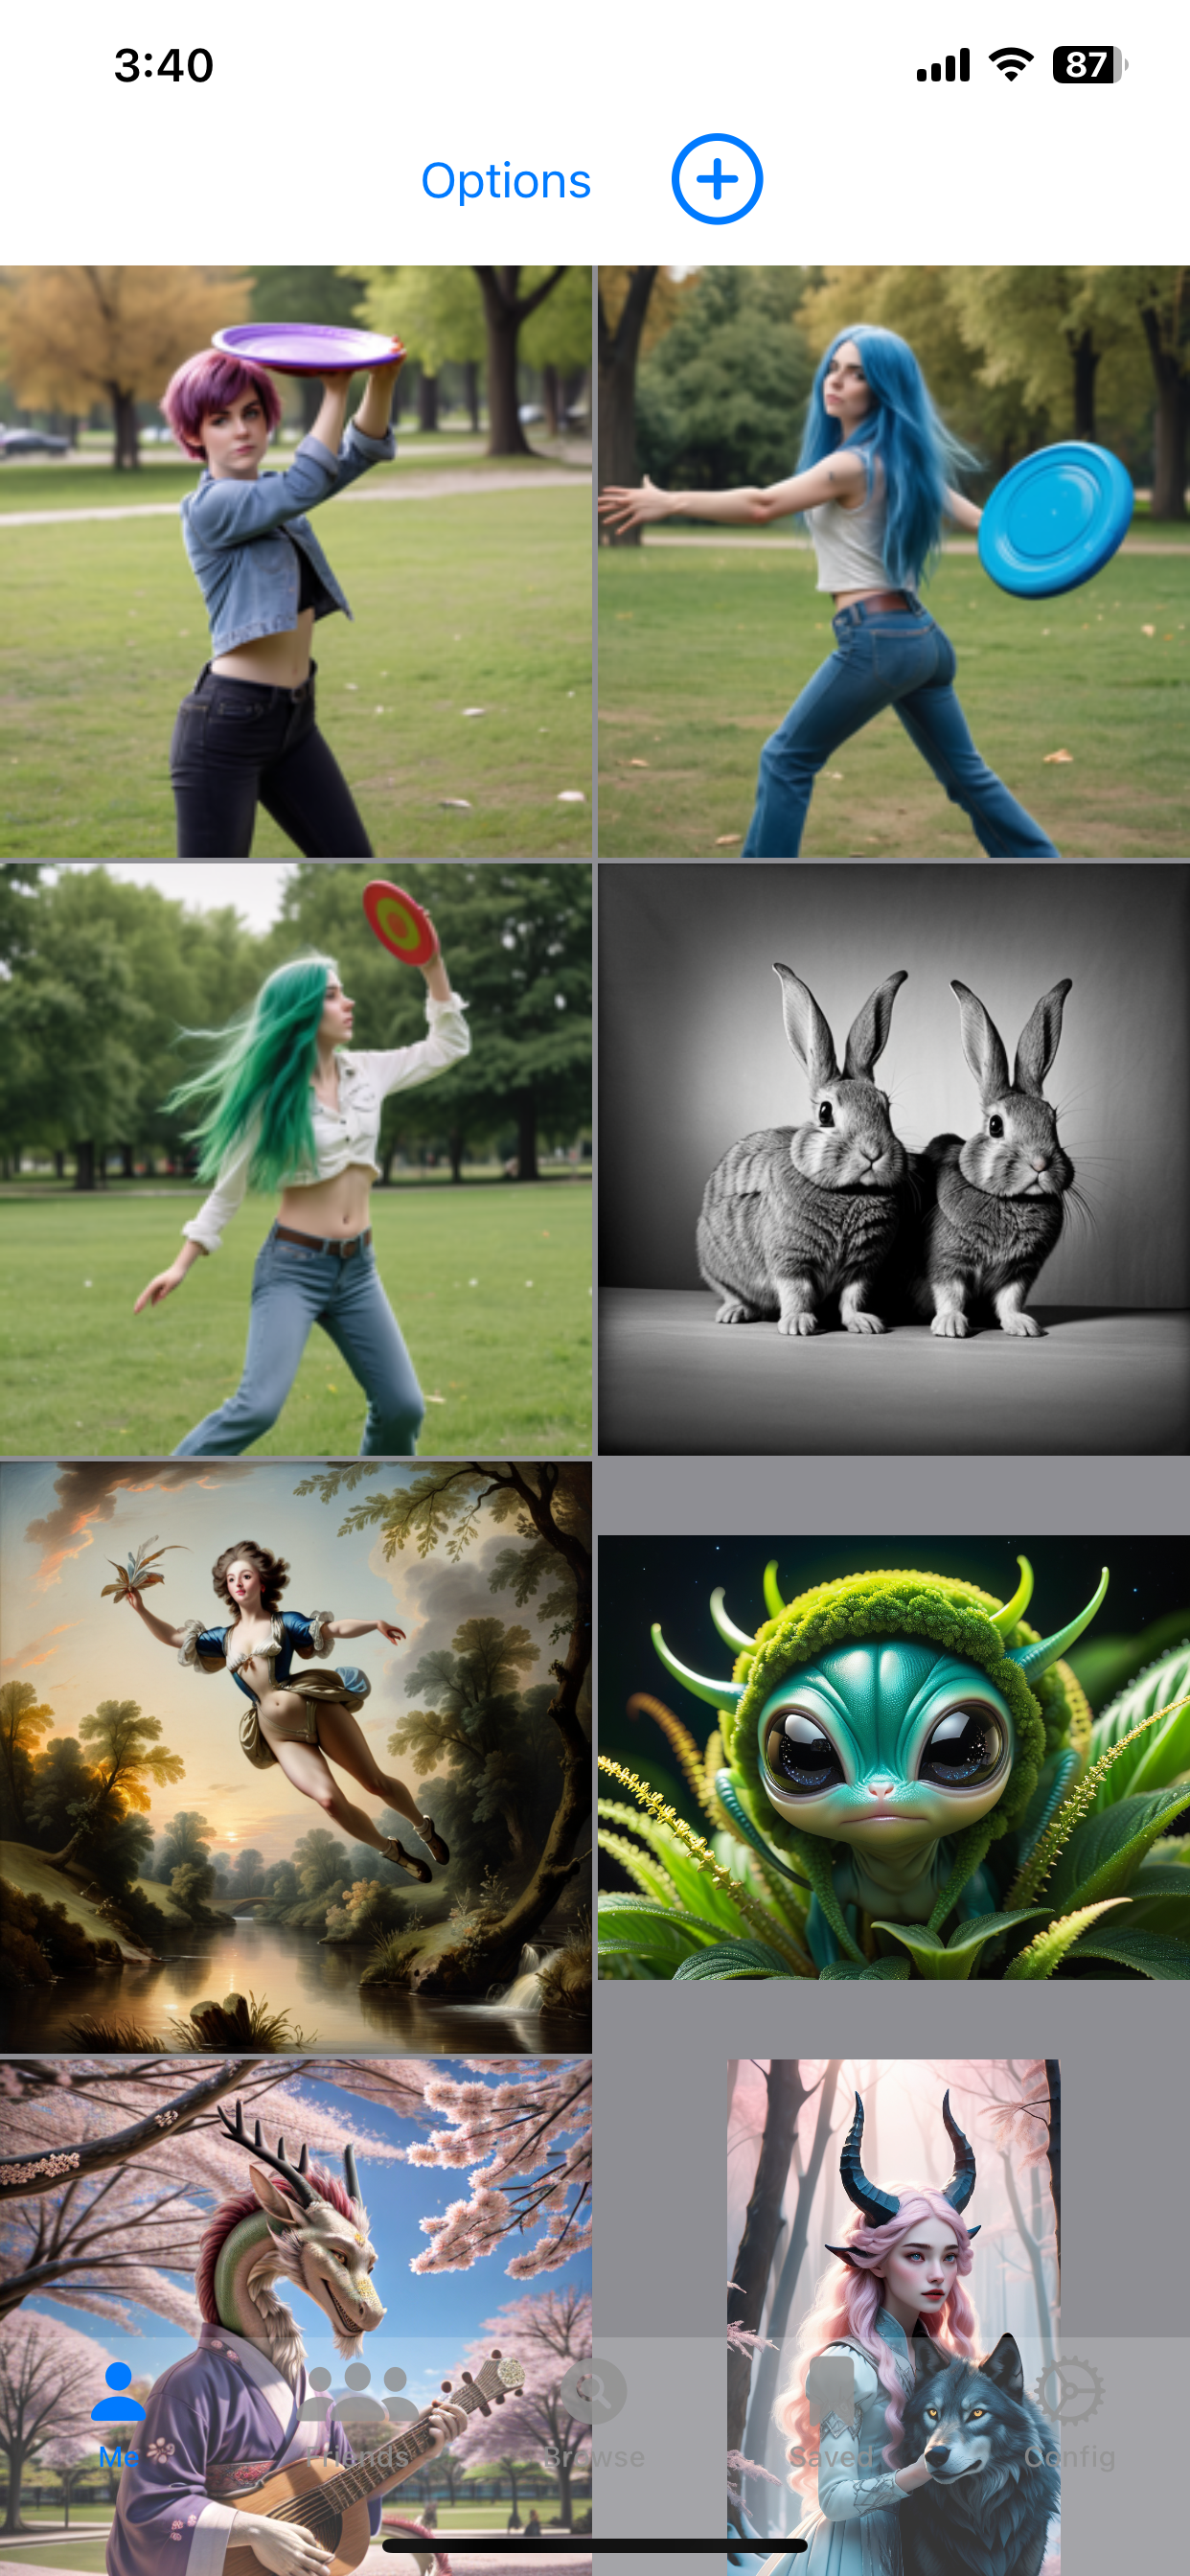
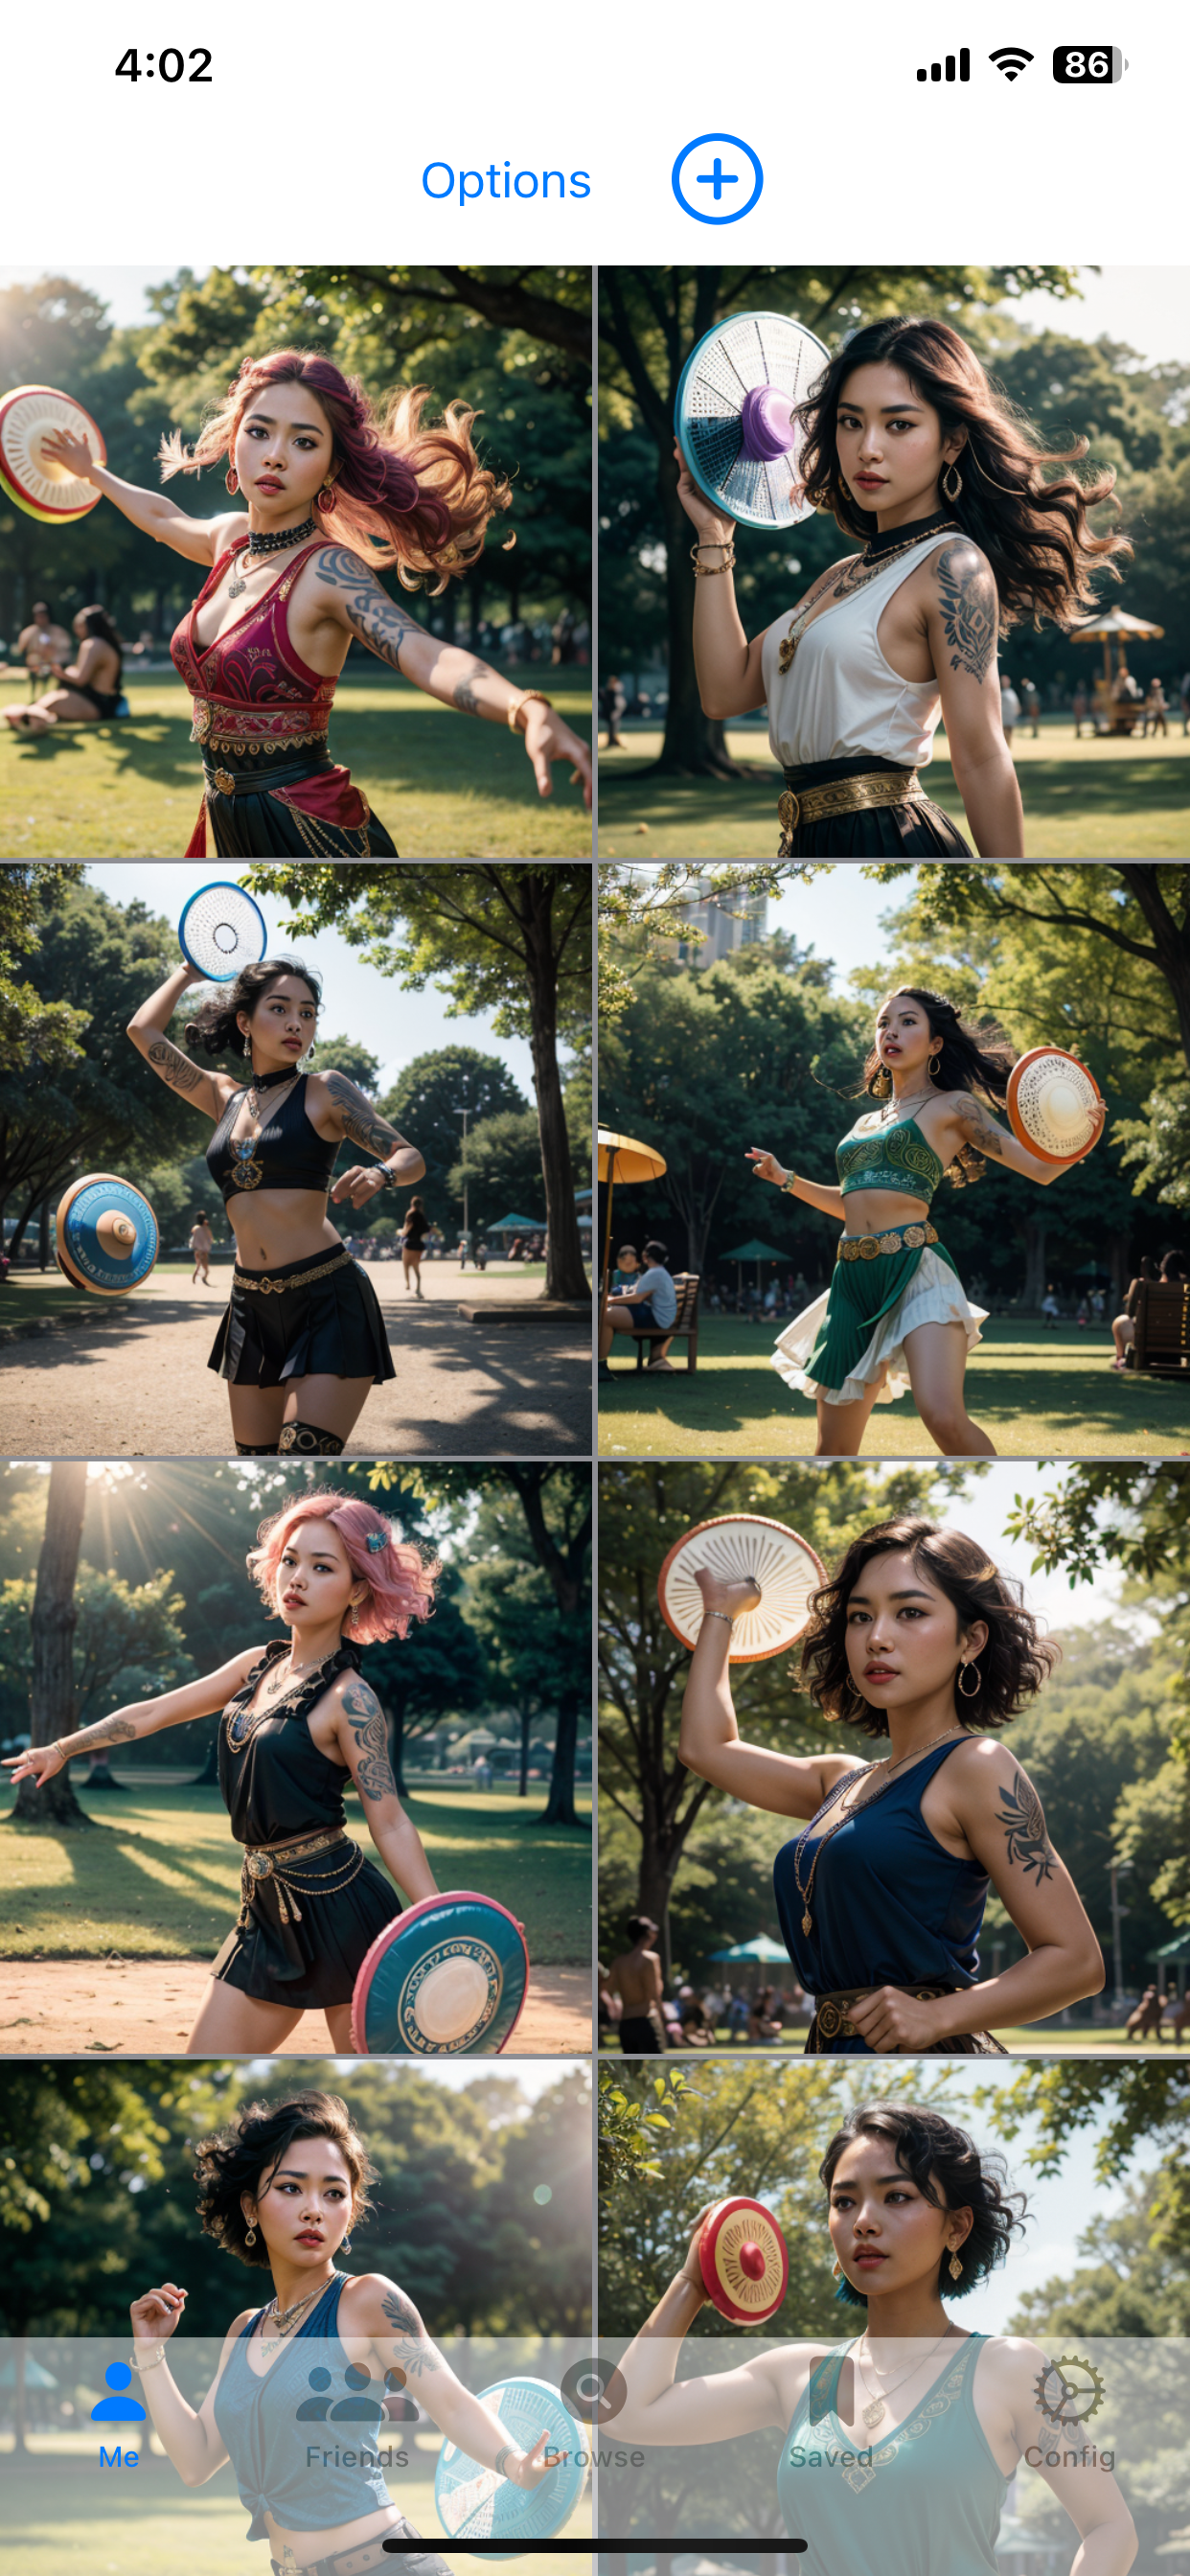
Now let’s look at the results and they are pretty bad. Click on the first image to get into Image Detail view, take a look, expand the face…and then delete it.Next one is ok so swipe left to see the next image, and decide whether to to delete it or not. When done I had deleted 3 and kept 3. But I didn’t like the 3 I kept that much.
Lets use Gadzoinks to help us make better images, we can go into browse mode, find an image we like and use it as a template.
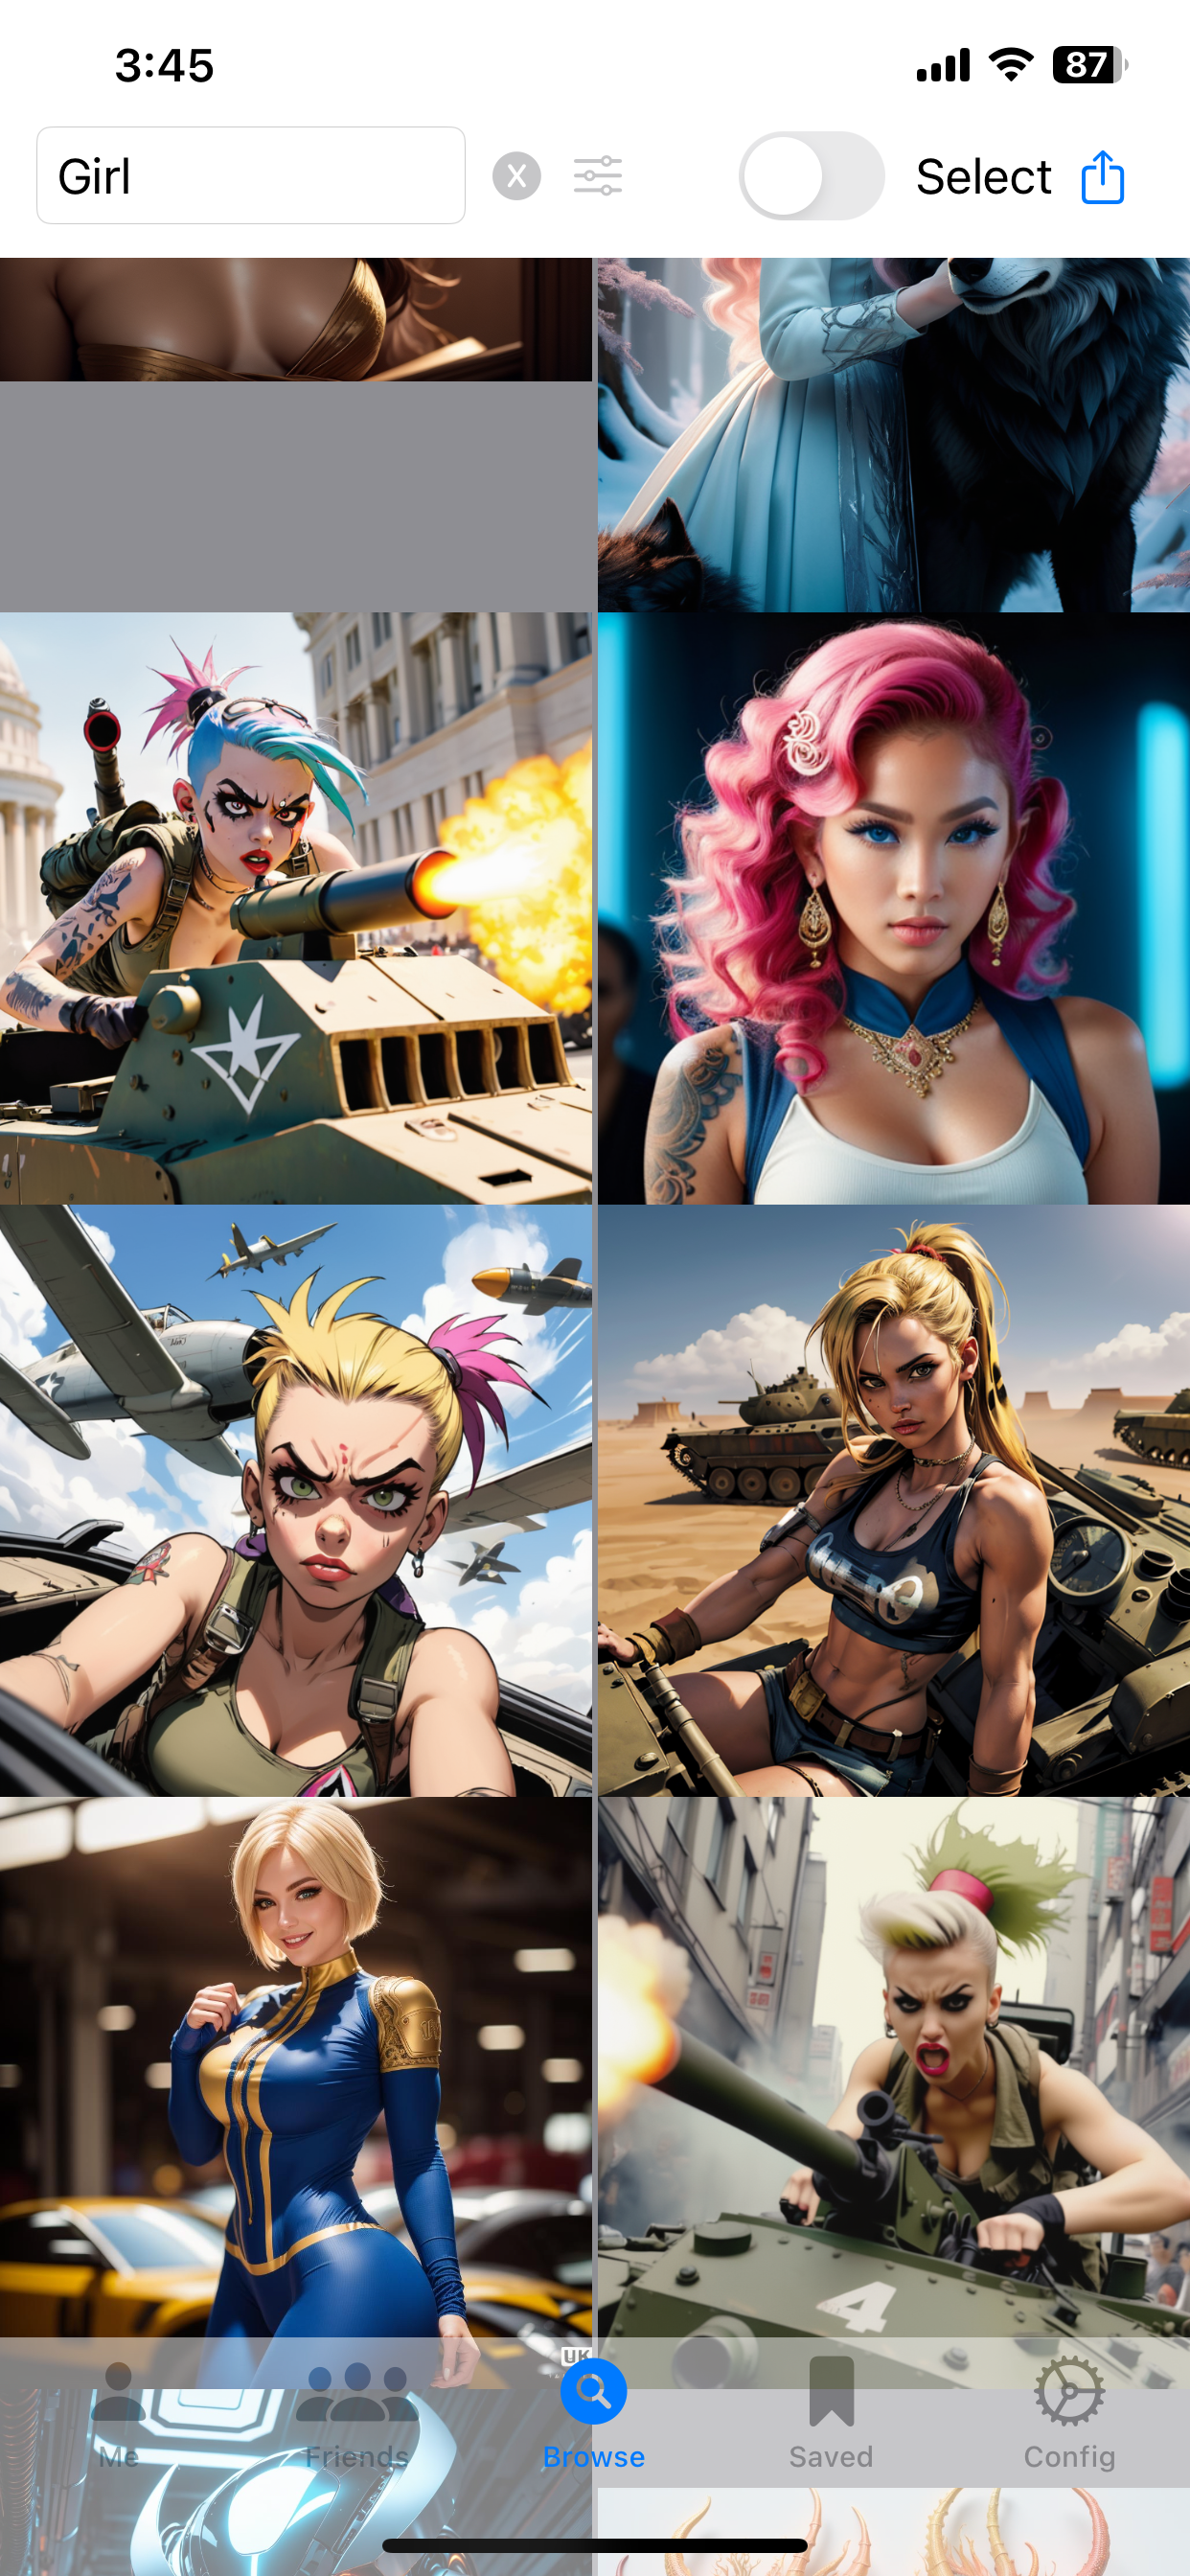
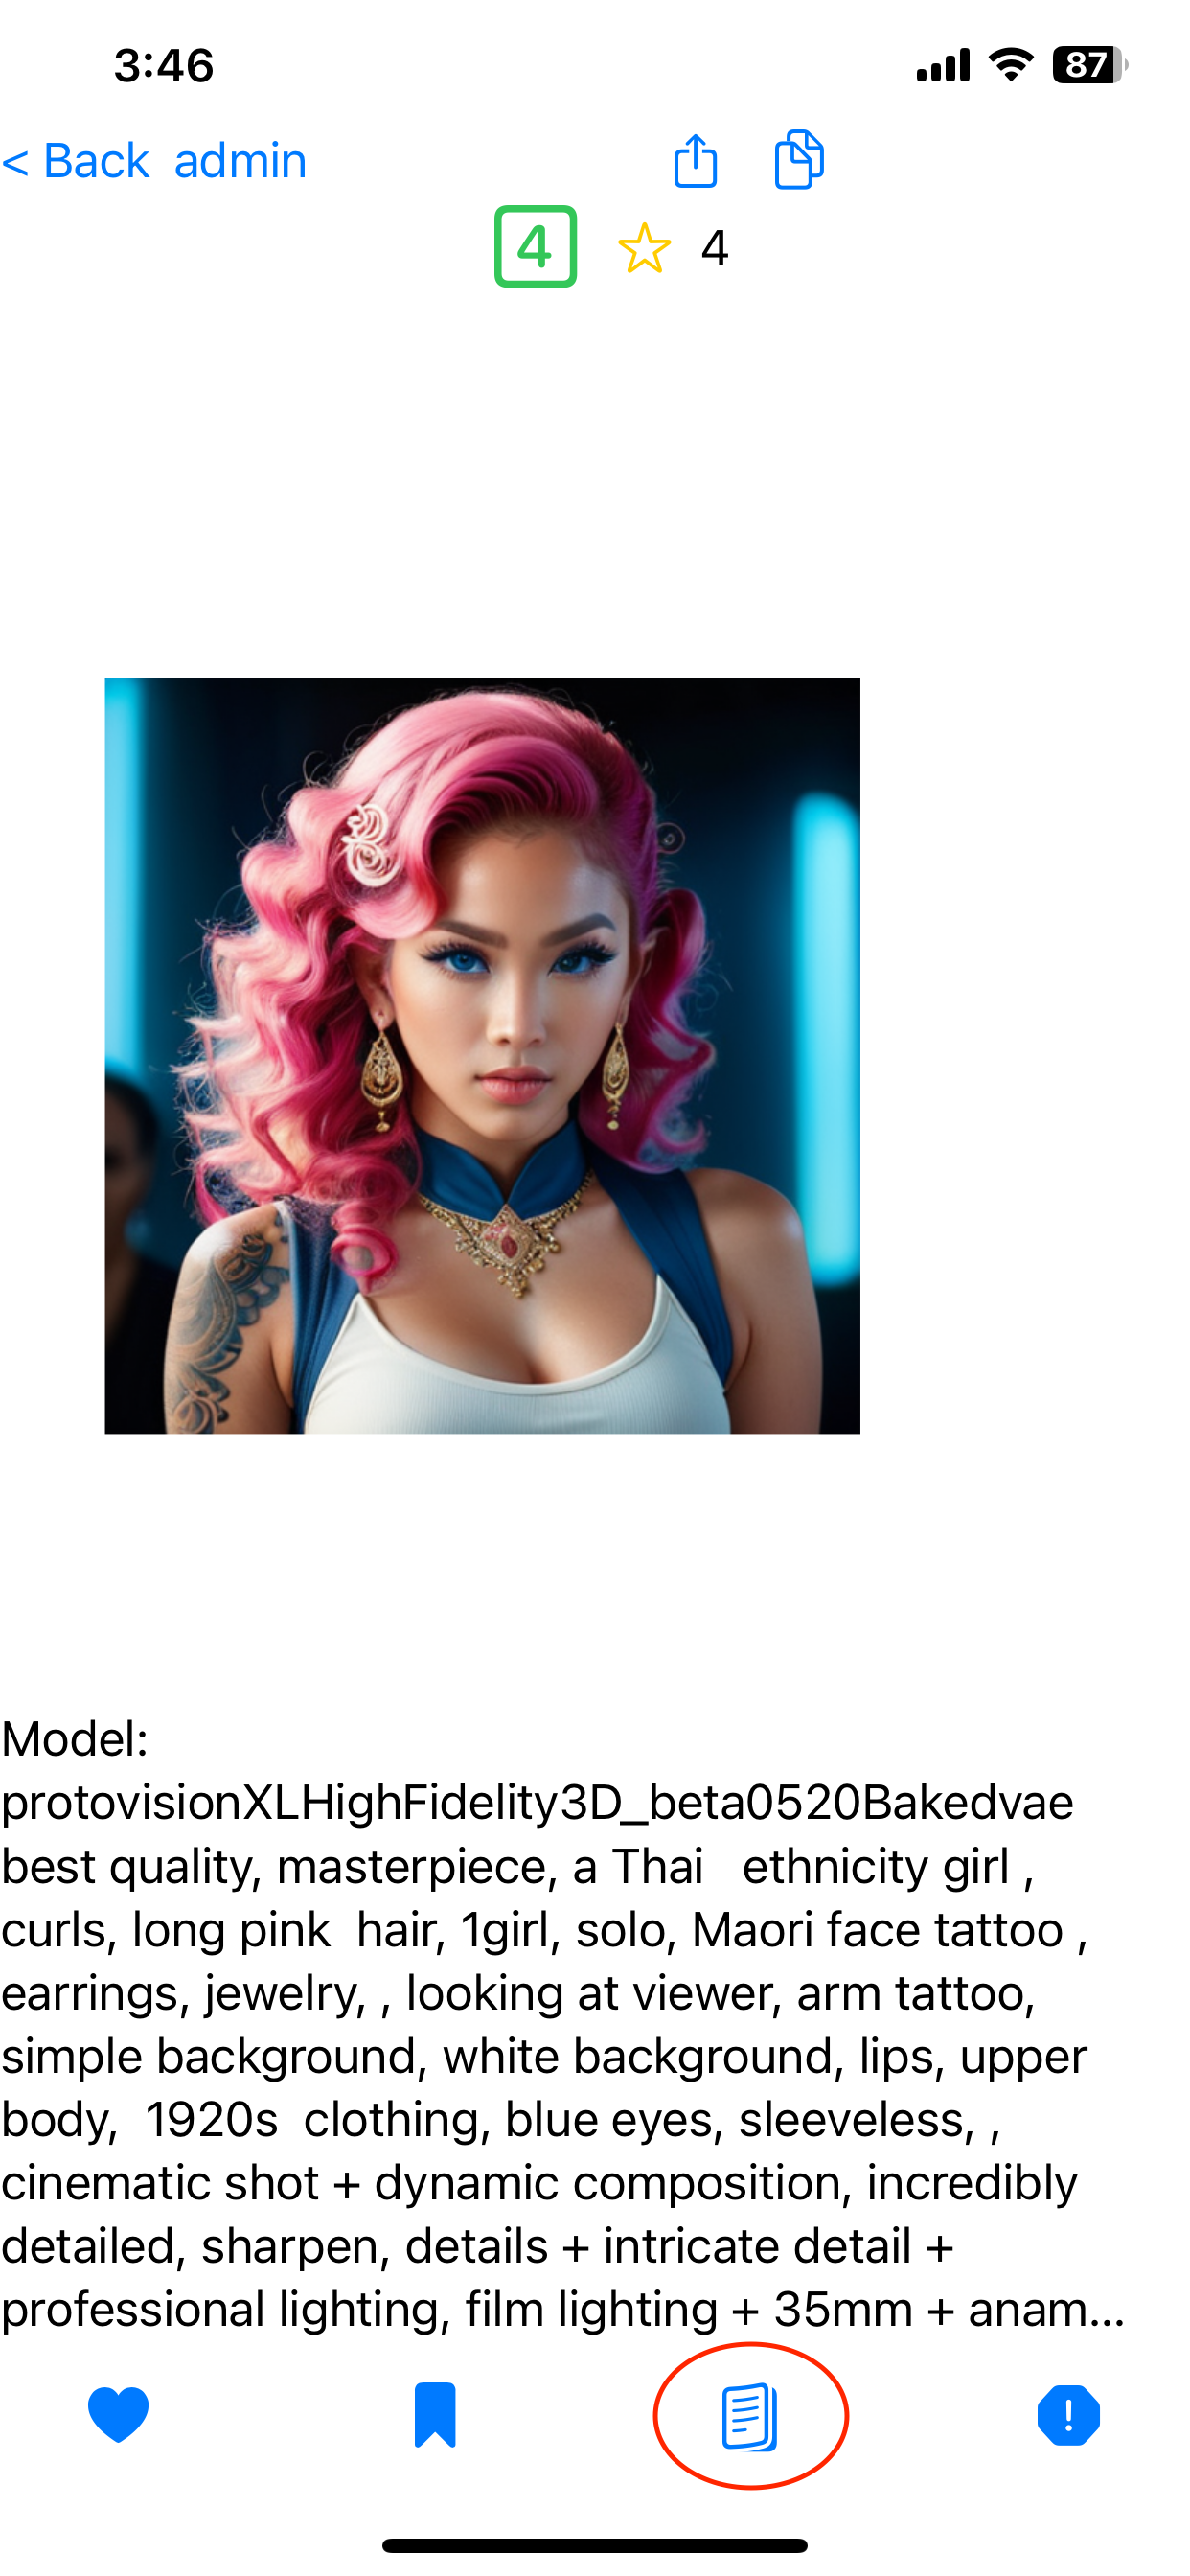
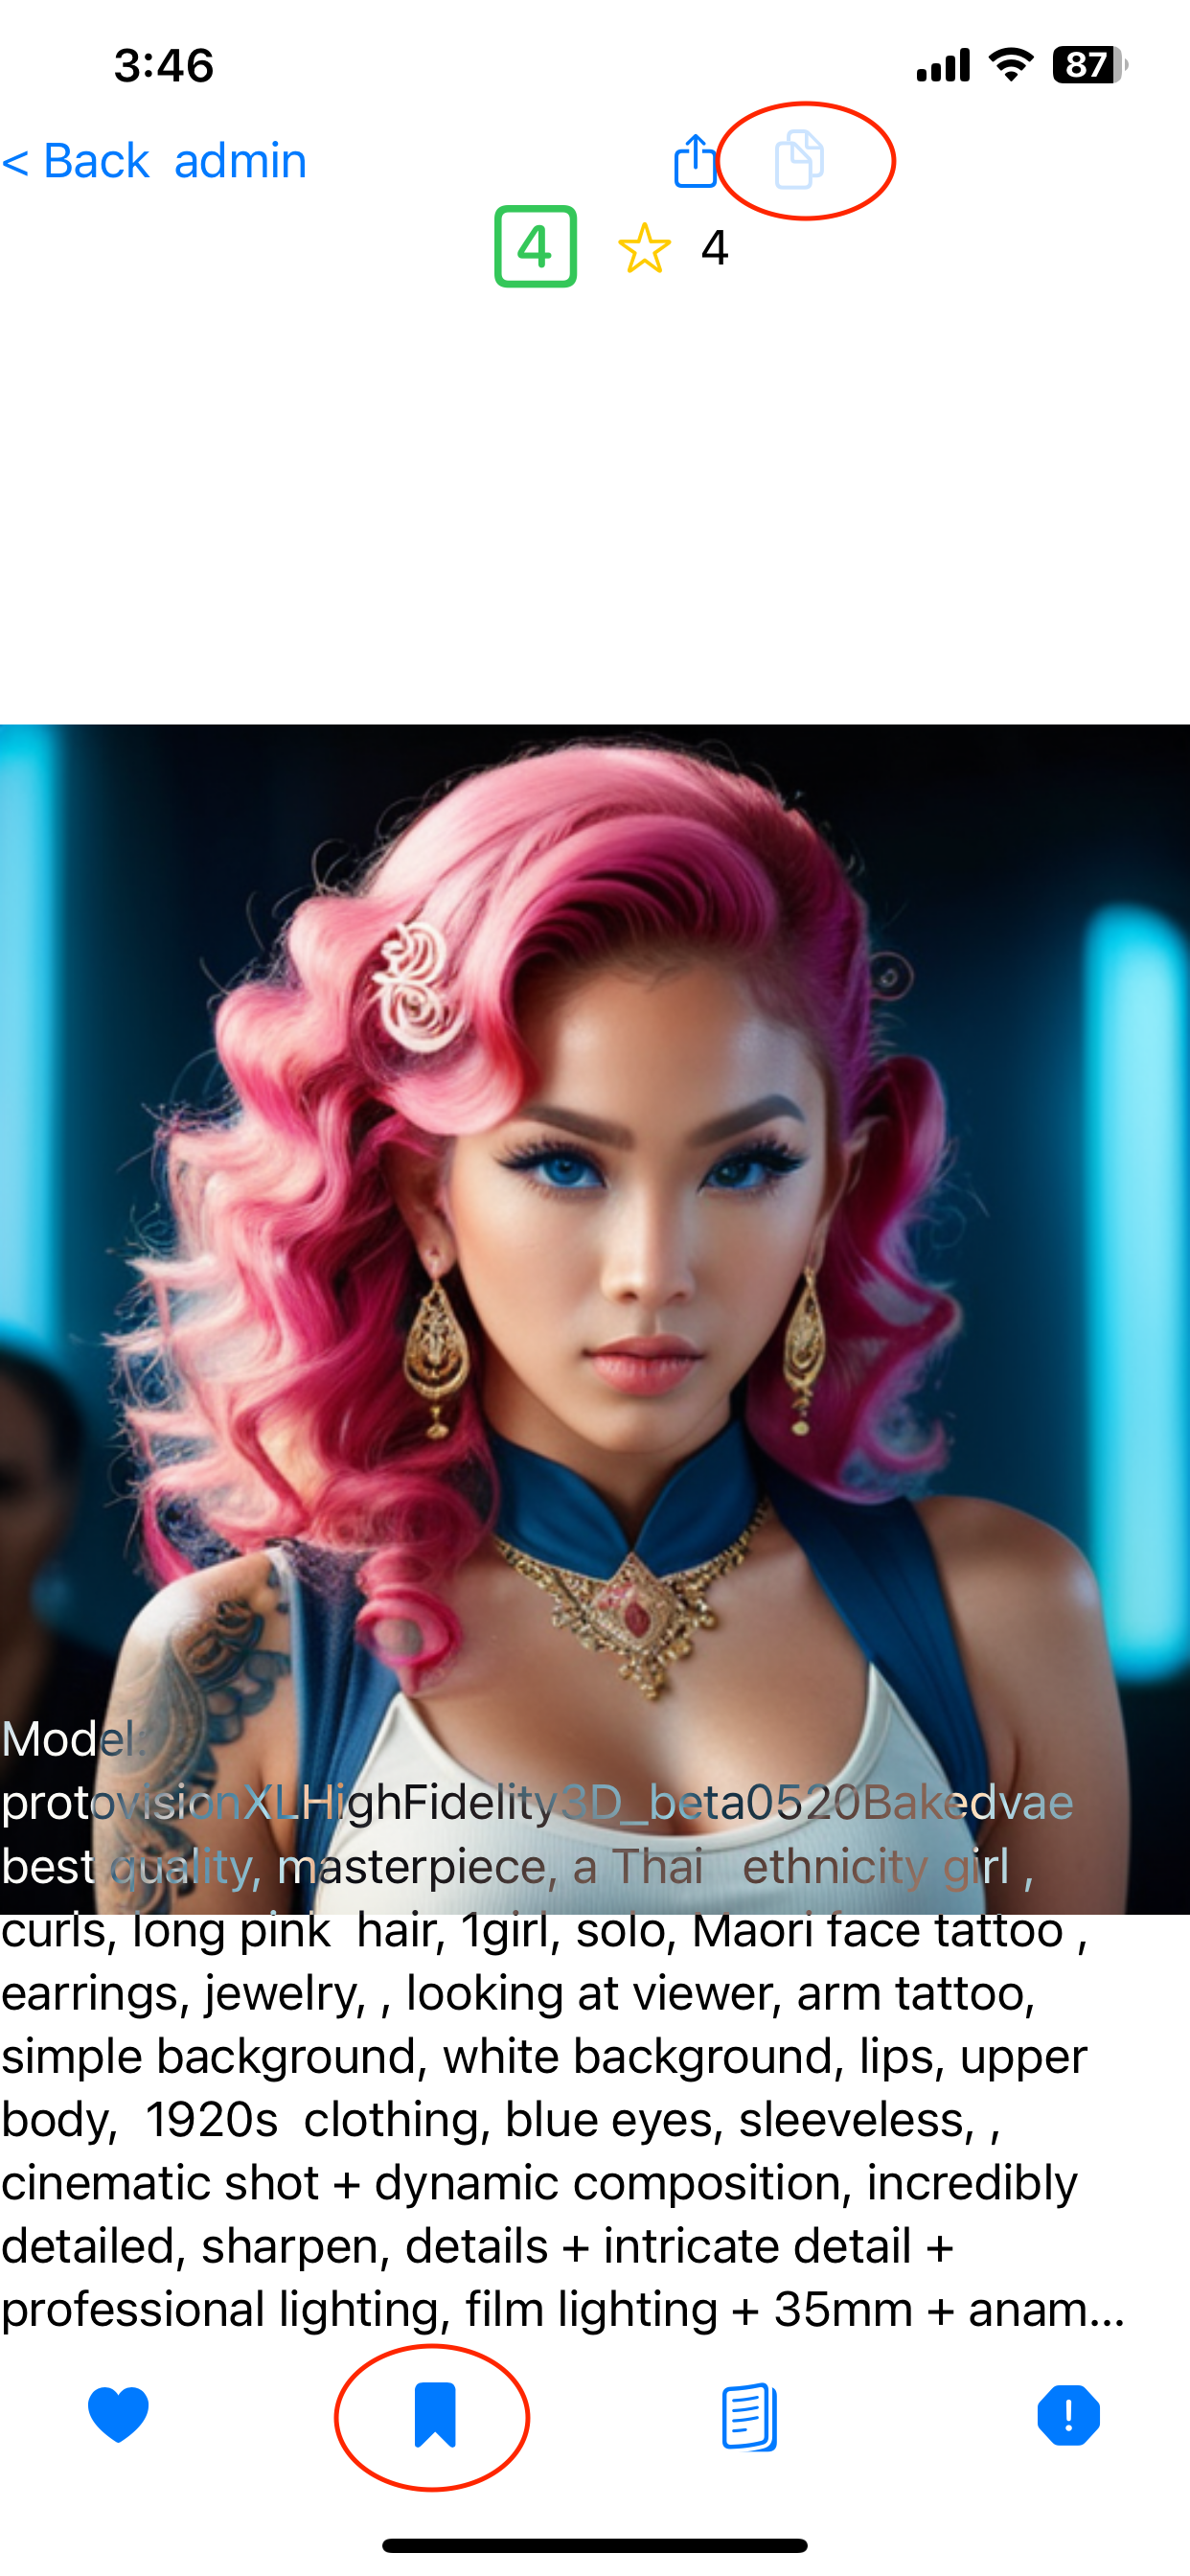
Switch to Browser View and search for “Girl”, scroll down until you find something you like. In this case I am going to use the Pink haired girl. Click on the Image to get into Image Detail View, then click on the details button to bring up the model name and prompt. You may need to pinch and resize the image to read everything. Take note of the model “ProtovisionXL”. Next click on the 🔗 (Link) button, top right. This will copy the parameters to your Gadzoinks cloud clipboard, it will also copy the details to your iPhone clipboard – so you can paste into messages, mail, or anything else. It is also a good idea to save the image to your Saved Images collection. Don’t worry if the prompt looks like it is cut off, that just to make it fit on your screen, the full prompt will be copied to the clipboard.
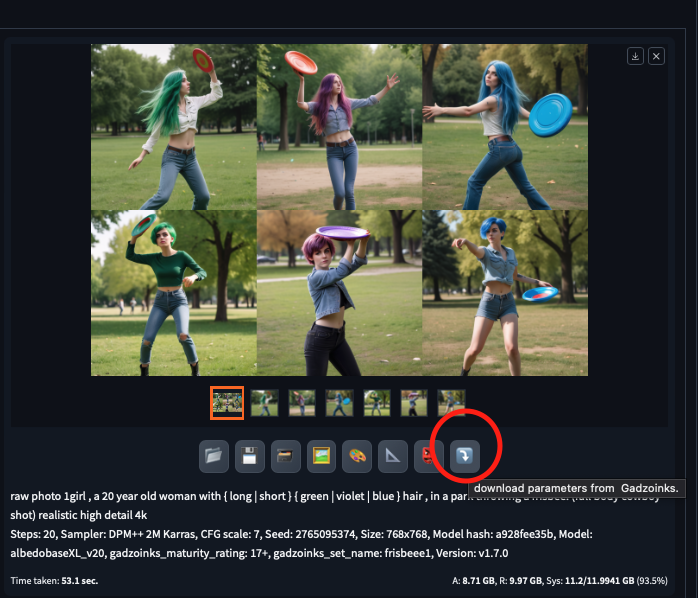
Now go to Automatic1111 and click on the 🔗 Link button [ ignore the old icon in the image ] You should see the prompt appear, settings such as width, height, cfg , steps, etc will also be updated. There are 2 gotchas, 1) The model is not changed, so if you want to use ProtovisionXL like the original image you need to change at the top of the page where it says “Stable Diffusion checkpoint”, and 2) the seed is set , if you want to generate random images make sure to click on the dice icon to set it to -1.

Next I modified the prompt from the original a bit and added (((throwing a frisbee in the park))) in the front of the prompt. ((( xx ))), is an hint to stable diffusion that this section is very important and to pay more attention to it. After generating a few images which did not have any frisbees I decided to change models and use “realcartoonRealistic” checkpoint which did a much better job of including a frisbee in the image.
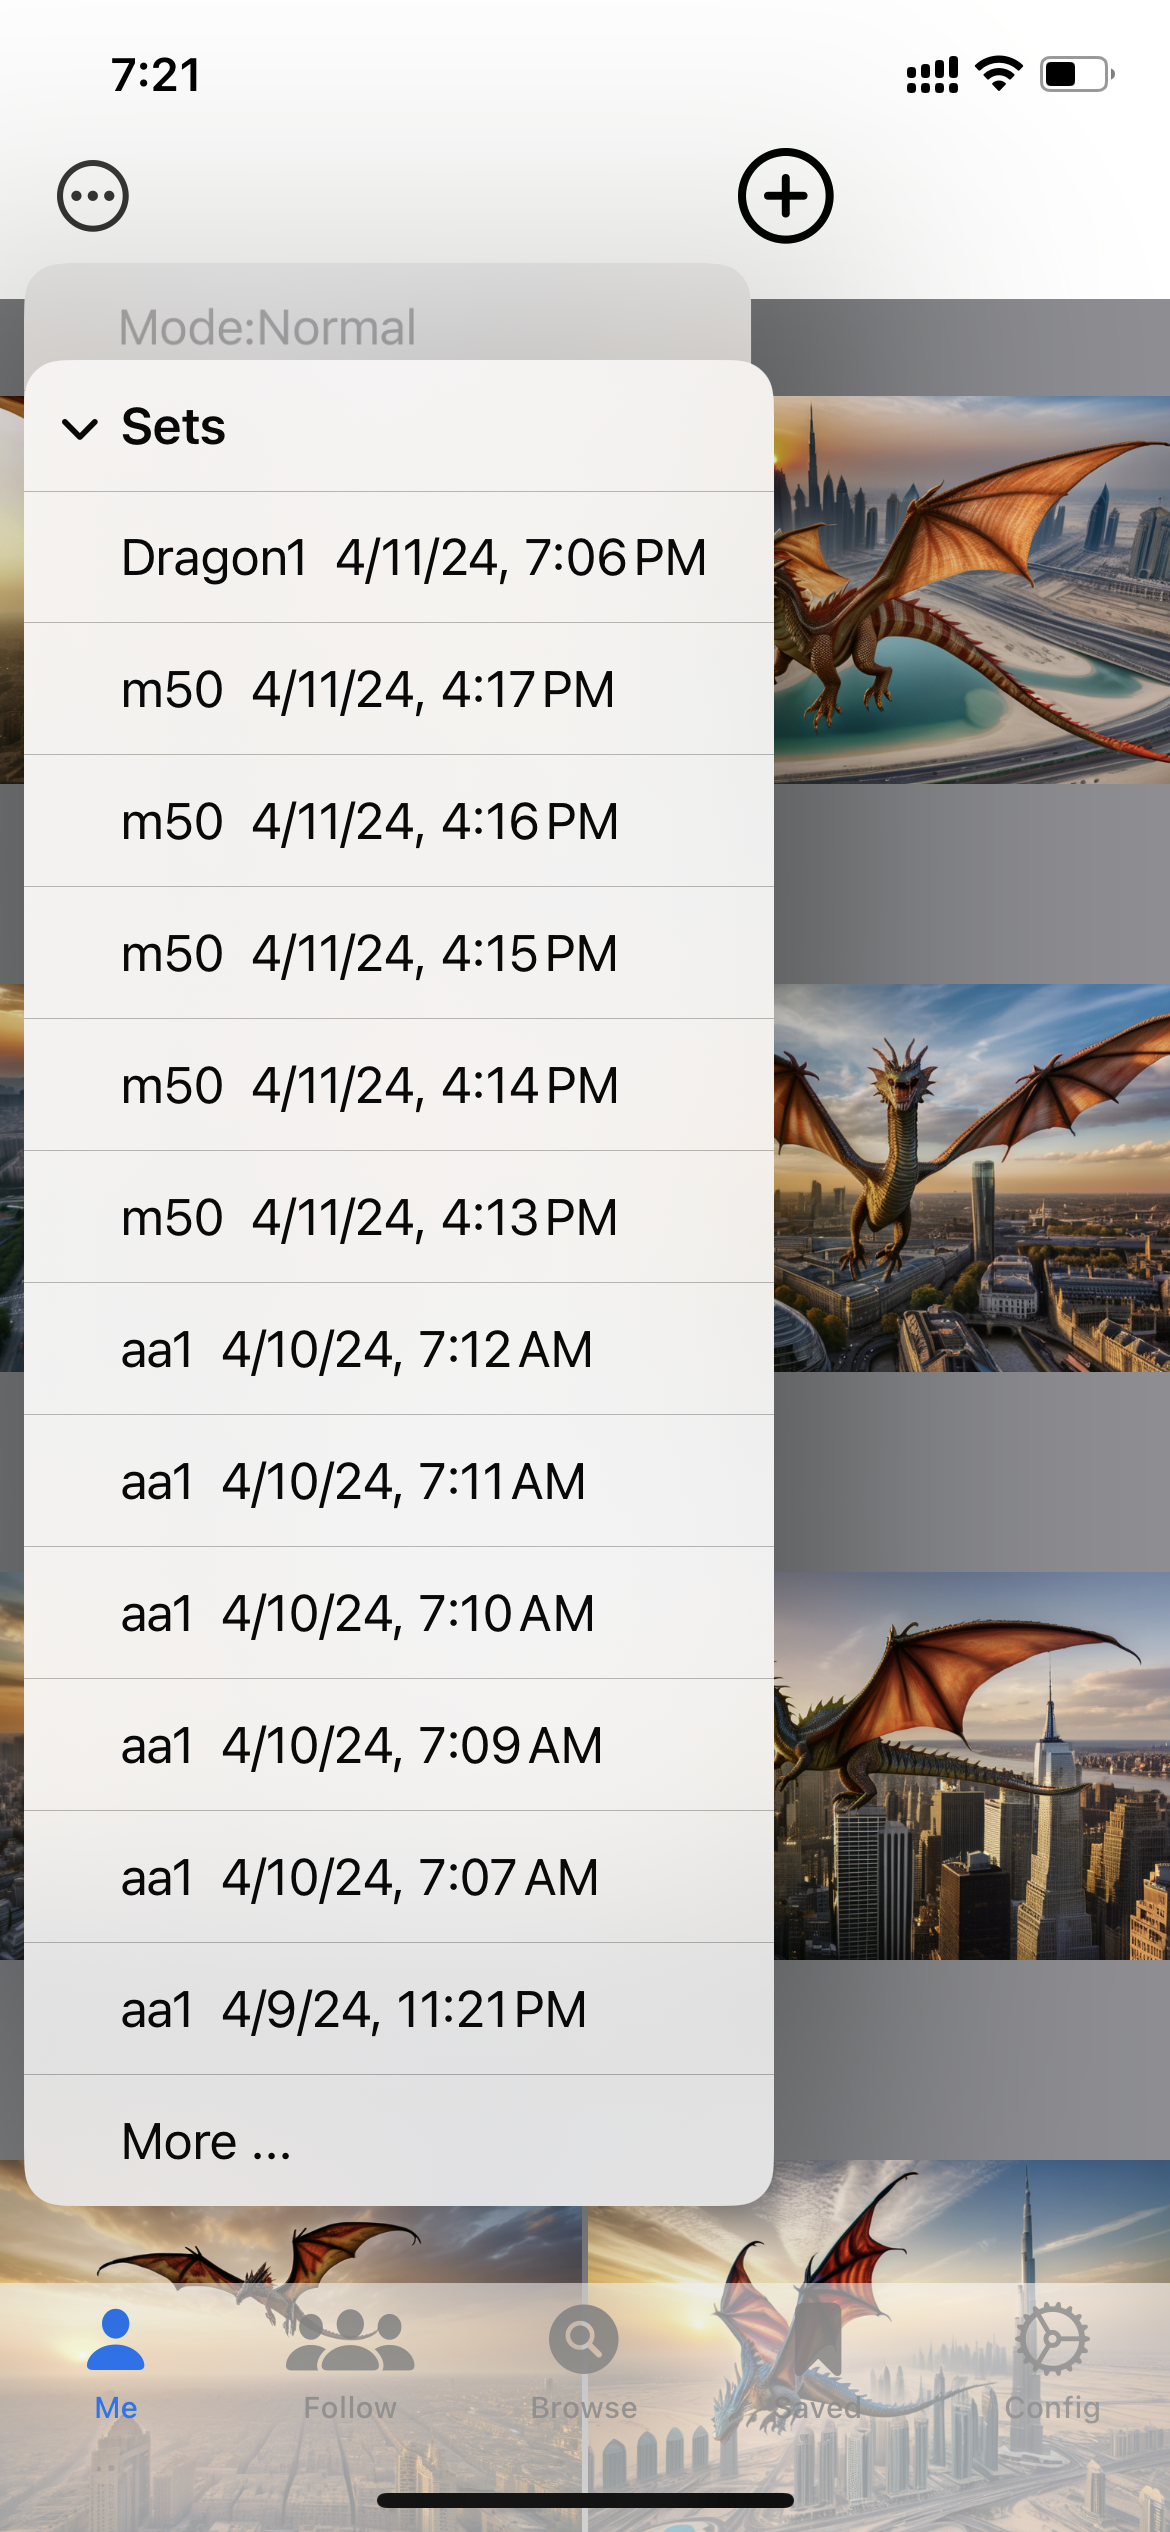
Sets
Sets are a feature for organizing images that are generated together, an example would be creating a batch of 100 images or using dynamic prompts to create 60 images. Sets are still an experimental feature, which is shorthand for it’s very useful so I’m including it, but it’s still got some rough edges.
To use sets provide a set name like “dragon1” and then use automatic 1111 to generate a large number of images, for example I could use dynamic prompts with the prompt
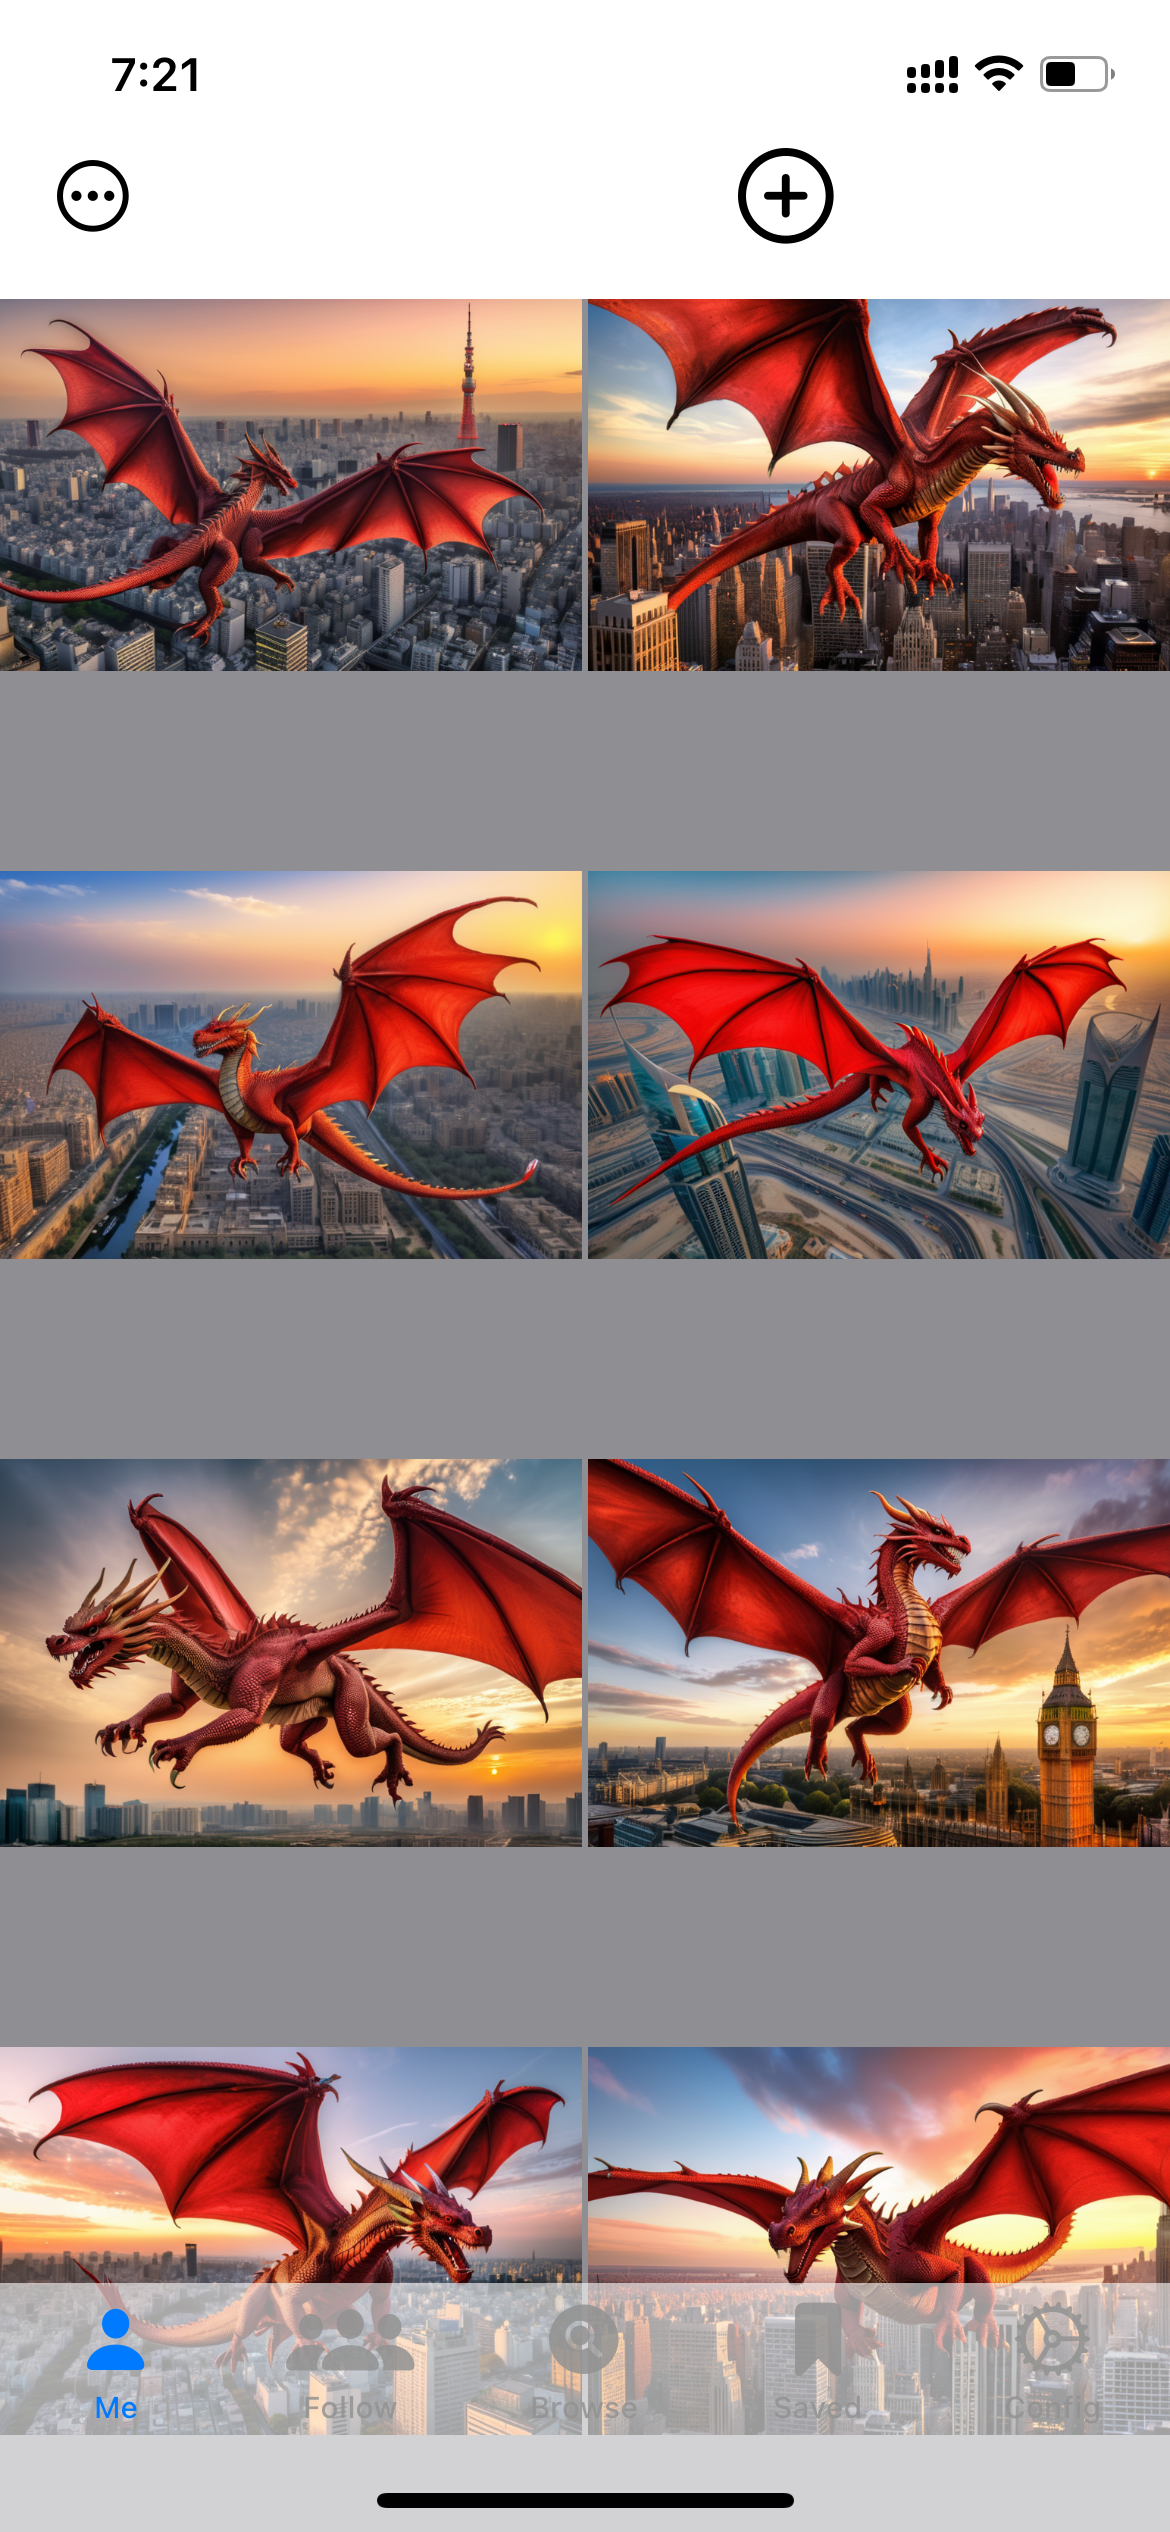
“A { red| green | pink | polka dot | striped } { | eastern } dragon flying over { Nyc | Tokyo | London | Beijing | Dubai | Cairo }” – This will generate 60 images in total and could take hours depending on your hardware, resolution, etc.
After these images are generated and uploaded to Gadzoinks, you can use the ‘Sets’ menu to view your recently created set. Click on a set name and you will see just those images.
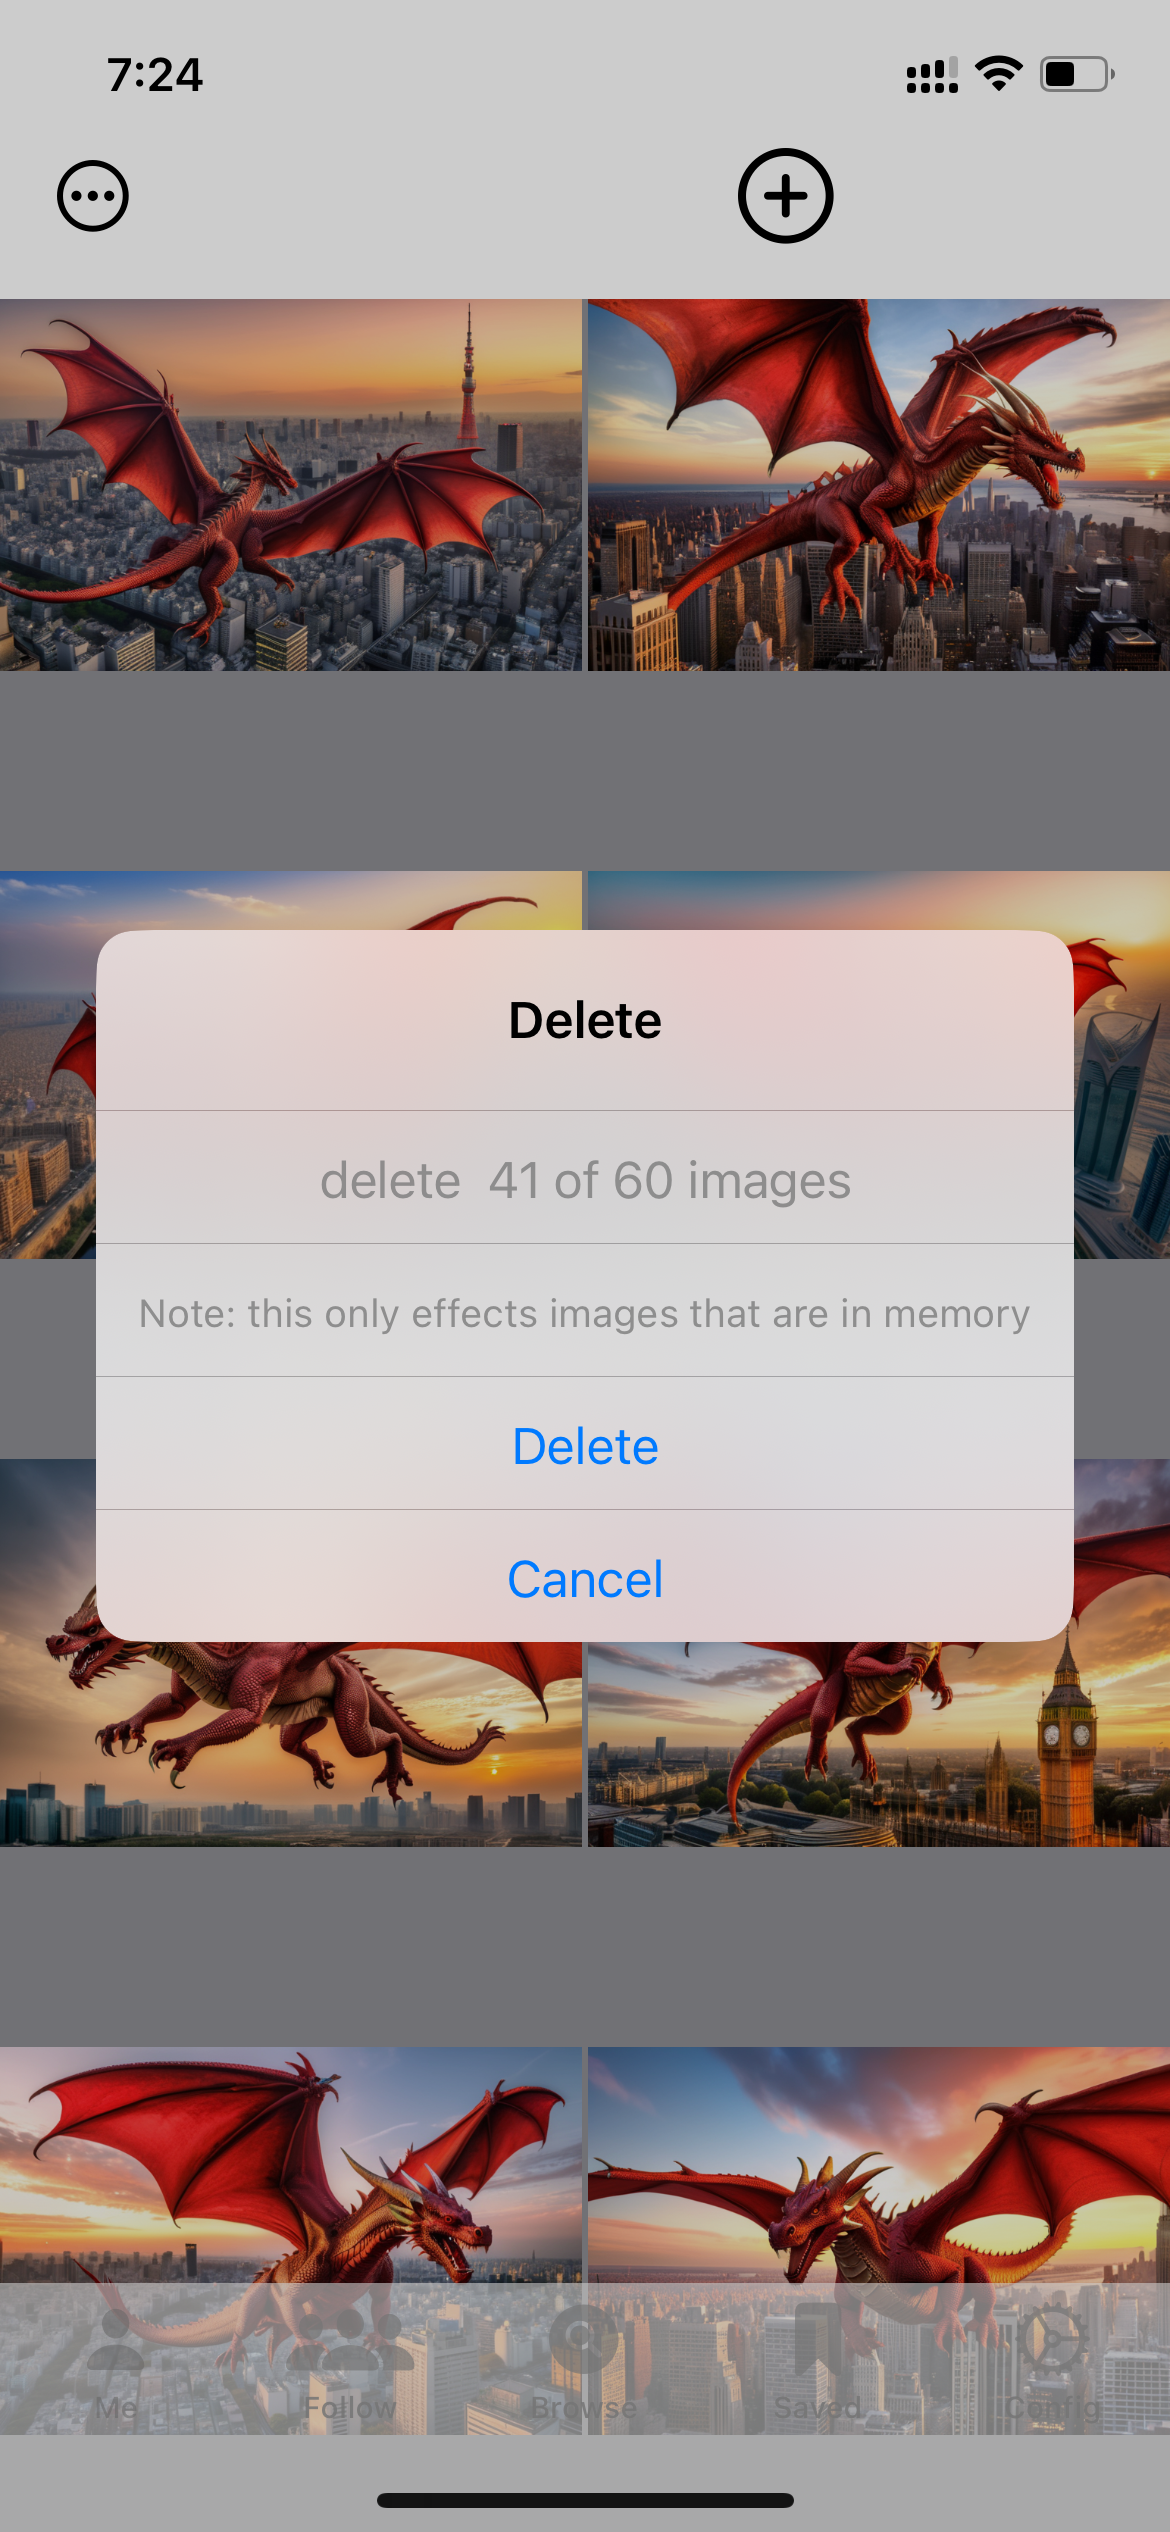
Sets are most useful in trimming down what you don’t like. With sets you can go thru the images assigning a ranking to those you like ( for me 1 star means keep, and 5 means it should be in a museum, mostly I give 2 and 3 stars ).
After you have gone thru the image, go back to the Sets menu and select “Delete all unranked in dragon1” – This will delete everything that has no stars. There is a dialog so you can cancel if the numbers do not look right.
There is also an menu item “delete unranked upto image xxx in dragon1” , this is useful for when you don’t have time to rank everything all at once, you can rank the first 10 images and then delete only unranked from those 10 ( this assumes you start at the first image and work sequentially, if you jump around its not useful ).
There is some Set management going on in the cloud, so if you delete everything ( or almost everything) in a set, that set name may no longer show up in the menu. Also sets will ‘age out’. ( not the images – just the name ).
A few gotchas with Sets
The Sets menu only shows a limited number of recent sets, don’t count on it to work for images you generated last month.
Sets will download at most 200 images, if you have more then 200 images in a set then trim down what is downloaded , deleting what you don’t like and then reload the set to get more. Don’t worry about deleting images that have not been downloaded. When you use the set delete functions only download images will be affected.
Sets are not as fast as I’d like – they will get better.
Deleted images will be moved to your Trash, and can be un-deleted if you need to.
Sets have a timestamp and a name, the timestamp is whats important so if you forget to change the set name and generate another 60 images, they will have the same name BUT a different timestamp and be treated separately